
If you want to get a clean, professional finish on your wood projects, using a brad nailer is a great choice. But if you’re worried about damaging the wood, you’re not alone.
You might be asking yourself how to avoid dents, splits, or ugly nail marks. The good news is, with a few simple tips and the right technique, you can use your brad nailer confidently without ruining your wood. Keep reading, and you’ll learn exactly how to protect your wood while getting perfect results every time.

Credit: www.reddit.com
Choosing The Right Brad Nailer
Choosing the right brad nailer is key to protecting your wood. The correct tool makes your work smooth and avoids marks or splits. Knowing the types and nail sizes helps you pick the best brad nailer for your project. This choice saves time and keeps wood looking perfect.
Types Of Brad Nailers
Brad nailers come in three main types: pneumatic, electric, and cordless. Pneumatic brad nailers use air pressure and need an air compressor. They are powerful and fast. Electric brad nailers plug into a power source, making them easy to use indoors. Cordless brad nailers run on batteries. They offer great mobility and no cords to manage.
Each type fits different needs. Pneumatic nailers suit big projects with many nails. Electric and cordless nailers work well for small jobs or places without power access. Choose the type that fits your workspace and project size.
Selecting The Correct Nail Size
Nail size matters a lot for wood protection. Brad nails usually range from 5/8 inch to 2 inches. Short nails are best for thin or delicate wood to avoid splitting. Longer nails hold thicker wood securely. Use nails that are long enough to hold but not too long to poke through.
The nail diameter also matters. Thinner nails make smaller holes, causing less damage. Match the nail size to your wood type and thickness. This keeps wood safe and your project strong.
Preparing The Wood Surface
Preparing the wood surface is a key step before using a brad nailer. It helps avoid damage and ensures strong, clean nails. Proper preparation makes the wood ready to hold nails firmly without cracking or splitting.
Cleaning And Sanding
Start by cleaning the wood surface. Remove dust, dirt, and old paint for better nail grip. Use a soft cloth or brush for cleaning.
Next, sand the wood lightly. Sanding smooths rough spots and removes uneven layers. Use fine-grit sandpaper to avoid deep scratches. Clean the surface again after sanding.
Checking Wood Density
Check the wood density before nailing. Soft woods like pine need gentle handling. Hardwoods like oak require more power from the nailer.
Test by pressing your fingernail lightly on the wood. If it leaves a mark easily, the wood is soft. Adjust the nailer’s depth and pressure based on this test to prevent damage.
Setting Up The Brad Nailer
Setting up a brad nailer correctly helps protect wood surfaces. Proper setup reduces dents and splits in the wood. It also ensures nails go in straight and secure the material well.
Start with checking the tool and air supply. Follow the manufacturer’s instructions for safety and performance. Adjust the settings before loading nails to avoid mistakes.
Adjusting Air Pressure
Set the air pressure to the right level for your wood type. Too much pressure can damage soft wood. Too little pressure causes nails to not go in fully.
Use a pressure gauge to find the best setting. Start low and increase pressure slowly. Test on scrap wood to see if nails hold well without damage.
Loading Nails Properly
Choose the correct nail size for your project. Insert nails carefully to avoid jams or misfires. Follow the tool’s guide to load strips of nails.
Make sure nails are straight and properly seated. Close the magazine firmly to keep nails in place. Check for smooth feeding before starting your work.
Techniques To Avoid Wood Damage
Using a brad nailer without harming the wood takes care and the right approach. Small mistakes can cause dents, splits, or marks on wood surfaces. Learning key techniques helps protect your wood and keeps your project looking clean and professional.
Positioning The Nailer Correctly
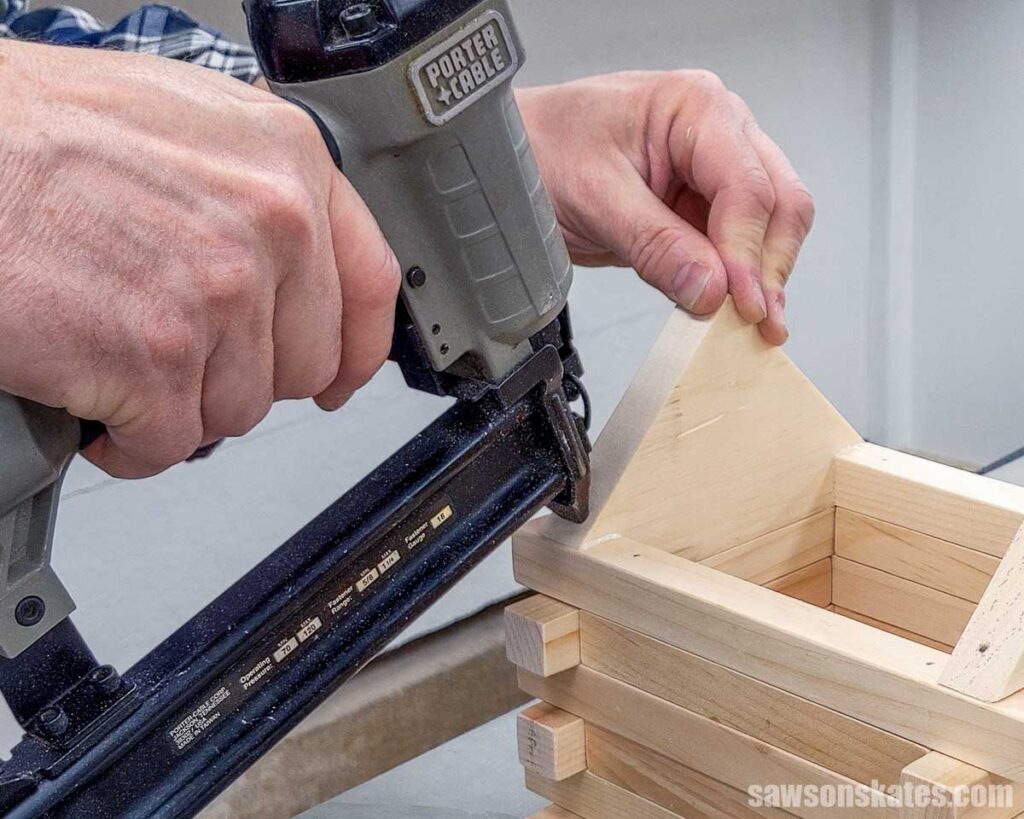
Hold the nailer straight and steady on the wood surface. Angle the nailer slightly, about 90 degrees to the wood. Avoid tilting it too much. This stops nails from bending or causing wood damage. Keep the tool close to the edge, but not too close. This helps the nail go in smoothly without splitting the wood.
Controlling Nail Depth
Adjust the nailer’s depth setting before you start. Set nails to sit just below the wood surface. Nails pushed too deep can leave marks or damage the wood. Nails set too shallow may pop out later. Test on a scrap piece first. Make small adjustments until the nails embed perfectly without harming the wood.
Using A Wood Block For Protection
Place a scrap wood block between the nailer and your workpiece. The block acts as a shield to prevent dents or marks. It spreads the nailer’s force across a larger area. This reduces the risk of damaging soft or thin wood. Move the block along as you work to protect every spot. This simple step keeps your wood smooth and undamaged.
Troubleshooting Common Issues
Troubleshooting common issues with a brad nailer helps protect wood from damage. Small problems can lead to big marks or splits. Knowing how to fix these quickly keeps your work smooth and clean. The tips below focus on avoiding nail splitting and handling misfires or jams.
Preventing Nail Splitting
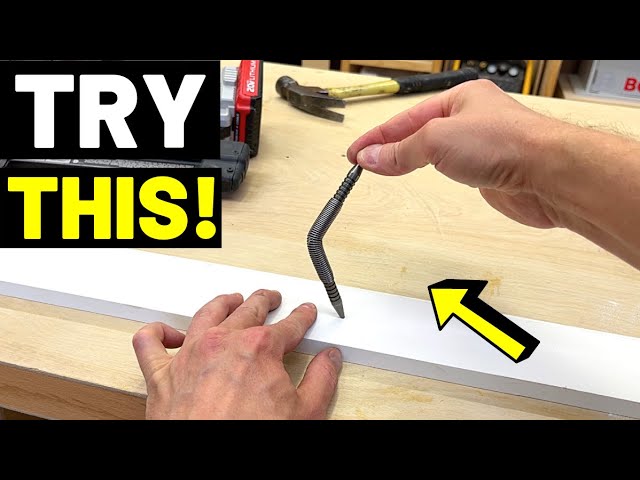
Nail splitting happens when the nail forces the wood apart. Choose nails that match the wood thickness. Use thinner nails for thin or soft wood. Keep the nailer’s air pressure low for delicate wood. Drive nails near edges slowly to avoid cracks. Use a pilot hole for very hard or thin wood. Check the wood grain direction; nail across the grain carefully.
Fixing Misfires And Jams
Misfires and jams stop your work and may damage wood. Turn off the nailer before fixing jams. Open the nailer’s magazine and remove stuck nails gently. Clean the nailer regularly to avoid dirt buildup. Use the right size and type of nails for your tool. Check the air pressure; too high or too low causes issues. Test the nailer on scrap wood after clearing jams.
Credit: www.youtube.com
Maintenance Tips For Longevity
Proper maintenance keeps your brad nailer working well for a long time. It helps avoid damage to the wood you work on. Simple care steps extend the tool’s life and improve its performance. Clean and check your brad nailer regularly. This prevents problems and ensures smooth nailing every time.
Cleaning The Brad Nailer
Remove dust and debris after each use. Use a soft brush or compressed air to clean tight spots. Clear the nail magazine to avoid jams. Wipe the exterior with a dry cloth. Avoid water or harsh cleaners, as they can cause rust. Clean tools work better and cause fewer mistakes on wood.
Regular Inspection And Lubrication
Check the brad nailer for loose screws and worn parts. Tighten any loose parts immediately. Look for cracks or damaged pieces. Apply a few drops of pneumatic tool oil in the air inlet. Lubricate moving parts to keep them running smoothly. Regular oiling reduces friction and extends tool life.
Credit: sawsonskates.com
Frequently Asked Questions
How Do I Avoid Wood Damage With A Brad Nailer?
To avoid damage, use the correct nail size and adjust air pressure. Test on scrap wood before nailing. Hold the nailer steady and drive nails straight into the wood surface.
What Is The Best Brad Nail Size For Delicate Wood?
For delicate wood, use 18-gauge brad nails between 1/2 and 1 inch. Smaller nails reduce splitting and surface damage. Choose length based on wood thickness for secure fastening.
How To Adjust Air Pressure On A Brad Nailer?
Set the air pressure to the manufacturer’s recommended range, usually 60-90 PSI. Lower pressure prevents deep nail marks and splitting. Test and fine-tune pressure for optimal results.
Can I Use A Brad Nailer On Finished Wood?
Yes, but use lighter nails and lower air pressure. Avoid nailing near edges or knots. This prevents visible damage and keeps the finish intact.
Conclusion
Using a brad nailer does not have to harm your wood. Choose the right nails and set the correct depth. Keep the nailer steady and press gently. Test on scrap wood first to avoid mistakes. Small steps bring better results and less damage.
Practice makes your work cleaner and neater. With care, your wood stays smooth and strong. Enjoy your project without worry or damage. Simple habits lead to great woodworking success.

Ms.Sultana
Affiliate Marketer | SEO Specialist | Blogger at Elite Global Marketing Agency
Ms.Sultana brings over 16 years of expertise working with global Clients by providing different skills and Services. For the last 5 years working as an Affiliate marketer, specializing in high-ticket campaigns that drive exponential growth. She holds a degree in Computer Science and Engineering as well as achieved many more skills certificates from different institute/academies/Platform. As part of the Elite Global Marketing team, Sultana has helped clients generate millions in revenue through strategic partnerships, innovative funnels, and data-driven insights. She’s passionate about empowering businesses to scale by connecting them with the right affiliate opportunities.
Explore our resources or connect with us on LinkedIn to stay ahead in affiliate marketing.