
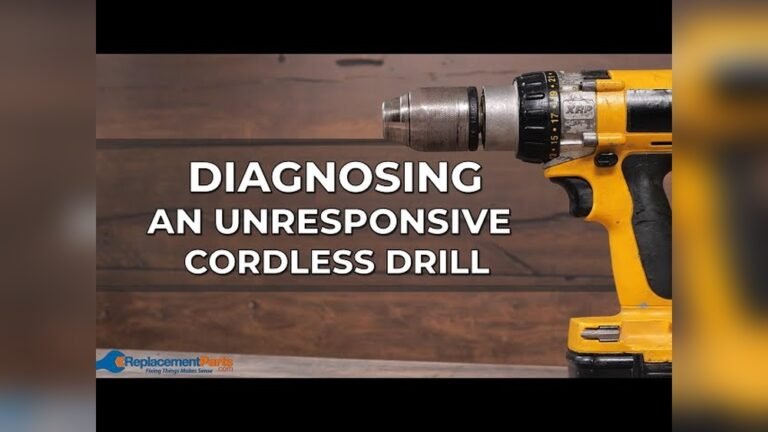
Is your cordless drill refusing to turn on just when you need it most? It’s frustrating, right?
You might feel stuck, unsure if it’s broken beyond repair or if there’s a simple fix you’re missing. Don’t worry—you’re not alone, and the solution could be easier than you think. You’ll discover clear, step-by-step tips to get your drill working again quickly.
Keep reading, and you’ll save time, money, and the hassle of buying a new tool.

Credit: www.youtube.com
Common Reasons For Power Failure
Power failure in a cordless drill can be frustrating. Knowing the common reasons helps you fix the problem quickly. Often, the issue lies in simple parts like the battery or charger. Sometimes, internal wiring can cause trouble. Understanding these causes saves time and money.
Battery Issues
Dead or weak batteries stop the drill from working. Batteries lose charge after long use or storage. A battery may look fine but not hold power. Check the battery by trying a full charge. Replace old batteries to ensure proper drill function.
Charger Problems
A faulty charger can prevent the battery from charging. Damaged cords or broken plugs stop power flow. Chargers that do not fit the battery cause issues. Test the charger with another battery if possible. Use the correct charger for your drill model.
Internal Wiring Faults
Wiring inside the drill can break or disconnect. Loose wires stop electrical current from reaching the motor. Worn-out wires from heavy use cause power failure. Inspect the drill carefully for damaged wiring. Repair or replace wires to restore power.
Checking And Replacing The Battery
Battery issues are a common reason a cordless drill won’t start. Checking and replacing the battery can solve this problem fast. Batteries lose power over time and may stop holding a charge. This section covers how to test the battery, clean its contacts, and find the right replacement.
Testing Battery Charge
First, remove the battery from the drill. Use a battery tester or a multimeter to check the charge. A fully charged battery usually shows the voltage printed on its label. If the voltage is low or zero, the battery needs charging or replacement. Try charging the battery with the proper charger. If it still won’t hold power, the battery is faulty.
Cleaning Battery Contacts
Dirty contacts can stop the battery from connecting to the drill. Use a clean cloth or small brush to wipe the battery contacts gently. Remove any dust, dirt, or corrosion. Clean the drill’s battery slot contacts as well. This simple step improves the power flow and may fix the problem without replacing the battery.
Choosing The Right Replacement Battery
Pick a replacement battery that matches the drill’s brand and model. Check the voltage and amp-hour rating to ensure compatibility. Using the wrong battery can damage the drill or reduce performance. Buy batteries from trusted sellers to get good quality. Proper batteries keep the drill running safely and efficiently.
Inspecting The Charger And Connections
When a cordless drill won’t turn on, the charger and connections often cause the problem. Checking these parts can save time and money. A faulty charger or loose connection stops the battery from charging properly. This section helps you find and fix charger and connection issues quickly.
Start with simple checks. Some charger problems are easy to spot. Others need a closer look. Follow these steps carefully for better results.
Verifying Charger Functionality
First, check if the charger works. Plug it into a power outlet. Look for any lights on the charger. A light usually means it is working. No light might mean a broken charger or power source problem. Try a different outlet to be sure. If the charger has a fuse, check if it is blown. Use a multimeter to test the charger’s voltage. It should match the label on the charger. If not, the charger needs replacement.
Examining Charging Ports
Next, inspect the charging ports on the drill and charger. Dirt or dust can block the connection. Clean ports gently with a dry cloth or a soft brush. Check for bent or broken pins inside the ports. Damaged pins stop the drill from charging. Make sure the battery fits snugly in the charging port. Loose connections prevent proper charging. Press the battery firmly into place and try again.
Using Alternative Charging Methods
If the charger or port seems faulty, try another way to charge. Use a different charger compatible with your drill. Borrow one from a friend or buy a replacement. Some drills allow charging the battery outside the tool. Remove the battery and place it in a separate charger. This method helps find out if the problem is with the drill or battery. Testing with another charger saves time and avoids buying new parts unnecessarily.
Examining The Trigger Switch
The trigger switch controls the power flow to the drill’s motor. It acts like a gate that opens and closes the electrical circuit. When the trigger is pressed, the drill should start running. If the drill won’t turn on, the trigger switch could be the problem.
Examining the trigger switch is a key step in fixing a cordless drill. It helps find any faults that stop the drill from working. Checking this part requires a careful look and simple tests. You can save money and time by fixing the switch yourself.
Identifying Switch Malfunctions
Start by inspecting the trigger switch for visible damage. Look for cracks, wear, or dirt buildup. Dirt or debris can block the switch from working properly. Press the trigger several times to check if it feels stuck or loose. A loose trigger may not connect the circuit fully.
Use a multimeter to test the switch’s electrical connection. Set the meter to check continuity. Press the trigger and watch the meter reading. No change means the switch is broken inside. If the switch fails this test, replacement is necessary.
Cleaning Or Replacing The Switch
Remove the switch carefully from the drill housing. Use compressed air or a soft brush to clean dust and debris. Wipe contacts with rubbing alcohol to remove grime. After cleaning, test the switch again with a multimeter.
If the switch still does not work, buy a new one. Make sure the replacement matches the drill model. Install the new switch by reversing the removal steps. Test the drill to confirm it turns on and runs smoothly.
Assessing The Motor And Internal Components
Checking the motor and the parts inside your cordless drill is important. The motor makes the drill spin and work. If the drill does not turn on, the motor or its parts might be broken. This section helps you find problems inside the drill. It shows how to spot motor damage and test the parts safely.
Signs Of Motor Damage
The motor may have damage if the drill does not start. Listen for any strange sounds, like grinding or buzzing. These noises can mean parts inside are stuck or worn out. Smell the drill for burning odors, which show overheating or electrical problems. Check if the drill gets very hot quickly. This heat often points to motor trouble. Look for visible damage such as burnt wires or broken parts inside the drill.
Accessing And Testing Internal Parts
First, remove the battery to avoid shocks. Use a screwdriver to open the drill’s case carefully. Keep screws safe to close the drill later. Find the motor and check for dirt or loose wires. Use a multimeter to test the motor’s electrical parts. Check the brushes and armature for wear or breaks. Spin the motor by hand to feel if it moves freely. Clean dust or debris with a soft brush. Replace damaged parts before putting the drill back together.

Credit: ameliasurfandracquetclub.com
Safety Tips During Repair
Repairing a cordless drill can be tricky and risky. Safety must come first during any repair work. Small mistakes can cause electric shocks or damage to the tool. Follow safety tips to protect yourself and your drill. This section covers key safety steps to keep in mind.
Handling Electrical Components Safely
Always remove the battery before starting any repair. This stops electric power flow and prevents shocks. Avoid touching wires with wet hands or metal tools. Inspect wires carefully for damage or fraying. Use insulated gloves for extra protection when needed.
Using Proper Tools
Use tools designed for electrical repairs. Screwdrivers with insulated handles are best. Avoid using damaged or worn-out tools. Proper tools reduce the risk of slipping and injury. Keep your workspace clean and well-lit for better control.
Avoiding Common Mistakes
Do not force parts to fit if they seem stuck. Forcing can break the drill or cause injury. Avoid working in damp or wet areas. Do not rush the repair process. Take your time and double-check each step before moving on.
When To Seek Professional Help
Knowing when to seek professional help is key for a cordless drill that won’t turn on. Some problems need expert skills and tools. Trying to fix these issues alone can cause more damage or safety risks. Recognizing the limits of DIY repairs saves time and money.
Complex Repairs Beyond Diy
Some drill problems need special tools and knowledge. Electrical faults inside the motor or circuit board often require a technician. Broken internal parts need careful replacement. DIY fixes might not solve these issues and can void warranties. Professionals can diagnose and fix complex faults safely and correctly.
Warranty And Service Options
Check if your drill is still under warranty. Many brands offer free repairs for certain problems. Using authorized service centers ensures proper parts and work quality. Trying to fix the drill yourself may cancel the warranty. Contact customer service for repair or replacement options covered by your warranty.
Credit: www.theartofdoingstuff.com
Frequently Asked Questions
Why Won’t My Cordless Drill Turn On?
A cordless drill may not turn on due to a dead battery, faulty switch, or loose wiring. Check the battery charge first. Inspect the power switch and connections. Replace damaged parts if needed to restore functionality.
How Do I Check The Battery Of A Cordless Drill?
Remove the battery and inspect for damage or corrosion. Use a voltmeter to check the battery charge. If the battery is dead or won’t hold a charge, replace it with a compatible new one.
Can A Faulty Trigger Switch Cause Drill Issues?
Yes, a faulty trigger switch can prevent the drill from turning on. Test the switch with a multimeter for continuity. Replace the switch if it’s defective to fix the power issue.
What Should I Do If The Drill Motor Won’t Start?
If the motor doesn’t start, it might be worn out or have damaged brushes. Open the drill casing carefully and inspect the motor components. Replace worn brushes or the motor to restore operation.
Conclusion
Fixing a cordless drill that won’t turn on can be simple. Check the battery first; often, it just needs charging. Clean the contacts to ensure good connection. Test the switch and motor for faults. Small problems can stop your drill from working.
Taking a few steps saves time and money. You don’t need expert help right away. Try these easy fixes before buying a new drill. Keep your tools ready for any project ahead.

Michael Harris is an experienced woodworker and power tool expert with over 12 years in woodworking. Specializing in functional, high-quality furniture, he offers expert advice on tool selection, maintenance, and sharpening for both beginners and professionals.