Are you tired of hunting for your tools every time you need them? Imagine having a neat, sturdy shed right in your backyard, built by you, just the way you want it.
Building your own DIY tool shed is easier than you think, and it gives you a perfect place to organize and protect your tools. In this guide, you’ll discover simple steps to create a shed that fits your space and needs.
Keep reading, and you’ll learn how to save money, customize your storage, and enjoy the satisfaction of a project done by your own hands. Your perfect tool shed is closer than you think!
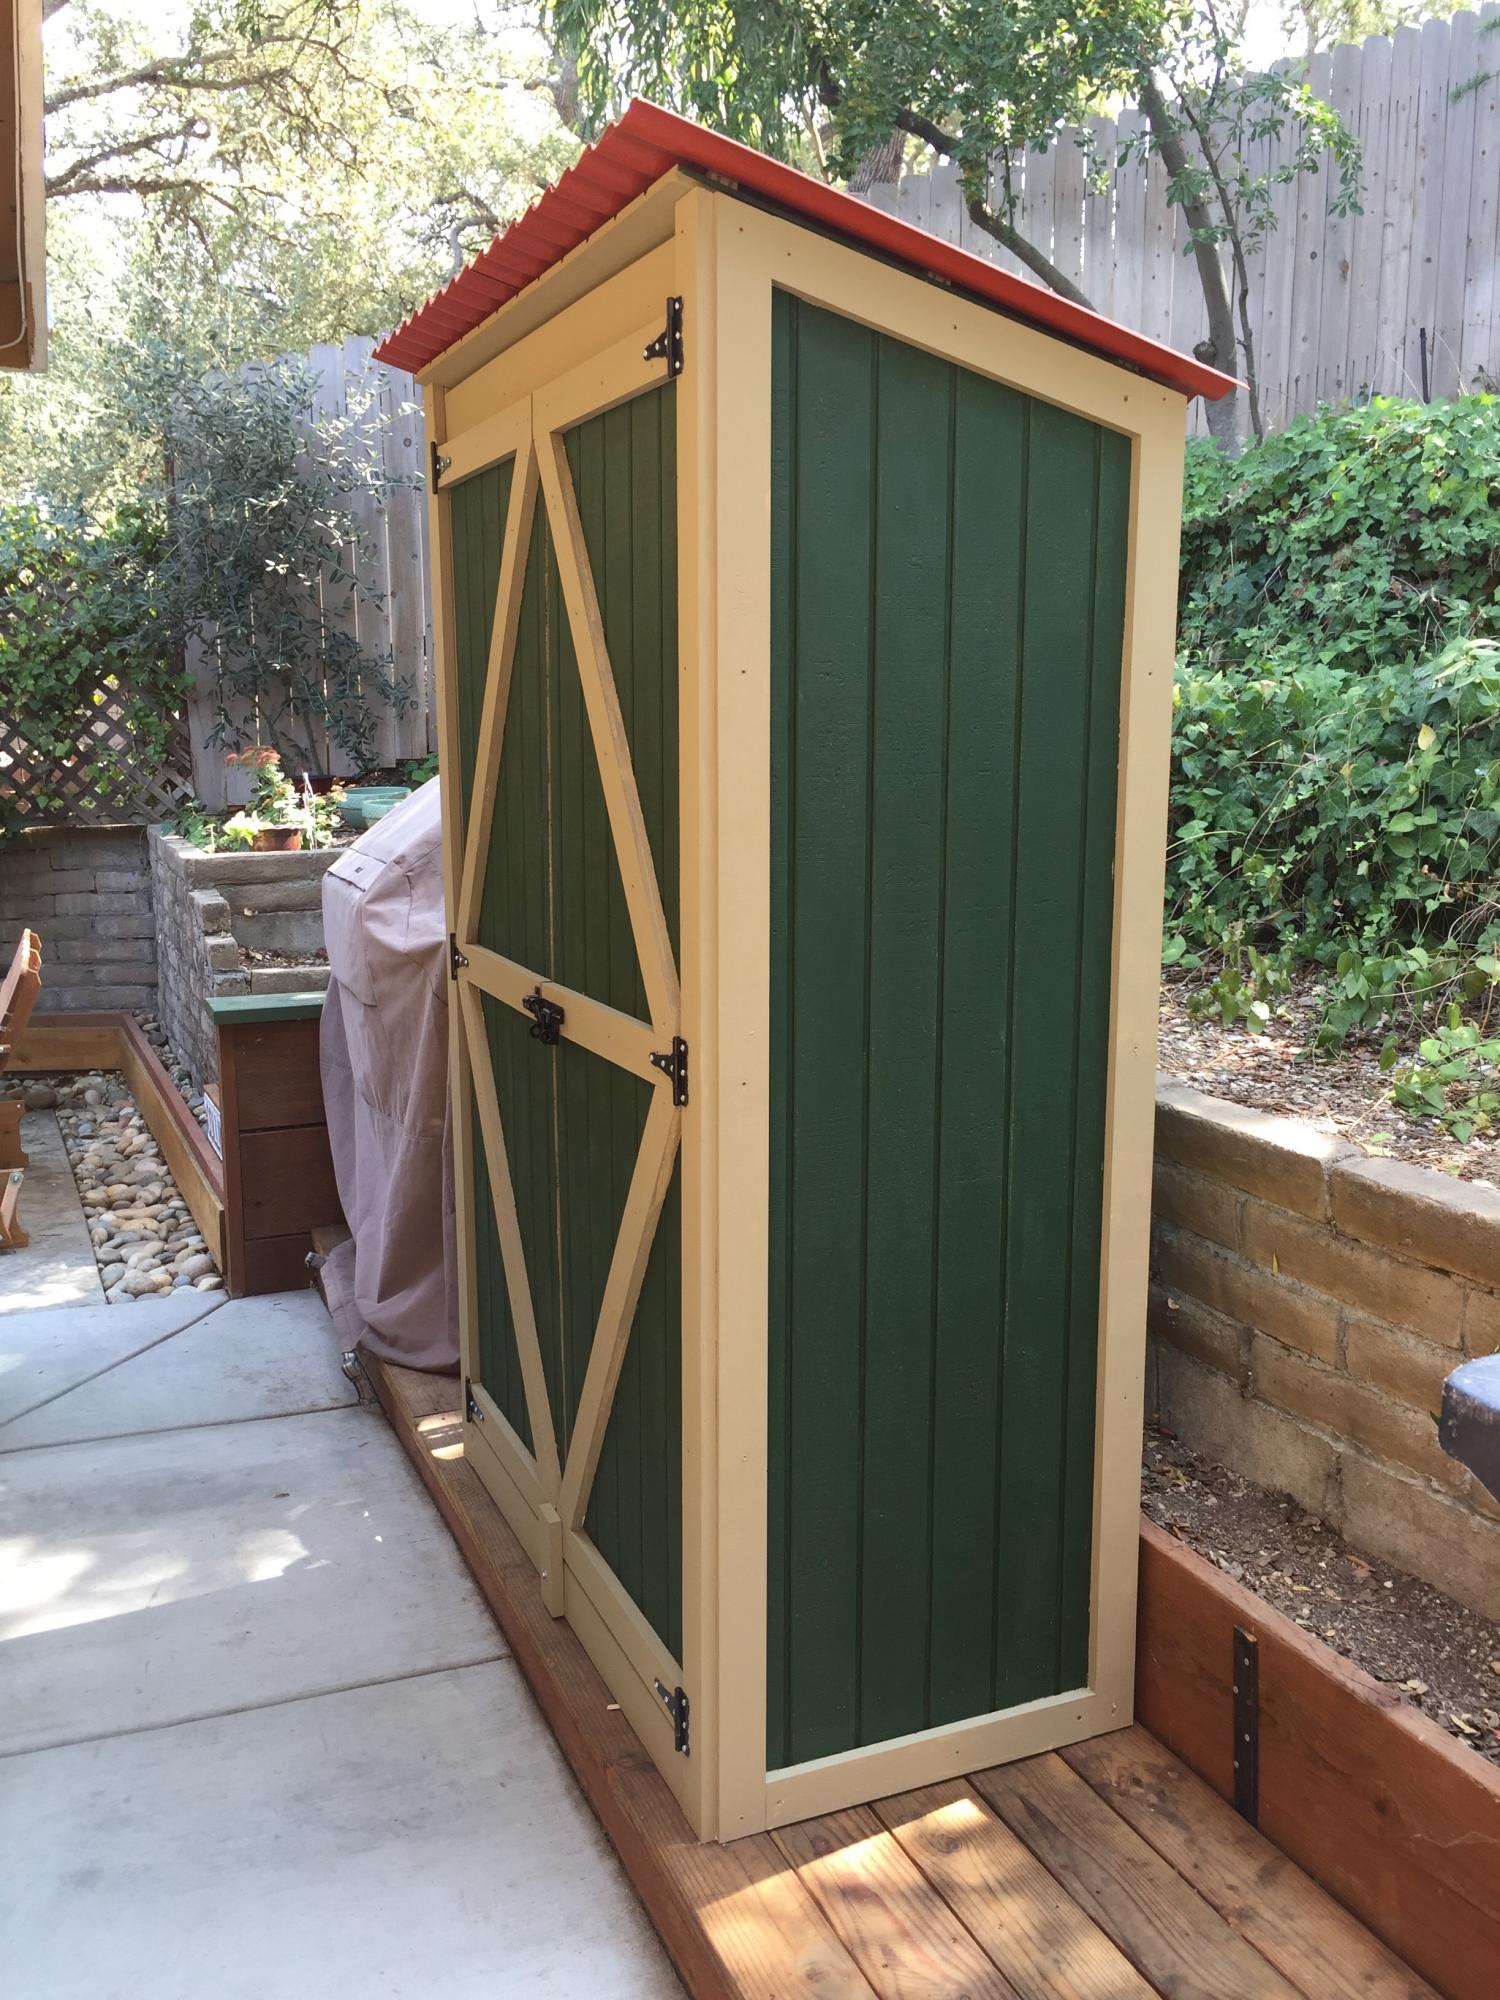
Credit: www.ana-white.com
Planning Your Tool Shed
Planning your tool shed is the first step to a successful build. Thoughtful planning saves time and money. It also helps create a shed that fits your needs perfectly.
Consider the location, size, and materials carefully. These choices affect the shed’s durability and usefulness. Clear planning leads to a strong and practical tool shed.
Choosing The Right Location
Pick a flat spot in your yard with good drainage. Avoid areas prone to flooding or heavy shade. A sunny place helps keep the shed dry inside. Make sure the spot is easy to reach from your house. This makes carrying tools back and forth simple.
Determining Shed Size
Think about how many tools you have now and in the future. Measure your largest tools to find space for them. Leave extra room to move around inside. A shed too small will feel cramped. A shed too big wastes space and money.
Selecting Materials
Choose materials that last and suit your budget. Wood is common and easy to work with. Metal sheds are strong but can rust. Plastic sheds resist weather but may not hold heavy tools. Pick roofing and flooring materials that protect from rain and dirt.
Gathering Tools And Supplies
Building your own DIY tool shed starts with gathering the right tools and supplies. This step sets the foundation for a smooth building process. Having the correct items ready helps avoid delays and frustration. It also ensures your shed will be strong and durable. Planning ahead saves time and money.
Essential Tools Needed
Start with basic hand tools like a hammer and tape measure. A cordless drill makes assembling easier. A saw is needed to cut wood pieces to size. Level and square tools help keep your shed straight and even. Safety gear such as gloves and goggles protects you during work. Don’t forget a screwdriver set for screws and fasteners. A pencil is useful for marking measurements. These tools cover most tasks in building your shed.
Recommended Materials List
Use treated lumber for the frame to resist rot and insects. Plywood works well for walls and flooring. Choose roofing materials like shingles or metal sheets for durability. Nails, screws, and brackets will hold everything together. A good quality wood primer and paint protect the shed from weather. Consider adding a door and window for access and light. Make sure to buy extra materials for mistakes or future repairs. Having all supplies ready keeps your project on track.
Preparing The Foundation
Preparing the foundation is the first key step in building your own DIY tool shed. A strong foundation keeps your shed sturdy and safe. It also stops damage from moisture and shifting soil. Take time to prepare the ground well. This makes the building process easier and the shed last longer.
Clearing And Leveling The Site
Start by choosing a flat spot for your shed. Remove all grass, rocks, and debris. Use a shovel or rake to clear the area. Next, check the ground for bumps or holes. Use a level tool to find uneven spots. Add or remove soil to make the surface flat. Compact the soil by stepping or using a tamper. A level site prevents future problems with the shed’s structure.
Building A Stable Base
After leveling, build a base to support the shed. Use materials like concrete blocks, gravel, or treated wood. Concrete blocks are strong and resist moisture well. Gravel helps with drainage and keeps the shed dry. Treated wood frames are easy to build and last long. Place the base evenly across the site. Check the level again to ensure stability. A stable base protects your shed from sinking or tilting.

Credit: www.youtube.com
Constructing The Frame
Constructing the frame is the first major step in building your DIY tool shed. This part forms the basic structure that supports the entire shed. A strong frame ensures your shed will last for years. Focus on accuracy and use quality materials. Follow each step carefully to build a sturdy frame.
Building The Floor Frame
Start by measuring the area for your floor frame. Use pressure-treated wood to resist rot and insects. Cut the lumber to the correct lengths. Lay out the frame on a flat surface. Join the pieces with galvanized screws or nails. Check the frame for square by measuring diagonals. Add support beams inside the frame for extra strength. Make sure the frame sits level on the ground.
Erecting Wall Frames
Next, build the walls separately on the ground. Cut studs to the same height for each wall. Space the studs evenly, usually 16 inches apart. Attach a top and bottom plate to the studs. Nail or screw all parts securely. Lift each wall frame carefully into place. Brace the frames temporarily to keep them upright. Check the walls for plumb with a level. Connect the wall frames at the corners with strong joints.
Installing Roof Supports
Roof supports hold the weight of the roof and protect the shed. Cut rafters to the length needed. Attach a ridge board at the peak for stability. Fix the rafters to the top plates of the walls. Space rafters evenly to distribute the load. Use metal brackets or nails for secure connections. Double-check all supports are level and aligned. Proper roof framing prevents sagging or leaks later.
Adding Walls And Roof
Adding walls and a roof is a key step in building your DIY tool shed. These parts give your shed shape and protect your tools from weather. This section guides you through attaching wall panels, installing roof sheathing, and applying weatherproofing. Follow these steps carefully for a strong and lasting shed.
Attaching Wall Panels
Start by lifting the wall panels into place. Align each panel with the shed frame edges. Use nails or screws to secure panels to the frame. Check that panels are straight and level. Work on one wall at a time for better control. Tighten fasteners to ensure panels stay firmly in place. Leave small gaps for expansion if using wood panels.
Installing Roof Sheathing
Lay roof sheathing boards over the roof frame. Start at the bottom edge and work upward. Nail each board firmly to the rafters. Overlap boards slightly to prevent water leaks. Make sure the sheathing covers the entire roof area. Cut boards to fit around vents or chimneys. Smooth edges help roofing materials lay flat later.
Applying Weatherproofing
Cover walls and roof with a weatherproof barrier. Use house wrap or roofing felt to stop water. Attach the barrier tightly using staples or nails. Overlap edges to create a continuous seal. Seal any holes or gaps with waterproof tape. Add drip edges to roof sides to guide water away. This step protects your shed from rain and snow.
Installing Doors And Windows
Installing doors and windows in your DIY tool shed is an important step. It improves access and lets in natural light and fresh air. This makes your shed more useful and comfortable.
Choosing Door Types
Select doors that fit your shed’s size and use. Sliding doors save space and work well in tight areas. Hinged doors are common and easy to install. Consider double doors if you need to move large tools in and out. Choose materials like wood or metal for strength and durability.
Fitting Windows For Light And Ventilation
Windows bring light into your shed, reducing the need for electric lamps. Place windows where they catch sunlight but don’t heat the shed too much. Small windows near the roof help hot air escape. Use simple frames and secure glass or clear plastic. Ensure windows open easily to allow fresh air in and keep the shed dry.
Finishing Touches
Finishing touches make your DIY tool shed both useful and attractive. These final steps protect the shed and organize your tools. Small details can improve your shed’s lifespan and functionality.
Painting Or Staining
Painting or staining protects the wood from weather damage. Choose a paint or stain that suits outdoor use. Apply at least two coats for better protection. Paint adds color; stain shows the wood grain. Let each coat dry fully before the next.
Adding Shelves And Storage Solutions
Shelves help keep tools off the floor and easy to find. Use strong wood or metal brackets for support. Hooks and pegboards hold smaller tools and accessories. Organize your tools by size or type for quick access. Custom shelves fit your tool collection perfectly.
Securing The Shed
Secure the shed to prevent theft and damage. Use a strong lock on the door. Anchor the shed to the ground to stop movement during storms. Check that windows and vents close tightly. Security keeps your tools safe and your shed stable.

Credit: www.dunnlumber.com
Maintenance Tips
Maintaining your DIY tool shed keeps it strong and useful for years. Simple care helps avoid big repairs later. It also protects your tools and makes the shed look good.
Regular Inspections
Check your shed often for damage. Look at the roof, walls, and doors. Find loose nails, broken boards, or cracks. Fix small issues before they get worse. Regular checks catch problems early.
Preventing Moisture Damage
Moisture harms wood and metal tools. Keep the shed dry by sealing gaps and cracks. Use waterproof paint or sealant on wood. Clear leaves and dirt from around the shed. Good airflow stops mold and rust.
Seasonal Care
Change your care with the seasons. In winter, clear snow from the roof. In summer, check for sun damage. In spring, clean gutters and check for leaks. In fall, remove fallen leaves and prepare for rain. Seasonal care protects the shed all year.
Frequently Asked Questions
What Materials Are Needed To Build A Diy Tool Shed?
You need wood, screws, nails, roofing materials, and paint. Also, basic tools like a saw, hammer, drill, and measuring tape are essential. Quality materials ensure durability and weather resistance for your tool shed.
How Long Does It Take To Build A Diy Tool Shed?
Building a basic tool shed typically takes 1 to 3 days. Time varies based on shed size, complexity, and your experience level. Proper planning and preparation can speed up the building process.
What Is The Best Location For A Tool Shed?
Choose a flat, dry, and accessible spot with good drainage. Avoid low areas prone to flooding. Ensure the location complies with local zoning and setback regulations.
How Do I Maintain My Diy Tool Shed?
Regularly inspect for damage, clean the interior, and repaint or reseal as needed. Keep the shed dry and ventilated to prevent mold and rust. Routine maintenance extends the shed’s lifespan.
Conclusion
Building your own DIY tool shed brings many benefits. It saves money and lets you customize space. You gain pride from creating something yourself. Keep your tools organized and easy to find. Follow the steps carefully and take your time.
Enjoy a neat, durable shed that fits your needs. A little effort turns into long-lasting storage. Start small, and watch your project grow. Simple tools and patience make it possible. Your backyard will look cleaner and more useful.

Michael Harris is an experienced woodworker and power tool expert with over 12 years in woodworking. Specializing in functional, high-quality furniture, he offers expert advice on tool selection, maintenance, and sharpening for both beginners and professionals.