Choosing the best grit for orbital sanding can make all the difference in your project’s finish. Whether you’re smoothing rough wood or preparing a surface for painting, the right grit helps you work faster and get better results.
But how do you know which grit to pick? This guide will help you understand the options so you can avoid mistakes that waste time and materials. Keep reading to discover how to get the smooth, professional finish you want with the perfect sanding grit.

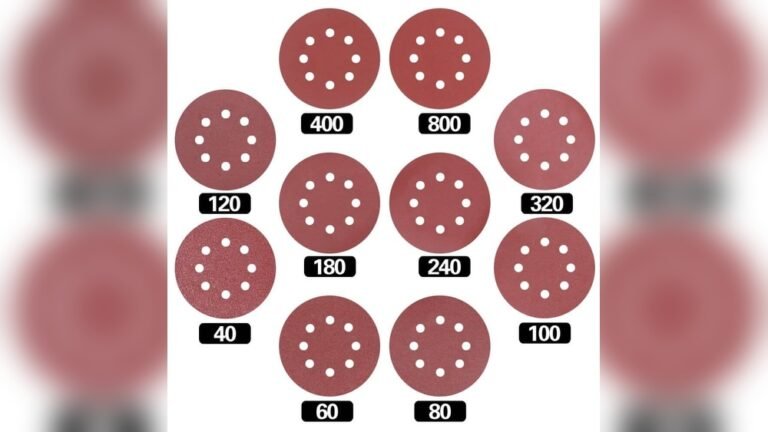
Credit: cityofharrah.com
Choosing Orbital Sander Grits
Picking the right grit for your orbital sander is key to good results. The grit size changes how much material you remove and the finish you get. Using the wrong grit can damage your work or waste time.
Understanding grit sizes helps you match the sanding job perfectly. Each project needs a specific grit range to achieve smooth, even surfaces. Let’s explore how grit size affects sanding and what ranges work best.
How Grit Size Affects Sanding
Grit size shows the number of abrasive particles per square inch. Lower numbers mean bigger particles and rougher sanding. Higher numbers mean finer particles and smoother sanding.
Coarse grit (40-60) removes paint or rough wood fast. Medium grit (80-120) smooths surfaces and removes small scratches. Fine grit (150-220) prepares surfaces for finishing or painting.
Choosing the right grit depends on how rough or smooth you want the surface. Start with coarse grit for heavy work, then move to finer grits for a polished finish.
Common Grit Ranges For Orbital Sanders
Orbital sanders commonly use grit sizes from 40 to 220. Each range serves a specific purpose during sanding.
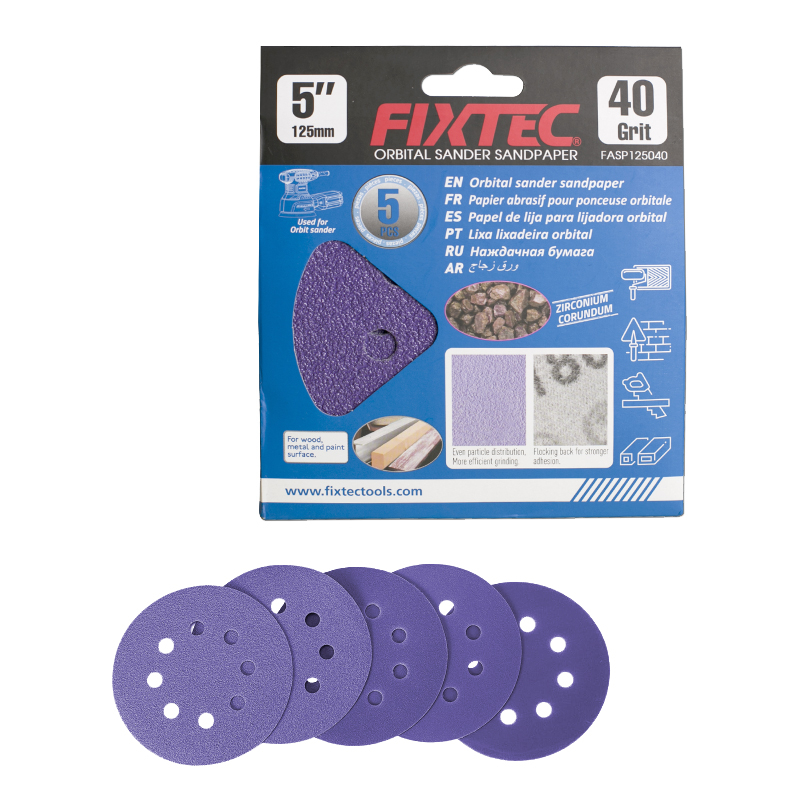
40-60 grit is best for stripping old finishes and shaping wood. It removes material quickly but leaves a rough surface.
80-120 grit is ideal for general sanding tasks. It smooths wood and removes minor imperfections.
150-220 grit works well for final sanding before painting or staining. It creates a fine, smooth surface ready for finishing.
Use the right grit sequence for best results. Start coarse and finish fine for a professional look.
Coarse Grit Uses
Coarse grit sandpaper plays a key role in orbital sanding. It is perfect for heavy-duty sanding tasks. This grit type removes a lot of material quickly. It helps shape rough wood or remove old finishes. Coarse grit is the first step in many sanding projects. Using it correctly saves time and effort.
When To Use 40 To 60 Grit
Use 40 to 60 grit for tough sanding jobs. This grit works best on rough surfaces. It removes paint, varnish, or glue fast. Also, it shapes wood that needs major smoothing. Use it at the start of sanding projects. It prepares the surface for finer sanding later. Avoid using coarse grit on soft materials. It can cause deep scratches that are hard to fix.
Benefits Of Coarse Grit For Material Removal
Coarse grit removes material quickly and efficiently. It saves time compared to finer grits. It also helps fix uneven or damaged surfaces fast. This grit exposes fresh wood for a better finish. It is ideal for stripping old finishes. Using coarse grit reduces sanding effort. It sets the stage for smoother sanding steps ahead.
Medium Grit Applications
Medium grit sandpaper plays a key role in orbital sanding tasks. It bridges the gap between rough shaping and fine finishing. This grit level smooths surfaces without causing deep scratches. It prepares wood or metal for further sanding or finishing steps.
Ideal Grit For Smoothing Surfaces
Medium grit sandpaper usually ranges from 80 to 120 grit. It removes small imperfections and evens out rough spots. This grit is perfect for softening edges and flattening uneven areas. It creates a clean surface ready for finer sanding or painting. Using medium grit prevents damage while improving surface texture.
Transitioning Between Coarse And Fine Grits
Medium grit acts as a bridge between coarse and fine sandpapers. Coarse grit removes large amounts of material but leaves scratches. Medium grit clears these scratches and smooths the surface further. Fine grit then refines the surface to a polished finish. Skipping medium grit may cause uneven sanding or poor finish quality.
Credit: nickgasparro.com
Fine Grit For Finishing
Fine grit sandpaper is essential for the final stage of orbital sanding. It smooths surfaces gently, removing small scratches left by coarser grits. This step creates a clean, even base ready for finishing touches. Using the right fine grit ensures a polished look without damaging the material.
Best Grits For Final Sanding Passes
Choosing the correct grit is key for the last sanding passes. Grits between 220 and 320 work well to refine surfaces. These grits remove minor imperfections and prepare the surface for a perfect finish. Avoid using grits that are too coarse, as they can leave marks.
Preparing Surfaces For Painting Or Staining
Fine grit sandpaper helps paint and stain stick better. It creates a smooth texture that absorbs finish evenly. Sanding with 220 to 320 grit ensures no rough spots remain. This step improves the durability and appearance of the final coating.
Specialty Grits And Materials
Specialty grits and materials play a key role in orbital sanding. Choosing the right grit depends on the material and task. Different surfaces need different abrasives to get the best finish. This section explores how to match grit types with specific materials and jobs.
Sanding Different Woods And Metals
Wood varies from soft pine to hard oak, each needing different grit. Coarse grits like 40-60 remove rough spots on hardwood quickly. Fine grits such as 180-220 smooth softwoods without damage. Metals require tougher abrasives to avoid scratches.
Use medium grit (80-120) for initial metal sanding. Fine grit (220 and above) polishes metal surfaces. Always test on a small area to prevent over-sanding. Proper grit choice saves time and improves results.
Using Abrasive Types For Specific Tasks
Not all abrasives are the same. Aluminum oxide works well on wood and metal. Silicon carbide suits sanding metal and plastic. Ceramic abrasives are tough and last longer for heavy work.
For paint removal, coarser grits help strip layers fast. For finishing, finer grits create smooth, clean surfaces. Match abrasive type and grit to your project for best results.
Credit: www.nainc.org
Tips For Effective Orbital Sanding
Effective orbital sanding improves the finish and saves time. Using the right techniques helps achieve smooth, even results. Small changes in how you sand can make a big difference.
These tips focus on selecting the best grit and caring for sandpaper. Both steps extend the life of your materials and improve your work.
Optimizing Grit Selection For Project Type
Choose grit based on your sanding goal. Coarse grit removes old paint or rough surfaces fast. Medium grit smooths wood and removes small scratches. Fine grit finishes surfaces for painting or staining. Use coarse grit first, then move to finer grit. This method prevents scratches and ensures a smooth finish.
Maintaining Sandpaper For Longer Use
Keep sandpaper clean to maintain its cutting power. Tap the sandpaper gently to remove dust often. Avoid pressing too hard during sanding; this wears out sandpaper quickly. Replace sandpaper when it stops cutting well. Proper care reduces costs and improves sanding results.
Frequently Asked Questions
What Grit Is Best For Orbital Sanding Wood?
For wood, start with 80-120 grit to remove rough spots. Use 150-220 grit for smoothing and finishing. Higher grits create a fine, smooth surface.
Which Grit Should I Use For Metal Sanding?
Begin with 120-150 grit for removing rust or paint. Use 180-220 grit for smoothing metal surfaces before polishing.
How To Choose Grit For Orbital Sanding Drywall?
Use 120-150 grit for sanding drywall joints. It smooths the surface without damaging the drywall paper.
What Grit Progression Works Best For Orbital Sanding?
Start coarse (80-120 grit), then medium (150-180 grit), finish with fine (220+ grit). This ensures smooth, even sanding.
Conclusion
Choosing the right grit for orbital sanding affects your project’s finish. Coarse grits remove material fast but leave rough marks. Fine grits smooth surfaces and prepare for painting or staining. Start with a lower grit to shape or strip, then move to higher grits for a clean look.
Match grit to your material and goal. This approach saves time and improves results. Keep your sanding even and steady. Good grit choice makes sanding easier and your work better. Simple steps lead to great finishes.

Michael Harris is an experienced woodworker and power tool expert with over 12 years in woodworking. Specializing in functional, high-quality furniture, he offers expert advice on tool selection, maintenance, and sharpening for both beginners and professionals.