If you use an angle grinder, you know how important a sharp, well-maintained grinding wheel is. But when it wears out or gets damaged, do you know how to change it safely and quickly?
This guide will walk you through every step, making sure you feel confident and ready to handle the job yourself. By the end, you’ll save time, avoid costly mistakes, and keep your tools working like new. Let’s get started and make changing your grinding wheel easier than you ever thought possible.

Credit: www.youtube.com
Tools And Materials Needed
Before changing a grinding wheel on an angle grinder, gather all necessary tools and materials. This step ensures a smooth and safe process. Having the right equipment also saves time and effort.
Angle Grinder
The angle grinder is the main tool. Check that it is unplugged before starting. This prevents accidental starts and injuries.
Replacement Grinding Wheel
Choose the correct grinding wheel for your task. Check the size and type match your angle grinder specifications. Use only wheels designed for your grinder.
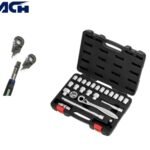
Wrench Or Spanner
A special wrench or spanner helps loosen and tighten the wheel nut. This tool fits the grinder’s locking flange or nut. Using the right wrench avoids damage to parts.
Safety Gloves
Wear safety gloves to protect your hands. Gloves guard against sharp edges and accidental slips. Use gloves that fit well and allow good grip.
Safety Glasses
Protect your eyes with safety glasses. Grinding can produce sparks and debris. Glasses shield your eyes from flying particles.
Clean Cloth
Use a clean cloth to wipe dust and debris from the grinder. Keeping the parts clean helps secure the grinding wheel firmly. Clean surfaces also prevent slippage during use.

Credit: www.protoolreviews.com
Safety Precautions
Changing a grinding wheel on an angle grinder requires focus on safety. The tool spins at high speeds. A small mistake can cause serious injury. Follow these safety steps carefully to protect yourself and others around you.
Wear Protective Gear
Always wear safety goggles to protect your eyes. Use gloves to guard your hands from sharp edges. A dust mask helps avoid breathing dust and debris. Wear sturdy shoes and long sleeves for extra protection.
Unplug The Angle Grinder
Disconnect the power source before changing the wheel. This prevents accidental startup. Double-check the tool is off and unplugged. Safety first—never skip this step.
Inspect The New Grinding Wheel
Check the wheel for cracks or damage. Using a damaged wheel can cause it to break during use. Only use wheels that fit your angle grinder model.
Secure The Angle Grinder
Place the grinder on a flat, stable surface. Hold the tool firmly to avoid slipping. Use a clamp if available. Stability helps avoid accidents during the wheel change.
Follow Manufacturer Instructions
Read the user manual for specific guidance. Each grinder model may have unique steps. Following the manual ensures proper and safe installation.
Preparing The Angle Grinder
Preparing your angle grinder before changing the grinding wheel is key for safety and efficiency. Proper preparation helps avoid accidents and ensures the tool works well. Follow these simple steps to get your grinder ready.
Unplug The Angle Grinder
Always unplug the angle grinder from the power source. This stops the tool from starting by mistake. Never work on the grinder while it is plugged in. Safety first.
Wear Safety Gear
Put on safety glasses to protect your eyes from dust and sparks. Use gloves to shield your hands from sharp edges. Wear a dust mask if you work in a dusty place.
Check The Grinder’s Condition
Look over the grinder carefully. Check for any cracks or damage on the guard and handle. Make sure the switch works properly. A damaged grinder can be dangerous.
Secure The Angle Grinder
Place the angle grinder on a stable surface. Use a clamp or a vice if possible. This keeps the tool steady while you change the wheel. Stability makes the task easier and safer.
Removing The Old Grinding Wheel
Removing the old grinding wheel is the first step in changing it safely. This process requires care and attention. The wheel must be secured before loosening any parts. Follow the steps to avoid damage or injury.
Locking The Spindle
The spindle holds the grinding wheel in place. To remove the wheel, lock the spindle first. Find the spindle lock button on the angle grinder. Press and hold it firmly. This stops the spindle from turning. It makes unscrewing the flange nut easier and safer.
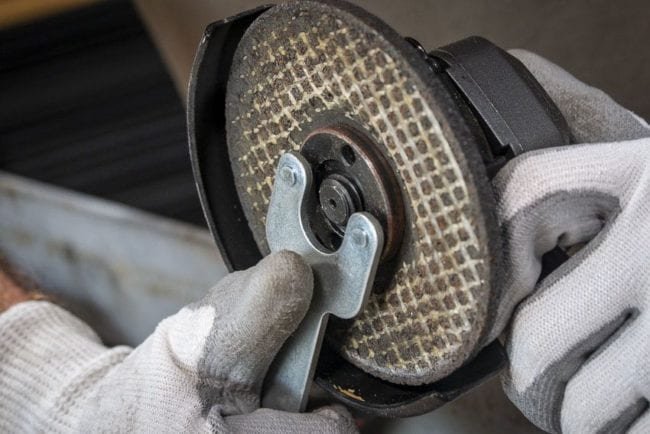
Unscrewing The Flange Nut
Next, use the right tool to loosen the flange nut. Usually, a wrench or spanner fits the nut. Turn the nut counterclockwise to unscrew it. Keep the spindle lock pressed while doing this. Remove the nut completely to free the grinding wheel. Handle the wheel carefully as you take it off.
Selecting The Right Replacement Wheel
Selecting the right replacement wheel is key to safe and effective grinding. Using the wrong wheel can damage your tool or cause injury. It also affects how well your angle grinder works. This section helps you choose a wheel that fits your tool and suits your project.
Checking Wheel Compatibility
Start by checking the size of your angle grinder’s current wheel. The diameter and thickness must match the replacement wheel. Look for the maximum speed rating on the wheel. It should be equal to or higher than your grinder’s speed. Using a slower wheel can be dangerous. Also, check the arbor hole size. It must fit your grinder’s spindle perfectly. Using the wrong size can cause the wheel to wobble or come loose.
Choosing The Correct Wheel Type
Angle grinders use different types of wheels for various tasks. Grinding wheels are for metal shaping and smoothing. Cutting wheels are thin and designed for slicing through metal or stone. Flap discs are for sanding and blending surfaces. Make sure to pick the right wheel for your specific job. Consider the material you are working on. Each wheel type has a specific use. Using the correct type improves results and tool life.
Installing The New Grinding Wheel
Installing the new grinding wheel is a crucial step for safe and effective work. This process ensures the wheel fits perfectly and stays secure during use. Take your time to position and fasten the wheel correctly. Proper installation helps avoid accidents and improves tool performance.
Positioning The Wheel
Place the new grinding wheel on the spindle carefully. The hole in the wheel must match the spindle size exactly. Align the wheel so it sits flat against the backing flange. Do not force the wheel or let it wobble. Check that the wheel is centered and stable before moving on.
Securing The Flange Nut
After positioning, screw the flange nut onto the spindle. Turn the nut by hand first to avoid cross-threading. Use the wrench that came with the grinder to tighten the nut firmly. Do not overtighten; it could damage the wheel or the tool. The nut should hold the wheel tightly without any movement.
Testing The Angle Grinder
Start by unplugging the angle grinder for safety. Loosen the flange nut with a wrench, remove the old wheel, and place the new one carefully. Tighten the nut securely before testing the grinder to ensure proper fit and function.
Inspecting The Wheel And Guard
Before turning on the angle grinder, check the wheel carefully. Look for cracks, chips, or signs of damage. A damaged wheel can break and cause injury. Make sure the guard is secure and positioned correctly. The guard protects you from sparks and debris. Never skip this step. Safety starts here.
Securing The Work Area
Clear the area around you. Remove any objects that could get in the way. Stand on a stable surface. Hold the grinder firmly with both hands. Keep bystanders at a safe distance. Sparks and debris can fly far. Prepare your surroundings for safe testing.
Testing The Grinder At Low Speed
Plug in the grinder and switch it on briefly. Let it run at low speed for about 30 seconds. Listen for unusual noises or vibrations. If it sounds smooth and steady, it is ready. If you hear wobbling or grinding sounds, stop immediately. Check the wheel and mounting again.
Checking The Wheel Balance
Watch the wheel as it spins. A balanced wheel runs straight without wobbling. If it wobbles, the wheel may be loose or damaged. Turn off the grinder and unplug it. Tighten the wheel or replace it if needed. A balanced wheel improves performance and safety.
Credit: www.reddit.com
Maintenance Tips For Grinding Wheels
Grinding wheels need regular care to work well and last longer. Good maintenance keeps the wheel safe and effective. It also saves money by avoiding early replacements.
Follow these simple tips to keep your grinding wheel in top shape. Proper care helps you get the best results from your angle grinder.
Inspect The Grinding Wheel Before Use
Check the wheel for cracks or damage every time. A damaged wheel can break during work and cause injury. Look for chips, cracks, or worn edges. If you find any damage, replace the wheel immediately.
Keep The Wheel Clean
Remove dust and debris from the wheel after each use. Use a soft brush or cloth to clean it. Dirt can reduce the wheel’s grinding power and cause uneven wear. Clean wheels last longer and work better.
Store Wheels Properly
Store grinding wheels in a dry, cool place away from moisture. Avoid stacking wheels on top of each other. Proper storage prevents warping and damage. Keep wheels flat and supported to maintain their shape.
Use The Correct Wheel For The Job
Match the wheel type and size to your task. Using the wrong wheel can cause poor results and damage. Check the wheel’s speed rating and material compatibility. Always follow the manufacturer’s recommendations.
Dress The Wheel Regularly
Use a wheel dresser to clean and shape the wheel surface. Dressing removes clogged debris and sharpens the wheel. This improves grinding efficiency and safety. Dress the wheel after heavy use or when it feels rough.
Frequently Asked Questions
How Do I Safely Change A Grinding Wheel?
First, unplug the angle grinder. Use a wrench to loosen the flange nut. Remove the old wheel carefully. Install the new wheel, tighten securely, and check alignment before use.
What Tools Are Needed To Replace A Grinding Wheel?
You need a wrench or spanner, a new grinding wheel, and safety gloves. Sometimes, a locking pin helps hold the spindle in place during the change.
How Often Should I Replace My Angle Grinder Wheel?
Replace the wheel when it shows signs of wear, cracks, or damage. Using a worn wheel reduces efficiency and increases safety risks. Regular inspection is key.
Can I Use Any Grinding Wheel On My Angle Grinder?
No, use wheels that match your grinder’s size, speed rating, and material type. Incorrect wheels can cause damage or accidents. Always check manufacturer specifications.
Conclusion
Changing a grinding wheel on an angle grinder is simple and safe. Always unplug the tool before starting. Use the right wrench to loosen the nut. Remove the old wheel carefully. Place the new wheel in the correct position. Tighten the nut firmly but don’t overtighten.
Check the wheel for damage before use. Wear safety gear during the whole process. Following these steps protects you and your tool. Practice makes the task easier over time. Stay safe and keep your grinder working well.

Michael Harris is an experienced woodworker and power tool expert with over 12 years in woodworking. Specializing in functional, high-quality furniture, he offers expert advice on tool selection, maintenance, and sharpening for both beginners and professionals.