How to Adjust a Brad Nailer Pressure: Easy Tips for Perfect Nails
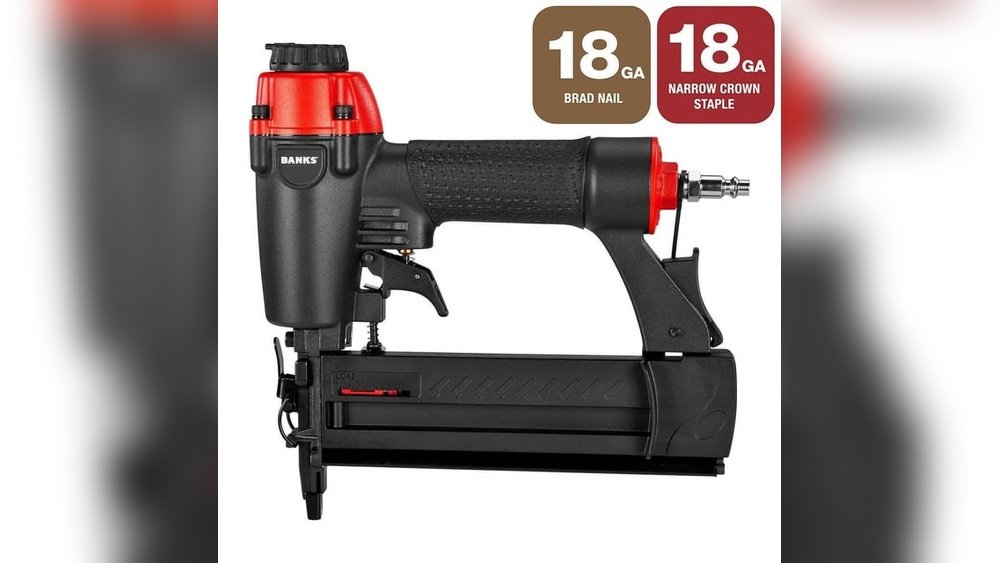
Achieving perfectly set nails isn’t about luck—it’s about knowing how to dial in the right air pressure and use your brad nailer’s built‑in depth controls. Whether you’re assembling cabinet trim, building picture frames, or tacking delicate moulding, too much pressure can shatter thin stock and too little leaves fasteners proud of the surface. This guide takes you beyond the basics, covering the full interplay between your compressor’s regulator, the tool’s depth‑of‑drive wheel, and the material you’re fastening. By the end, you’ll be able to fine‑tune your setup and avoid the most common mistakes that lead to split wood, jammed nails, and inconsistent results.
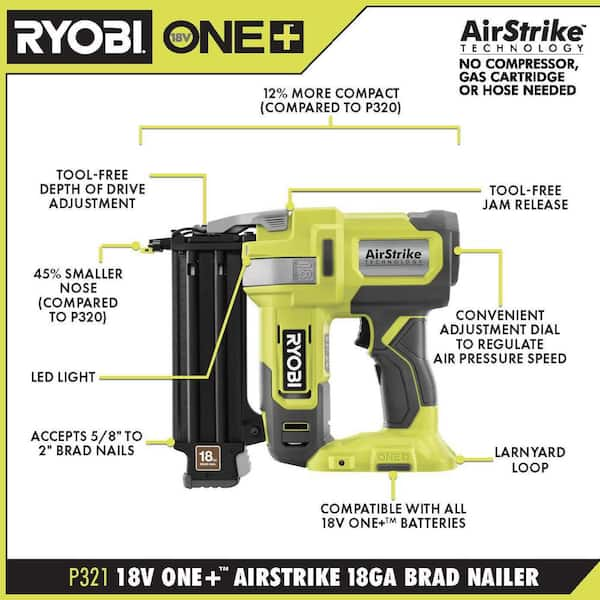 Modern cordless brad nailers use a depth adjustment wheel instead of air pressure, but the same principles of correct nail set apply.
Credit: www.homedepot.com
Why Getting the Pressure Right Matters
Pressure doesn’t just control how far a brad enters the workpiece—it directly influences joint strength, surface appearance, and tool longevity. In practice, finding the sweet spot is one of the fastest ways to transition from a beginner finish carpenter to someone who consistently delivers clean, professional results.
Controlling Nail Depth for a Flush Finish
When pressure is dialled in correctly, brad heads end up just below the wood surface, creating a tiny dimple you can easily fill with putty. Too much pressure drives the head below the surface far enough to tear the wood fibres around it—a classic cause of blowout, especially on plywood edges or MDF. Too little pressure leaves the nail head sticking out where it will catch sandpaper, snag clothing, or simply look amateurish. On dense hardwoods like oak, you’ll often need the higher end of your nailer’s recommended PSI range; soft pine or cedar may accept brads perfectly flush at 20 PSI less.
Preventing Material Damage and Waste
Thin or brittle materials—door skins, pre‑finished ply panels, delicate trim profiles—are unforgiving. Over‑driven brads can crack the piece instantly, forcing you to start over. Air pressure that’s set too aggressively can also leave a visible dent from the nailer’s safety tip (the nosepiece) pressing into the surface. A properly adjusted gun seats nails with minimal marring, reducing the need to fill, sand, and refinish.
Safety Starts with Correct Pressure
A brad nailer running at excessive pressure increases the risk of the fastener completely blowing through the edge of a board and exiting at an unpredictable angle. Misfires, double‑drives, and jammed nails are more likely when the tool cycles violently. Following OSHA’s pneumatic tool safety guidelines means you always disconnect the tool from the air supply before making any adjustment—a habit that prevents accidental discharge.
How Brad Nailer Pressure Actually Works
Before you touch a dial it helps to understand what you’re adjusting and where. Air‑powered brad nailers rely on a burst of compressed air that drives a piston forward, pushing the nail into the wood. The force of that burst is determined by the air pressure delivered from the compressor (measured in PSI) and the internal mechanical advantage the nailer provides. Most 18‑gauge pneumatic brad nailers operate within a 60–120 PSI band, and the manufacturer’s spec is not a suggestion—running below the minimum often causes sluggish cycling; running above the maximum can blow seals and damage the driver blade.
Beyond the compressor regulator, most quality brad nailers include a separate depth‑of‑drive adjustment directly on the tool, usually a small thumbwheel or recessed screw near the nose. This moves the safety nosepiece slightly in or out, changing how far the driver can travel relative to the workpiece. Understanding the difference between these two adjustments—and using them together—is what separates a novice from an experienced user.
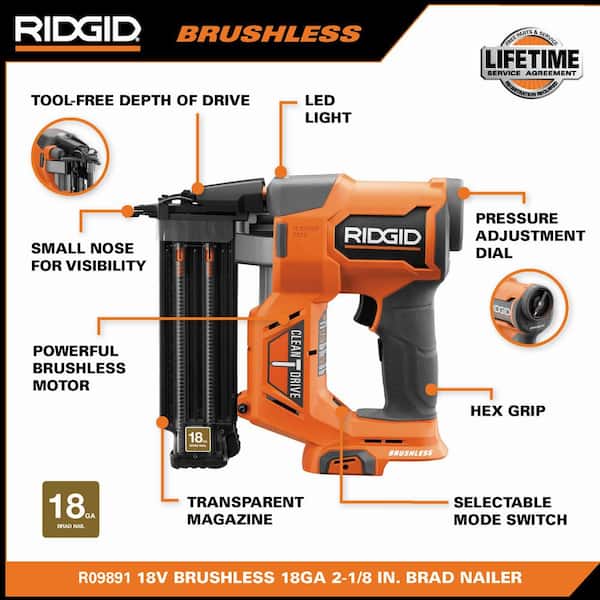 Pneumatic brad nailers combine an on‑tool depth dial with a compressor regulator to fine‑tune nail set for different materials.
Credit: www.homedepot.com
Tools You Need for Pressure Adjustment
Adjusting brad nailer pressure doesn’t require a toolbox full of specialised gear. A few essentials ensure you work safely and accurately.
- Air pressure gauge: Nearly every compressor includes a regulator with a gauge, but if yours is hard to read or inconsistent, a reliable inline gauge that mounts between the hose and the nailer is a worthwhile investment.
- Regulator knob: Located on the compressor, this is your coarse pressure control. It typically raises or lowers PSI in broad strokes—often in 10‑PSI increments, so fine‑tuning calls for the tool’s depth dial as well.
- Depth‑of‑drive adjustment: On the nailer itself, this thumbwheel or screw allows 1/2‑turn micro‑adjustments that dramatically change nail set without you having to walk back to the compressor.
- Scrap material of the same species and thickness: This is your test bed. Never adjust pressure directly on your finished project; a few test fires on identical cutoffs eliminates guesswork.
- Safety glasses: Shards of wood or a deflected nail can cause eye injury; always wear protection when test‑firing.
Step‑by‑Step Pressure Adjustment That Gets It Right First Time
The goal is to achieve a nail head that sits just below the surface—flush enough to fill but not so deep it tears the grain. The following sequence moves from coarse compressor adjustment to fine tool tuning.
1. Disconnect the Nailer from the Air Supply
Always start by unplugging the quick‑connect coupler. Never adjust a nailer while it’s under pressure; a stray trigger pull can send a fastener where you don’t want it. Detaching the hose also lets you inspect the quick‑connect fitting and O‑ring for wear, which can cause tiny air leaks that sap performance.
2. Set a Baseline PSI on the Compressor
Check your brad nailer’s manual for its recommended operating range—if you’ve misplaced it, a safe starting point for 18‑gauge brad nailers is 90 PSI. On the compressor, pull the regulator knob outward (on most models) and rotate it until the gauge needle reads 90 PSI. If your compressor lacks a precise gauge, a reputable affordable compressor-nailer combo will include one that’s easy to read even in dim workshop lighting.
3. Charge the Tool and Test on Scrap
Reconnect the hose and allow the compressor to fill to the set pressure. Load the magazine with the exact brand and length of brads you’ll be using—different coatings and nail lengths influence driving resistance. Hold the nailer flat and firm against the scrap, squeeze the trigger cleanly, and inspect the result.
4. Assess and Coarse‑Adjust PSI
If the nail head stands proud of the surface, the pressure is too low. If it’s deeply countersunk or the wood is dimpled, the pressure is too high. Adjust the compressor regulator in 5‑PSI increments—small, controlled changes prevent overshooting. After each tweak, fire two or three fasteners on the scrap; the first may not fully reflect the new setting if residual pressure in the hose hasn’t equalised.
5. Fine‑Tune with the Tool’s Depth Dial
Once the nail is close to flush—say, just barely below the surface or exactly flush—turn to the depth‑of‑drive adjustment on the nailer. Most wheels turn clockwise to increase countersink depth and counter‑clockwise to make it shallower. A quarter turn often makes a noticeable difference. Use this control for the final micro‑adjustment so that you never need to touch the compressor again unless you change nail length or material type dramatically.
 Most brad nailers include a recessed depth dial near the nose—turning it adjusts nail set without touching the compressor.
Credit: www.reddit.com
6. Lock In the Setting and Document It
Once you find the right combination of compressor PSI and depth‑dial position for a particular nail length and wood species, note it on a piece of painter’s tape stuck to the nailer body. Over time you’ll build a personal reference that saves staggering around between projects.
Matching Pressure to Your Materials (and Nail Length)
A one‑size‑fits‑all PSI number doesn’t exist. Use the table below as a starting guide, then refine with your scrap tests.
| Material | Nail Length | Suggested Compressor PSI Range | Notes |
|---|---|---|---|
| Softwood (pine, cedar, fir) | 1/2″ – 1‑1/4″ | 70–90 PSI | Start at 80 PSI; use upper end for 1‑1/4″ brads in dense grain. |
| Softwood | 1‑1/2″ – 2″ | 85–100 PSI | 2″ brads often need 95‑100 PSI to avoid proud heads. |
| Hardwood (oak, maple, walnut) | 1/2″ – 1‑1/4″ | 85–100 PSI | Dense wood demands more force; watch for surface marring. |
| Hardwood | 1‑1/2″ – 2″ | 95–110 PSI | Test with the depth dial set shallow first and increase gradually. |
| MDF / Particleboard | Any length | 75–90 PSI | MDF dents easily; keep pressure low and rely on the depth wheel. |
| Plywood edge (birch, maple) | 1/2″ – 1″ | 80–95 PSI | Edges can split with excessive force; fire at a slight angle if needed. |
A common mistake is to keep increasing air pressure to fix a nail that won’t sink, when the problem is actually that the nail length is too long for the job. A 2″ brad driven into 1/2″‑thick stock will punch through the back regardless of PSI. Select the right fastener first, then adjust pressure.
Pneumatic vs. Cordless Brad Nailers: What About Pressure?
If you’re using a battery‑powered brad nailer, there is no air pressure to set—the tool’s internal flywheel or gas‑cartridge mechanism delivers a fixed amount of force. Depth adjustment on a cordless nailer is handled entirely by the depth‑of‑drive wheel. While this simplifies setup, it limits your range. If you often switch between thick oak and soft trim, a pneumatic nailer paired with a versatile compressor gives you more granular control. Many finish carpenters keep both types on hand, choosing a cordless model that eliminates hoses for quick punch‑list items and reaching for pneumatic when they need maximum adjustability. Understanding the trade‑offs between pneumatic and battery‑operated tools will help you decide which setup fits your most common projects.
Troubleshooting Common Pressure and Depth Problems
Even a dialled‑in setup can act up. Here’s how to diagnose what’s going wrong.
Nails Won’t Sink Fully (Proud Heads)
- Cause: Pressure too low or depth dial set too shallow.
- Fix: Increase compressor PSI by 5 PSI, test; if still proud, turn the depth wheel clockwise a half‑turn.
- Overlooked culprit: A magazine nearly empty can cause the driver to short‑cycle because the nail stack isn’t providing consistent back‑pressure. Reload before assuming the tool is faulty.
Nails Sink Too Deep or the Wood Splits
- Cause: Pressure too high, depth dial set too deep, or nail too long for the material thickness.
- Fix: Reduce PSI by 5‑10 increments and back off the depth wheel. Check that you aren’t using a 2″ brad where 1″ would suffice.
- Splitting prevention: When nailing near the end of a board, move at least 1½ nail lengths from the edge. Pre‑scoring hardwoods with a utility knife along the nail path can also reduce splitting.
Double Fires or Skipped Shots
- Cause: When pressure is borderline low, the tool may not cycle completely, leaving a nail behind after a trigger pull that fires the driver but fails to advance the magazine. On the next shot, two nails come out.
- Fix: Increase pressure slightly and ensure the magazine slides smoothly; a dirty magazine rail will mimic low‑pressure problems.
Air Leaks Around the Fitting or Trigger
- Cause: Worn O‑rings or a cracked seal.
- Fix: Disconnect air, apply a drop of pneumatic tool oil to the air inlet, and cycle the tool manually. If the leak persists, replace O‑rings. A damaged battery charger on a cordless brad nailer can cause similar frustration—if your cordless unit’s battery isn’t accepting a charge, troubleshoot the charger itself before replacing expensive packs.
Maintenance Tips That Preserve Consistent Pressure
A nailer that gradually loses power mid‑project almost always has an avoidable mechanical issue. Build these habits into your workshop routine.
- Lubricate daily: A few drops of air‑tool oil into the inlet before each session keeps seals pliable and prevents the piston from sticking. Without oil, internal friction increases and effective driving force drops even if your compressor gauge reads the same PSI.
- Drain the compressor tank: Moisture condenses inside the tank and travels through the hose, leading to internal rust and erratic pressure delivery. Crack the drain valve at the end of every workday.
- Inspect O‑rings and quick‑connect fittings: A tiny hiss at a coupling robs pressure before it reaches the nailer. Replace hardened O‑rings annually.
- Clean the nosepiece and magazine: Dust, adhesive from coated nails, and wood splinters build up and can restrict the driver’s travel. A soft brush and a wipe with a dry cloth prevent drag that mimics low pressure.
- Store properly: Hang the nailer vertically or store it in a case away from high‑humidity areas. Consistent routine upkeep extends the life of internal seals and keeps pressure requirements predictable.
If you’re building out a workspace for the first time, investing in a well‑rounded starter set that includes a quality compressor, hose, and brad nailer eliminates most compatibility guesswork and lets you focus on technique.
Frequently Asked Questions
How do I know which PSI is right without a fancy gauge? Even a basic compressor regulator gauge is enough. Start at 90 PSI and fire a nail into a scrap of the same material. If the nail head protrudes, raise the pressure 5 PSI and test again; if it sinks too deep, lower it. Mark the setting for that material.
Can I damage my brad nailer by running too much pressure? Yes. Consistently operating above the manufacturer’s maximum (often 120 PSI) can blow internal seals, crack the driver blade, or cause the tool to fire violently, increasing wear on the trigger valve.
Why does my nailer work perfectly for the first 20 nails and then lose power? This usually points to a moisture‑logged tool or a compressor that can’t keep up. Drain the tank and add oil to the nailer’s inlet. Also verify your compressor’s recovery rate—small pancake compressors may struggle to maintain pressure during rapid‑fire usage.
Is it better to adjust the compressor or the depth wheel? Use both. Set the compressor to a PSI that keeps the nails consistently close to flush, then fine‑tune with the depth wheel. This approach minimises trips back to the compressor and gives you the most control.
Do cold temperatures affect brad nailer pressure? Yes. Cold thickens pneumatic tool oil and stiffens O‑rings, which can reduce driving force and make the PSI reading less reliable. In unheated winter workshops, run the tool at 5–10 PSI higher than your summer setting, but keep the nailer within its rated range.
Conclusion
Mastering brad nailer pressure isn’t complicated—it’s methodical. Start with a safe baseline, test on scrap, and use both the compressor regulator and the tool’s depth dial to get each nail exactly where you want it. Regular maintenance keeps the number you set on the gauge meaningful, and understanding how material density interacts with nail length stops you from chasing a pressure setting that was never the problem. With these techniques, you’ll avoid split trim, proud heads, and lengthy clean‑up on every project.
A nailer that fits your workflow makes all the difference. If you’re ready to upgrade to a tool that blends portability with precision, our look at current top‑rated cordless options for woodworkers can point you toward a model that earns its place on your bench.

Michael Harris is an experienced woodworker and power tool expert with over 12 years in woodworking. Specializing in functional, high-quality furniture, he offers expert advice on tool selection, maintenance, and sharpening for both beginners and professionals.