How to Maintain Your Brad Nailer: Expert Tips for Longevity
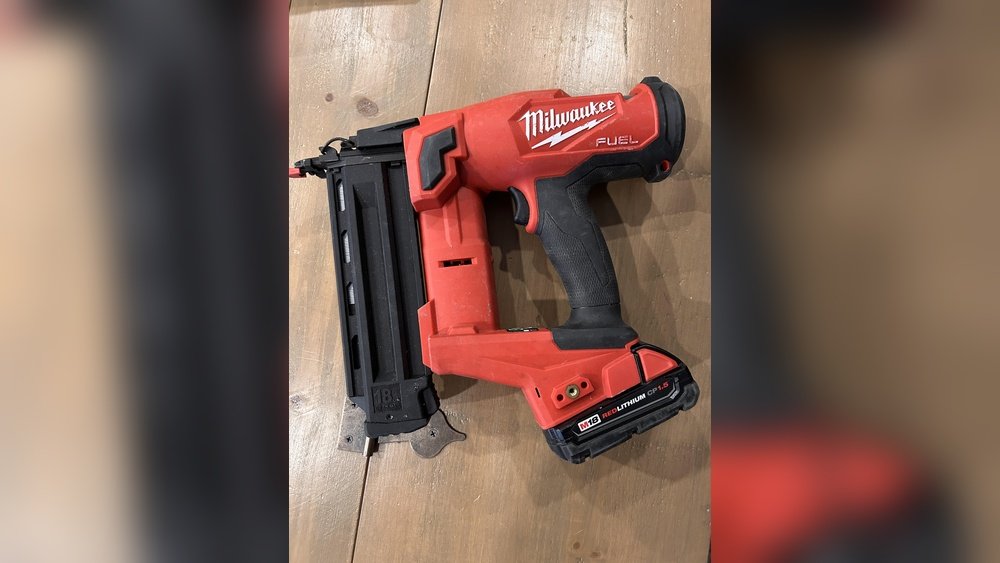
A brad nailer that runs smoothly turns trim work, cabinetry, and delicate assemblies from a chore into a pleasure. Yet even premium tools slowly degrade when maintenance is skipped. Dust accumulates in the magazine, old lubricant turns gummy, and tiny o-rings crack — each causing jams, inconsistent depth, and eventually a dead tool.
The good news? A few minutes of routine care will dramatically extend the life of your nailer, whether it’s pneumatic, electric, or cordless. In this guide you’ll learn proven cleaning steps, lubrication tricks, part-inspection routines, and storage habits that professional finishers rely on. Let’s get your nailer back to peak condition.
Know Your Brad Nailer First
A little familiarity with how your tool works makes every maintenance step easier. Brad nailers drive thin 18‑gauge fasteners into delicate trim without splitting the wood. They fall into three power sources, and each has slightly different upkeep needs.
- Pneumatic (air‑powered): Requires an air compressor. Dependable and powerful, but they demand regular oiling, moisture control, and compressor filter checks.
- Electric (corded): Plugs directly into a wall outlet. Minimal internal lubrication, but the nosepiece and magazine still collect debris.
- Cordless (battery‑powered): Uses a lithium‑ion battery and a small internal motor. Battery contacts require cleaning, and you must store batteries at a partial charge during extended downtime.
Understanding your model helps you focus on the maintenance tasks that matter most. Regardless of the power source you choose — cordless versus corded models each bring distinct trade‑offs — dirt and friction are the universal enemies.
Essential Maintenance Tools and Supplies
You don’t need a workshop full of gadgets. A small dedicated kit next to your nailer turns upkeep into a 90‑second habit.
Cleaning Supplies
- Compressed air can or small blower: Blasts loose dust from the magazine track and trigger mechanism without disassembly.
- Nylon bristle brush (stiff but non‑metallic): Sweeps compacted sawdust off the driver blade and nosepiece.
- Lint‑free cloths: Wipe down exterior surfaces and catch excess oil.
- Cotton swabs and toothpicks: Reach narrow crevices around the safety yoke.
- Mild degreaser or isopropyl alcohol: Removes stubborn residue on metal contacts — never use on o‑rings.
Lubricants and Protective Fluids
- Pneumatic tool oil (ISO 32, non‑detergent): Specifically engineered for high‑speed air tools. It won’t degrade seals or foam under pressure.
- Light machine oil: Acceptable in a pinch for hinge points on electric and cordless models, but never substitute inside an air chamber.
- Silicone‑free lubricant for magazine rails: Keeps fasteners sliding without attracting dust. A dry PTFE spray often works well here.
Many premature failures trace back to a charger that won’t work or a battery that sat completely drained for months, so include basic battery maintenance supplies in the same kit.

Oil the air inlet with 2–3 drops before each use.
Credit: www.reddit.com
Daily and Pre‑Use Maintenance Routine
Spending 60 seconds before connecting the power will prevent most jams and misfires.
- Unplug or remove the battery. Never work on a loaded nailer with the power engaged.
- Inspect the nosepiece. Wipe any dried glue or wood resin off the safety tip with a cloth dampened in alcohol.
- Check nail collation. Bent or sticky fasteners often cause misfires; discard damaged strips.
- Oil the air inlet (pneumatic only). Place 2–3 drops of pneumatic oil directly into the inlet, then cycle the tool briefly to distribute it. Blot excess with a rag.
- Clean battery contacts (cordless). A dry cotton swab removes micro‑dust that can cause intermittent power loss. If you spot blue‑green corrosion, neutralise it with a little baking‑soda paste, then dry thoroughly.
Getting into this rhythm keeps the tool consistently clean, and a battery that won’t charge after a long break becomes far less likely.
Thorough Cleaning Steps
Every 2,000–3,000 shots — or immediately after working with MDF or painted trim — give your nailer a deeper clean. Fine dust from composite materials settles into the firing mechanism and hardens like cement.
Safe Disassembly for Cleaning
Refer to your tool’s manual for specific tear‑down instructions. In most models you can remove four to six screws and lift the nose cap or side cover without exposing complex internals. Keep all screws in a magnetic tray and note their positions — mixing them up can distort the housing.
Removing Dust and Debris
Blow compressed air through every opening at a shallow angle so you don’t force debris deeper. Follow with a nylon brush on the driver‑blade track. Stubborn clumps can often be flicked out with a wooden toothpick (metal picks may scratch guide rails).
Cleaning the Magazine and Nosepiece
Open the magazine fully. Run a dry cloth along the rail where the nail heads ride; any sticky residue will slow the slide. Inspect the nosepiece’s contact‑trip plunger — it must move freely with no grit. A tiny dab of dry PTFE lubricant on the mag‑rail groove lets fasteners feed smoothly without attracting dust.
The Driver‑Path Deep Clean
In pneumatic nailers, oil and wood dust create a black paste that packs into the driver‑channel area. Wipe it out completely with a swab. A clean path allows the piston to cycle at full speed, which means better nail sets and less wear on the bumper.

Visual reference for daily and deep‑clean routines.
Credit: www.stapleheadquarters.com
Lubrication: The Heart of Pneumatic Nailer Care
Oil isn’t just a rust preventive — it’s what keeps your piston ring sealing properly stroke after stroke. Skip it, and you’ll notice the tool firing sluggishly or leaving nails proud of the surface.
Where and How Much Oil to Apply
Place 2–3 drops of pneumatic oil directly into the air‑inlet fitting at the start of every session. If you’re firing thousands of nails in a day, add another drop every four hours of steady use. After oiling, point the nailer downward, squeeze the trigger once or twice to cycle the oil, then blot the exhaust area lightly to prevent oil‑stains on your workpiece.
What to Use — and What to Avoid
Stick with a dedicated pneumatic tool oil (often labeled ISO 32 or turbine oil). It stays thin when cold, resists foaming under rapid cycling, and doesn’t attack nitrile o‑rings.
Avoid:
- WD‑40: It’s a solvent, not a lubricant — it will strip existing oil and leave seals dry.
- Motor oil: Viscosity is too high; can gum up the cylinder and cause sticky operation.
- Vegetable‑based oils: Oxidise quickly into a gummy varnish.
A small squeeze bottle with a needle tip makes it easy to reach the inlet without saturating the coupler. Even an inexpensive tool carefully maintained will outlast a neglected premium model.
Inspecting and Replacing Worn Components
Porosity in o‑rings, a cracked bumper, or a chipped driver blade won’t fix itself. Identifying wear early prevents the domino effect — a crushed bumper, for instance, forces the piston to bottom out against the cylinder wall, eventually cracking the housing.
Visual Inspection Checklist
- O‑rings and seals (pneumatic): Look for flat spots, cracks, or a loose fit around the piston head and cylinder cap. Air‑leakage sound at rest is a tell‑tale sign.
- Driver blade: The tip should be square and sharp. A rounded edge deflects nails and causes misfires.
- Bumper: Visible crumbling, flattening, or a sticky texture means it’s time to replace it. This part absorbs the piston’s energy; a dead bumper sends shock through the entire tool.
- Magazine springs and followers: The follower must press nails forward without binding. Rust or kinked springs lead to misfeeds.
- Trigger and contact‑trip function: Ensure the nailer only fires when the safety yoke is depressed; sticky triggers can be disassembled and cleaned.
When and How to Swap Parts
Most brands sell a rebuild kit containing common wear items (o‑rings, bumpers, seals). Replace all kit components at once — pairing an old o‑ring with a new bumper simply defers the next breakdown. Follow the exploded diagram in your manual, and seat o‑rings with a light coating of pneumatic oil, never force them dry. If the drive depth still wanders after replacing seals, recalibrating the depth of drive often resolves the issue.
Proper Storage for Long‑Life Performance
How you put the tool away determines whether it fires on the next trigger pull — or jams immediately.
Moisture Control
Pneumatic nailers must be stored dry. Even a small amount of moisture inside the cylinder causes rust and swollen o‑rings. Drain your compressor tank daily to minimise water carry‑over. For long‑term storage, squeeze a few extra drops of oil into the nailer, cycle it, and plug the air inlet with a dust cap or folded cloth. Cordless models benefit from silica‑gel packs tucked inside the case.
Safe Storage Locations
Keep the nailer in its original case or a dedicated toolbox, away from extreme temperatures and damp basements. Never store a nailer loaded — remove the battery and all fasteners. A cordless tool’s battery should be stored at roughly 40–60 % charge in a cool environment; full charge storage in heat accelerates capacity loss.
Troubleshooting Common Issues
Even well‑maintained nailers occasionally act up. Most problems have simple fixes.
Fixing Jams
- Disconnect power.
- Open the magazine and remove any loose nails.
- Release the jam‑clear latch or unscrew the nosepiece.
- Extract the stuck fastener with needle‑nose pliers — pull straight out, never twist.
- Inspect the driver‑blade channel for bent nail fragments.
- Reassemble and test‑fire into scrap wood.

Clearing a jam by opening the nose assembly and removing stuck fasteners.
Credit: www.youtube.com
Addressing Misfires and Double Firing
- Weak or no fire: Check air pressure (80–120 PSI is typical) or battery charge. In pneumatic tools, a clogged exhaust port can stall the return stroke.
- Double firing (bump fire mode unintended): Clean the safety yoke plunger — dust makes it stick in the depressed position.
- Inconsistent depth: Adjust the depth setting wheel; if the problem persists, replace the bumper and verify correct oil viscosity. A dry seal will randomly lose power.
Air Leaks from the Body or Trigger Area
A faint hiss at rest often signals a worn trigger‑valve o‑ring or a loose air‑inlet plug. Tighten all fittings and replace the small o‑rings inside the trigger housing — a 10‑minute job with a pick set.
Maintenance Schedule at a Glance
| Interval | Task |
|---|---|
| Before each use | Oil air inlet (pneumatic), wipe nosepiece, check fasteners, inspect battery charge state. |
| After heavy‑dust jobs | Brush magazine track, clean contact‑trip plunger, blow out driver channel. |
| Every 2,000–3,000 nails | Deep clean nosepiece and driver path, inspect o‑rings and bumper, lubricate magazine rails. |
| Monthly (or when stored) | Cycle tool with extra oil, drain compressor tank, clean battery terminals, check for rust. |
| Annually | Replace bumpers and seals if any signs of wear, test safety yoke function, rebuild if piston lag is noticeable. |
Common Mistakes That Shorten Nailer Life
- Using the wrong lubricant. A single application of penetrating oil can swell o‑rings and cause chronic air leaks.
- Over‑oiling. More oil does not equal better protection; excess pools in the cylinder, carbonises, and gums up the piston.
- Ignoring a jam. Forcing the nose against a jammed workpiece while pulling the trigger again can snap the driver blade. Stop and clear it properly.
- Storing a pneumatic nailer without oil‑cycling. Unprotected cylinders form microscopic rust pitting in humid conditions, ruining the bore.
- Dropping the tool. Even a short fall can crack the magazine or misalign the nosepiece, leading to persistent jams.
For comprehensive pneumatic tool safety practices while performing these maintenance steps, review OSHA’s pneumatic tool eTool.
Frequently Asked Questions
How often should I deep‑clean my brad nailer?
Every 2,000–3,000 fasteners or after any session cutting MDF, particleboard, or painted trim. Fine dust from these materials is especially abrasive.
Can I use 3‑in‑1 oil instead of pneumatic tool oil?
In cordless or electric models for external hinge points, yes — but never inside a pneumatic nailer’s air chamber. Stick with ISO 32 pneumatic oil to protect internal seals.
Why does my pneumatic nailer leak air from the trigger?
Likely a worn trigger‑valve o‑ring. Replacing it is inexpensive and takes only a few minutes. Continuing to use the tool with a leak forces the compressor to cycle excessively.
Do cordless brad nailers need oil?
No internal oiling is required. Keep the magazine rails clean, the safety tip free of debris, and the battery contacts dry. Occasionally lubricate the magazine‑slide groove with a dry PTFE spray.
When is it time to replace the nailer instead of repairing it?
If the cylinder body is cracked, the magazine tower is bent, or rebuild parts are no longer available, a new tool is the safer choice. However, with consistent upkeep, most professional brad nailers last well beyond 500,000 shots.
Conclusion
A brad nailer that flicks 18‑gauge pins into delicate trim without a single misfire is the result of small, consistent habits. Keep it clean, lubricate it with the right oil, inspect consumable parts before they fail, and store it in a dry, protected space. These steps don’t just prevent downtime — they translate directly into cleaner nail lines and fewer call‑backs on your work.
If you’re building a tool collection that rewards meticulous care, take a moment to explore our top‑rated picks for home projects, workshop expansions, and professional finish carpentry. A few extra minutes of maintenance today will keep your nailer performing like new for years.

Michael Harris is an experienced woodworker and power tool expert with over 12 years in woodworking. Specializing in functional, high-quality furniture, he offers expert advice on tool selection, maintenance, and sharpening for both beginners and professionals.