How to Change a Circular Saw Blade: Quick & Easy Step-by-Step Guide
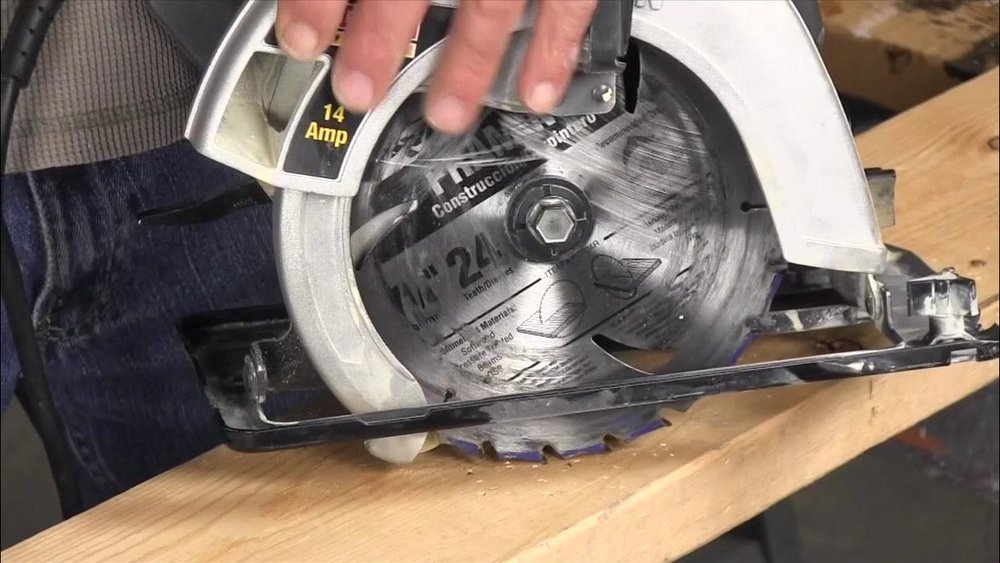
A dull, warped, or wrong blade turns a clean cut into a splintered mess—and worse, it makes your saw work harder, increasing the risk of kickback. Swapping the blade yourself takes only a few minutes and instantly restores cutting performance. This guide walks you through every step, from gathering the right tools to final safety checks, with practical details that help you avoid the most common mistakes. If you’ve been putting it off because the process looks intimidating, you’ll see just how straightforward it really is.
Tools You’ll Need
Most circular saws include the basics, but having everything ready before you start eliminates frustration. Gather these items on a clean, flat work surface. You can also read our guide on how to care for and sharpen your tools.
Wrench or Allen Key
Nearly every saw ships with a dedicated blade-change tool—often a stamped steel flat wrench or a long-arm Allen key stored on the saw body itself. If yours is missing, a standard combination wrench that fits the arbor nut will work, but avoid adjustable pliers, which can round the nut. Check your saw’s manual for the exact size; ½ inch and 13 mm are common. Owning a small, beginner-friendly set of basic hand tools makes jobs like this even faster.
Blade Lock Button
The spindle-lock button—usually on the motor housing—pins the arbor shaft so it can’t rotate while you loosen the nut. Press it firmly and rotate the blade by hand until you feel it engage. If your model lacks a lock (a few older corded worm-drive saws don’t have one), you can immobilize the blade by clamping a scrap of wood against it, but the lock is far safer. You can also read our guide on how to test a power tool battery.
Work Gloves
Leather or cut-resistant gloves protect your fingers from razor-sharp carbide teeth. In practice, a thin pair gives enough dexterity to handle the blade without fumbling. Never skip gloves: a slip against a blade edge can result in a serious gash.
Safety Glasses
Even a brief blade change can release dust, wood chips, or tiny metal burrs. Wear wraparound safety glasses that seal near your temples—standard prescription glasses aren’t enough. You can also read our guide on how to maintain your circular saw.
New Circular Saw Blade
Bring the correct replacement blade to the bench before you remove the old one. Verify diameter, arbor hole size, RPM rating, and tooth count to match your saw and project.
Safety Precautions Before You Touch the Saw
Power tools demand respect, and saw blades are unforgiving. Following these precautions consistently builds a habit that keeps you safe for years.
Disconnect the Power Source Completely
For corded saws, unplug the tool from the outlet—don’t just switch it off. For cordless saws, remove the battery pack completely; setting it aside eliminates the possibility of an accidental trigger pull. If you’re debating between corded and battery-powered gear, understanding the trade-offs can help you choose the right platform for your workshop. Either way, zero power means zero starts.
Wear Protective Gear
Put on safety glasses, gloves, and, if you’re in an enclosed space, a dust mask. Hearing protection isn’t necessary during the blade change itself but should go on before you test-run the saw later.
Secure the Saw
Place the saw on a stable bench with the blade facing up. If the saw tends to slide, a non-slip mat or a quick-grip clamp on the shoe will hold it steady. A moving saw turns a simple wrench turn into a wrestling match.
Use Only the Correct Tools
The factory-supplied wrench or Allen key is designed to fit the arbor nut precisely. Using pliers, an ill-fitting socket, or a hammer to force the nut damages the fastener and voids your warranty.
Inspect the New Blade First
Look for chipped carbide teeth, hairline cracks near the arbor, or rust on the plate. A damaged blade can disintegrate at high RPM. If anything looks off, exchange it before you install it.
How to Prepare Your Circular Saw
Setting up the saw properly takes less than a minute and makes the actual swap feel effortless.
- Clear the work area. Remove scraps, cords, and loose tools that could snag your sleeve or distract you. Good lighting is non-negotiable—position a task light so you can see the blade teeth clearly.
- Retract and lock the blade guard. Pull the lower guard lever back with your thumb and hold it open. Some saws let you lock the guard in the retracted position; on others, you’ll need to keep gentle pressure. This exposes the blade fully.
- Engage the spindle lock. Press the lock button and slowly rotate the blade until the arbor shaft catches. You’ll feel it click into place. Keep the lock pressed—the shaft should remain frozen.
- Position the wrench. Slip the wrench onto the arbor nut so it sits squarely. A crooked wrench can slip off and bark your knuckles.
Step 1: Remove the Old Blade
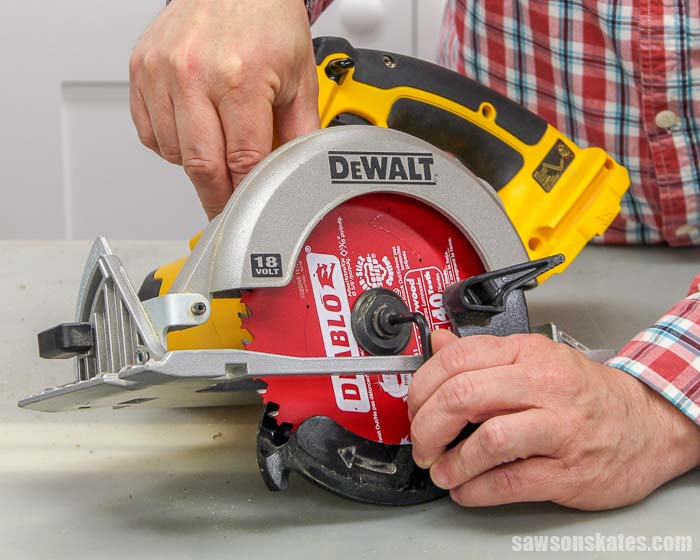 Sequence of the blade removal process on a typical circular saw.
Removing the old blade is the most physical part of the job. A little technique goes a long way when the nut is stubborn.
Unlock the Blade Guard
Gently push the guard lever until the entire blade is visible, keeping your fingers well away from the teeth. If your saw has a guard-lock tab, press it to hold the guard open. Don’t force the guard if it sticks—clean out packed sawdust first so the mechanism moves freely.
Loosen the Arbor Nut
With the spindle lock engaged, turn the wrench counterclockwise to loosen the nut. This is the moment most people struggle: factory-installed nuts can be extremely tight. Use steady, increasing pressure rather than a sudden jerk. If it won’t budge, tap the end of the wrench handle with the heel of your hand or a small rubber mallet. In practice, a brief check of your battery’s condition can prevent interuptions if you’re working with cordless tools, though here brute force is rarely the solution—simply remember that some worm-drive saws use a left-hand thread; check your manual if it won’t loosen.
Once the nut is loose, unthread it by hand and set it aside together with any washers or inner flange rings. Keep the parts in order—they must go back the same way.
Remove the Blade
Lift the old blade straight off the arbor. If it sticks, wiggle it gently while pulling outward. Place it somewhere safe, teeth away from you, until you can dispose of or sharpen it.
Step 2: Choose the Right Replacement Blade
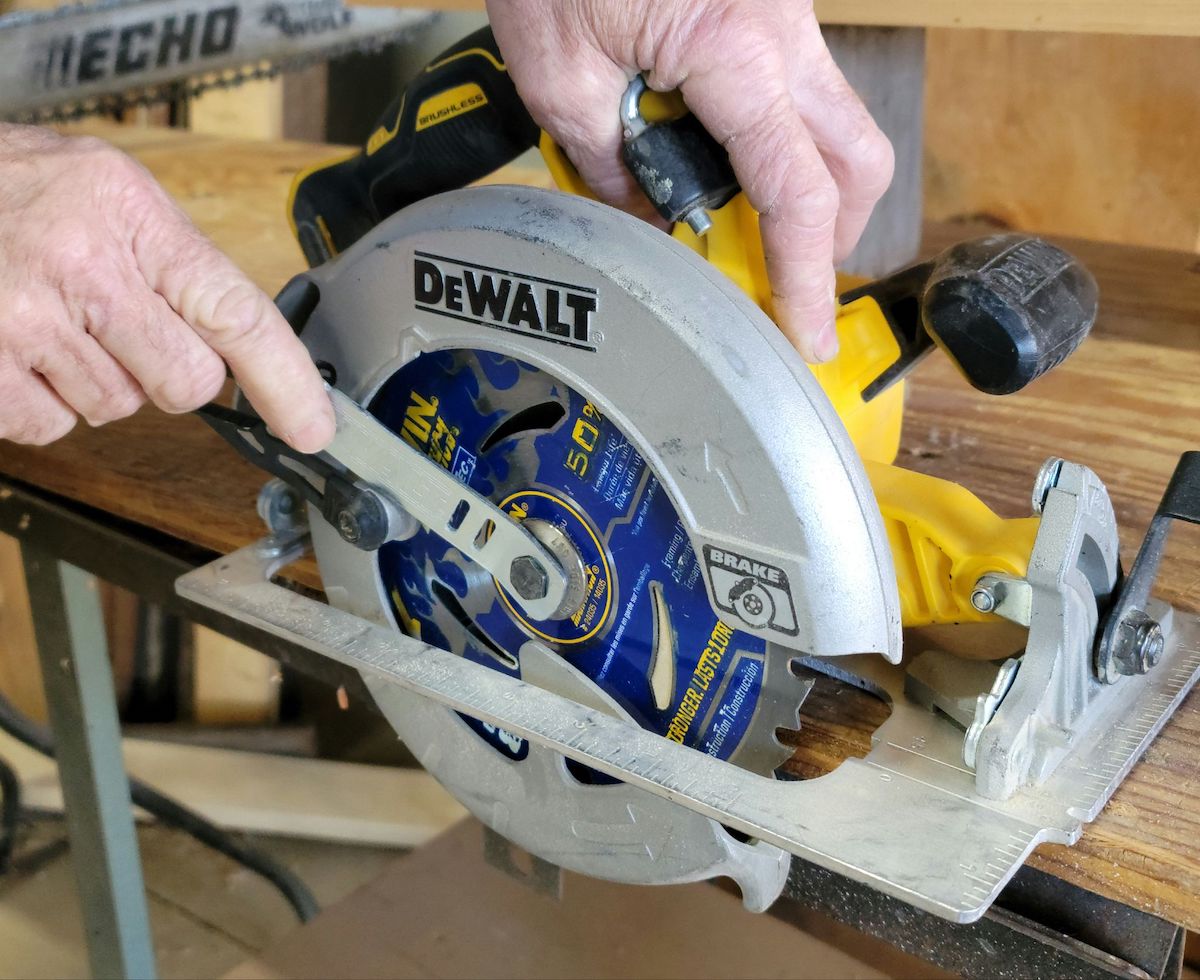 The arbor nut and blade being removed for replacement.
A saw is only as good as the blade bolted to it. Matching the blade to your material and desired finish prevents burn marks, tear-out, and dangerous binding.
Blade Size and Arbor Compatibility
Most handheld circular saws use a 7-1/4 inch blade, but 6-1/2 inch and 8-1/4 inch models exist. The exact diameter is stamped on the old blade and in your saw’s manual. Equally critical is the arbor—the hole at the blade’s center. Common arbor sizes are 5/8 inch (standard) and 1 inch (often on worm-drive saws). Using an adapter ring can bridge the sizes, but a native fit reduces runout. Also check the blade’s maximum RPM rating; it must equal or exceed the saw’s no-load RPM.
Tooth Count and Application
Tooth count determines how fast or how smooth a blade cuts. Fewer teeth hog out material quickly for rough framing; more teeth shear it cleanly for visible edges.
| Tooth Count | Best For | Typical Cut Quality |
|---|---|---|
| 18–24 teeth | Ripping framing lumber, fast demolition | Rough, splintered edge |
| 40–60 teeth | Crosscutting, plywood, trim carpentry | Smooth, minimal tear-out |
| 80+ teeth | Laminate, melamine, fine cabinetry | Chip-free, polished surface |
For general home-improvement work, a 40-tooth general-purpose carbide-tipped blade covers most cuts. If you’re building a collection, a reliable power saw paired with a versatile blade will serve you across dozens of projects.
Blade Materials
- Carbide-tipped blades: Carbide teeth stay sharp many times longer than steel, making them the practical choice for wood and composites.
- High-speed steel (HSS) blades: Inexpensive but dull quickly. Suitable only for occasional softwood cuts.
- Diamond blades: Designed for tile, concrete, and masonry. Never use one on wood.
Direction Markings
Every blade has an arrow printed on its plate showing the direction of rotation. When installing, this arrow must match the arrow stamped on the saw’s upper guard. A common mistake is flipping the blade—a backwards blade will still spin, but it won’t cut, and it will burn the wood and overheat the motor.
Step 3: Install the New Blade
 Video resource illustrating a quick blade swap in real time.
Installing the new blade correctly is where many DIYers stumble. Take your time aligning everything, and the saw will run true.
Align the Blade Teeth First
Place the blade onto the arbor with the teeth pointing up toward the front of the saw shoe. In other words, the cutting edges should rotate into the material in a forward-upward motion. Simultaneously, verify the arrows on the blade and guard match.
If your saw uses an inner flange or spacer, slide it on before the blade. Some flanges have two different diameters—flip them to match the arbor hole of the blade exactly.
Thread the Arbor Nut by Hand
Add any outer washer or flange, then thread the arbor nut clockwise (righty-tighty) with your fingers until it’s snug. Hand-tightening guarantees you won’t cross-thread it.
Tighten Firmly but Not Excessively
Engage the spindle lock again and tighten the nut with the wrench. You want it firmly secure, but hammering on the wrench can distort the blade body or pull the shaft out of alignment. A good rule of thumb: tighten until you feel solid resistance, then give an extra 1/8 turn. If your manual specifies a torque value (typically 15–25 ft-lbs for 7-1/4" saws), use a torque wrench; otherwise, bracing the saw with one hand while tightening with the other is enough.
Final Safety Checks Before You Start Cutting
Before you plug in or re-insert the battery, walk through these checks. They take 30 seconds and catch the oversights that lead to accidents.
- Blade tightness: Grab the blade with a glove and try to rotate it sideways. The arbor nut should prevent any wobble.
- Guard function: Flick the lower guard lever; it should snap back freely and completely cover the teeth the moment you release it. If it sticks, blow out the guard pivot with compressed air.
- Rotation direction: Briefly run the saw without cutting. The blade should spin smoothly without scraping the guard. Any metallic noise means the blade is likely rubbing—recheck the washers.
- Surroundings: Ensure the work area is clear and you’re wearing your safety glasses, hearing protection, and any other gear recommended by the power tool safety standards that OSHA outlines.
Common Mistakes to Avoid
Even experienced woodworkers slip up occasionally. Here are the missteps that repeatedly cause trouble:
- Installing the blade backward. The saw will labor, smoke, and barely cut. Always check the arrow.
- Forgetting to reinstall the outer washer. Without it, the nut bottoms out before clamping the blade, leaving it dangerously loose.
- Using a blade with the wrong arbor size or RPM rating. This is a primary cause of vibration and can damage the saw’s gears.
- Over-tightening the arbor nut. Breaking the clamping mechanism means an expensive repair.
- Skipping the battery removal. A cordless saw that accidentally starts during a blade change can cause severe injury. If you primarily use cordless tools, it’s worth keeping spares charged so you never rush through safety steps.
Maintaining Your Circular Saw Blade for Long-Term Performance
A sharp, clean blade rewards you with effortless cuts and protects the saw motor. Build a routine around your project schedule rather than waiting for symptoms to appear.
Clean the Blade After Each Use
Pitch and resin build up on the teeth and plate, increasing friction and heat. Spray the blade with a dedicated blade and bit cleaner (or a simple solution of warm water and household degreaser), let it sit for a minute, then scrub gently with a nylon bristle brush. Dry immediately to prevent rust. This small habit is central to general upkeep of your saw.
Inspect for Damage Before Every Project
Look for missing or chipped carbide, cracks radiating from the arbor, and a dull, rounded cutting edge. Run a fingernail along a tooth—if it skates over the edge instead of catching, the blade is too dull. Swap it immediately; a dull blade forces the saw motor to draw more current and raises the chance of kickback.
Sharpen or Replace Judiciously
Carbide-tipped blades can be resharpened by a professional sharpening service, which is cheaper than buying new for premium blades. Steel blades are meant to be replaced. If you’re tackling budget-friendly DIY builds, a quality mid-range blade often pays for itself in longevity and cut quality.
Store Blades So the Teeth Are Protected
Never toss loose blades into a toolbox drawer where they bang against metal. Use individual blade covers, hang them on pegs, or store them in a dedicated blade caddy. Moisture is the enemy—keep blades in a climate-controlled space to ward off rust.
Frequently Asked Questions
How can I tell if my circular saw blade is dull?
Look for burn marks on the wood, excessive force to push the saw through the cut, chipping along the cut line, or a glazed appearance on the carbide tips. A dull blade heats up quickly and produces smoke even in clean lumber.
What does the arrow on the blade mean?
The arrow indicates the recommended rotation direction. It must point the same way as the arrow on the saw’s blade guard—typically forward and up toward the front of the saw shoe.
Can I use a blade with more teeth than my saw recommends?
Yes, provided the diameter, arbor size, and RPM rating match the saw’s specs. More teeth give a finer finish but feed slower, so don’t push too hard or you’ll overload the motor.
Do I need a torque wrench to tighten the arbor nut?
A torque wrench is ideal but not mandatory for occasional blade changes. Most users tighten by hand sensation; just stop once the nut resists firmly, without leaning your body weight into the wrench.
Is it safe to change a blade while the battery is attached but the saw is switched off?
No. Always remove the battery completely. An accidental trigger press or a faulty switch can energize the motor, turning a routine swap into an emergency.
Conclusion
Changing a circular saw blade is one of those shop skills that feels daunting the first time and becomes second nature after two or three swaps. Remember the sequence: disconnect power, lock the arbor, loosen the nut counterclockwise, match the new blade’s arrow to the guard, hand-tighten the nut clockwise, and run a quick safety check before cutting. Keep your blades clean, sharp, and correctly seated, and you’ll never dread the moment you need a fresh edge. For more ways to keep your saw running at its best, dive into our detailed guide on routine saw care.

Michael Harris is an experienced woodworker and power tool expert with over 12 years in woodworking. Specializing in functional, high-quality furniture, he offers expert advice on tool selection, maintenance, and sharpening for both beginners and professionals.