How to Test a Power Tool Battery: Quick & Accurate Methods
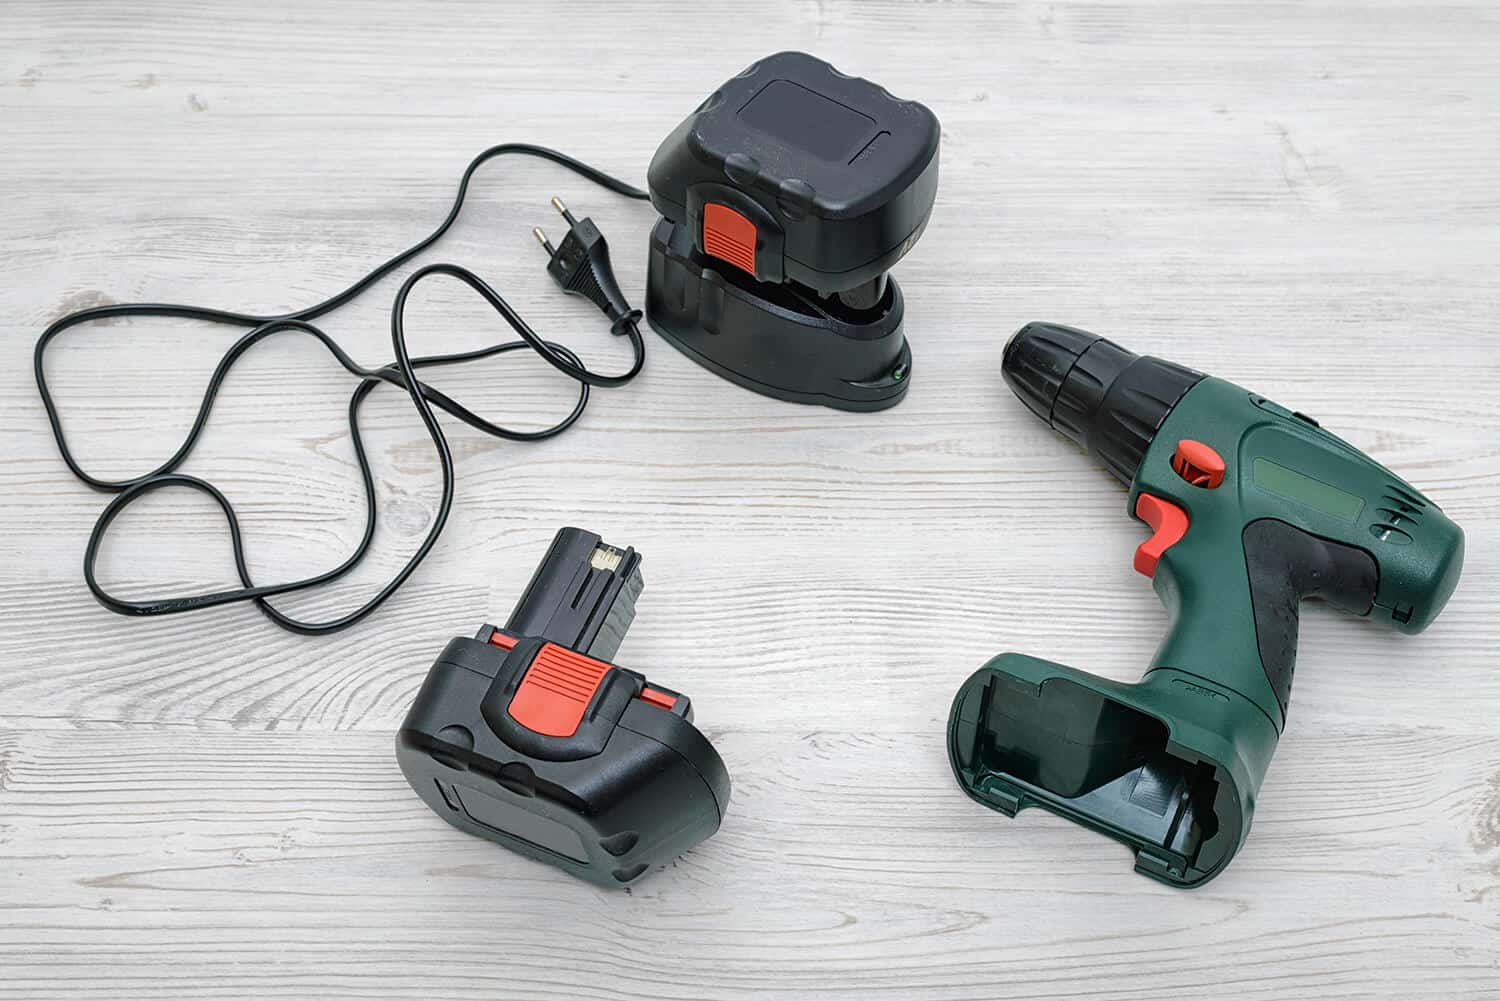
A cordless tool that stalls mid-cut or spins slower than it should isn’t always a sign the tool is failing. In many cases, the battery is the culprit—and testing it yourself can save you from an unnecessary replacement. Whether you’re a weekend DIYer or a tradesperson who relies on tools every day, knowing how to test a power tool battery with quick, accurate methods helps you work with confidence and stretch your budget further.
In this guide, you’ll learn practical, no-nonsense ways to check a battery’s health. You’ll see how to spot early warning signs, measure voltage, perform a load test, and make sense of the results—all with tools you likely already own or can pick up for a few dollars. By the end, you’ll know exactly when to recharge, when to recycle, and when it’s time to invest in a fresh pack. You can also read our guide on how to choose the right battery for your power tool.
Why Testing Your Battery Matters
A battery that dies unexpectedly turns a simple job into a frustrating stop-start ordeal. Testing gives you a clear answer right now, instead of guessing. It also prevents you from throwing away a perfectly good tool or buying a new battery when the real problem is a charger that’s malfunctioning.
Beyond the money, there’s safety. A damaged lithium-ion pack can overheat, swell, or even catch fire. Regularly checking your battery’s condition helps you catch trouble before it becomes dangerous. And because cordless packs lose capacity gradually, a quick test now and then lets you plan replacements around your projects, not in the middle of one.
Signs Your Battery Might Be Failing
Before you grab a multimeter, look for the symptoms that often appear first. These clues tell you a test is overdue.
- Reduced run time – The tool stops noticeably sooner than it used to on the same tasks. What once lasted an hour might now give you 15 minutes of work.
- Slow charging – The battery takes twice as long to reach a full charge, or the charger’s indicator never shows a solid green. This often points to internal resistance building up inside the cells.
- Overheating – The battery feels unusually hot to the touch during use or charging. Persistent heat is a red flag for cell damage and can permanently degrade performance.
- Physical swelling or cracks – A bulging case or visible cracks around the seams mean the pack is no longer safe to use. Stop charging immediately and handle it with care.
- Tool cuts out under load – The drill might spin freely in the air but stall the moment you press it into wood. That’s a classic sign of a battery that can’t sustain voltage when it’s needed.
- Inconsistent charge indicator – Pressing the on-board fuel gauge shows a full bar, but the tool dies minutes later. The electronics may be misreading the pack’s true state of charge.
A common mistake I see in the workshop is assuming a battery is dead just because it won’t run a tool. Sometimes the tool’s contacts are dirty, or the battery has simply entered a deep sleep state that a proper charger can wake up. Test before you toss.
Types of Power Tool Batteries and Their Voltage
Knowing what chemistry you’re dealing with helps you interpret test results correctly. Modern cordless tools use three main types of rechargeable batteries, though lithium-ion (Li-ion) has become the standard for most new gear.
| Battery Type | Typical Voltage Range | Notes |
|---|---|---|
| Nickel-Cadmium (NiCd) | 12V, 14.4V, 18V | Older technology; heavy, suffers from memory effect. Can sometimes be reconditioned. |
| Nickel-Metal Hydride (NiMH) | 12V, 14.4V, 18V | Higher capacity than NiCd but more sensitive to heat. Less common today. |
| Lithium-Ion (Li-ion) | 12V, 18V/20V, 40V, 60V, 80V | Lightweight, high energy density. No memory effect, but degrades with age and cycles. |
Nominal vs. maximum voltage – A “20V Max” Li-ion pack is actually a nominal 18V battery. Fully charged, it should read around 20 volts. A healthy 12V Li-ion pack will sit at about 12.6V when full. So when you test voltage, you’re comparing to the charged voltage, not the number printed on the label. I’ll share exact ranges in the multimeter method below.
Tools You’ll Need for Accurate Testing
You don’t need a laboratory to get reliable results. A few affordable items cover nearly every situation.
- Digital Multimeter – A basic auto-ranging multimeter that measures DC voltage is all you need. Look for one that can read up to 20V or 200V DC. Inexpensive models from hardware stores are perfectly adequate. (If you’re buying one, a backlit display and rubber overmold are nice-to-haves for garage use.)
- Battery Tester or Diagnostic Charger – Many tool brands offer chargers that show battery health with LED codes or digital readouts. Some standalone testers let you check capacity and internal resistance with a single button press. These are especially handy if you have multiple packs.
- Load Tester – A dedicated load tester applies a controlled resistive load and measures voltage sag. You can build a simple one, or use a tool itself as a makeshift load tester (covered later).
- Safety Gear – Safety glasses and gloves are a wise precaution. If you’re working with a swollen or damaged battery, do it outdoors and away from flammable materials.
If you’re troubleshooting a battery that won’t power up at all, start with the simplest checks before diving into advanced testing.
Quick Check: Does the Tool Run?
The fastest way to get a rough idea is to pop the battery into the tool and pull the trigger. If the tool spins freely, at least the battery isn’t completely dead. But this isn’t a real test—a battery can show a full no-load voltage and still collapse under work. Use this only as a first pass. If the tool doesn’t run at all, move straight to the multimeter method.
Method 1: Voltage Testing with a Multimeter
Measuring open-circuit voltage is the single most useful test you can do at home. It tells you the state of charge and often reveals dead cells immediately.
Step-by-Step
- Set the multimeter to DC voltage – Turn the dial to the “V⎓” setting. Choose the 20V range if your meter is manual, or let auto-ranging handle it.
- Identify the battery terminals – Look for the “+” and “–” markings on the battery’s connector. Some packs have multiple contacts; consult the tool’s manual or look for the two outermost terminals if you’re unsure.
- Connect the probes – Touch the red probe to the positive terminal and the black probe to the negative terminal. Keep the probes steady and avoid letting them touch each other.
- Read the display – Wait a few seconds for the reading to stabilize. Write down the voltage.
Interpreting the Numbers
Compare your reading to the expected fully charged voltage for the pack’s chemistry and nominal rating. The table below gives ballpark numbers for Li‑ion packs, the most common type today.
| Nominal Voltage Label | Full Charge (Healthy) | Moderate Charge | Low / Warning | Dead or Faulty |
|---|---|---|---|---|
| 12V | 12.6V – 12.8V | 11.5V – 12.0V | Below 10.5V | Below 8.0V |
| 18V / 20V Max | 20.0V – 20.5V | 18.0V – 19.5V | Below 16.0V | Below 12.0V |
| 40V | 40.0V – 41.0V | 36.0V – 39.0V | Below 32.0V | Below 24.0V |
| 60V | 60.0V – 61.5V | 54.0V – 59.0V | Below 48.0V | Below 36.0V |
If a freshly charged Li‑ion pack reads significantly below the “Full Charge” column, the battery has lost capacity or has a weak cell. A reading in the “Low / Warning” range means the pack is deeply discharged and may not recover. A reading near zero often indicates a broken connection, a blown internal fuse, or a completely dead string of cells.
In practice, a battery that charges to only 16V when it should be 20V is already on its last legs. I’ve reused such packs for light tasks, but they’ll disappoint you on any job that demands real torque.
A quick voltage check can reveal a battery’s state of charge before you start a project.
Image source: www.ejgpropertymanagement.com
Method 2: Load Testing to Reveal Hidden Weakness
A battery that shows a perfect 20V can still drop to 12V the moment you lean into a drill. That’s where load testing comes in. It simulates real work and exposes high internal resistance that a simple voltage test misses.
How to Perform a Load Test
- Attach the multimeter to the battery terminals as before. You may need to tape the probes in place or use clip leads so your hands are free.
- Secure the tool or load – If you’re using the tool itself, clamp a piece of thick scrap wood in a vise and sink a large drill bit or drive a long screw. The idea is to make the tool work hard for a few seconds.
- Run the tool under load while watching the multimeter display. Keep the load applied for 5–10 seconds. Note the lowest voltage you see.
- Stop immediately if the battery becomes too hot to touch or the voltage plunges drastically.
What the Numbers Mean
- For an 18V / 20V Max pack, a healthy battery might dip to 16–17V under a moderate load and recover quickly.
- A drop below 14V suggests the battery is weak and will struggle with demanding tasks.
- If the voltage crashes to 10V or lower within a few seconds, the pack is effectively unusable for any serious work.
This test is especially useful for older nickel-based packs that can show a full surface charge but have no stamina. A dedicated load tester that applies a fixed current gives more repeatable results, but the tool-as-load method is perfectly adequate for most DIYers.
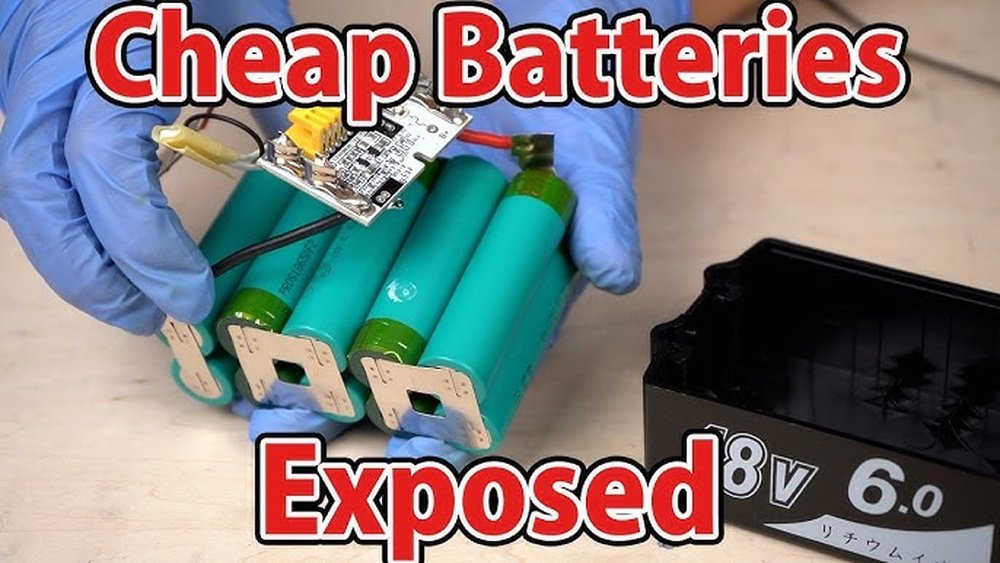
Opening a battery pack is risky and should only be attempted by someone with electronics experience and proper safety precautions.
Image source: www.reddit.com
Method 3: Using a Battery Analyzer or Smart Charger
Many tool manufacturers now embed diagnostics into their chargers. If you own a branded charger with a digital display or multi‑color LED codes, you already have a powerful testing tool.
- DeWalt, Milwaukee, Makita, Bosch and others offer chargers that blink error codes when a battery is faulty. Look up the code in your manual—it may indicate over‑temperature, a dead cell, or a communication fault.
- Smart chargers can sometimes read the battery’s internal resistance and capacity. A few third‑party analyzers plug directly into the battery and show health as a percentage, much like a smartphone battery gauge.
- If your charger refuses to charge a pack and flashes a warning, don’t immediately blame the battery. The charger itself could be the issue. Try a different charger before declaring the battery dead.
When you have access to a battery analyzer, run a full diagnostic cycle. Pay attention to the reported internal resistance—a high value (often above 100–200 milliohms for a compact pack) means the battery will heat up more and deliver less current. That’s a sign it’s nearing the end of its useful life.
Interpreting Test Results: When to Recharge, Recondition, or Replace
Once you’ve collected your voltage, load, and diagnostic data, it’s time to decide:
- Recharge – If the voltage is low but the battery accepts a charge and reaches the expected full voltage, it’s likely fine. Run a load test afterward to confirm it can deliver power.
- Recondition (NiCd only) – Older nickel-cadmium packs that suffer from memory effect can sometimes be restored by fully discharging and recharging them several times on a smart charger. This does not work for Li‑ion and can even damage them.
- Replace – A Li‑ion pack that won’t charge above 80% of its rated voltage, shows severe voltage sag under load, or has swollen cells is time to retire. Using it further risks the tool’s performance and your safety.
If your battery is clearly beyond saving, you’ll want to choose a replacement that fits your workflow. For a dependable everyday drill, a reliable home drill with a fresh battery often makes more financial sense than buying a standalone pack. And if you’re building a workshop from scratch, entry-level combo sets can be a cost-effective way to get multiple tools with compatible batteries.
Safety Precautions Every Time You Test
Working with batteries, especially lithium‑ion, demands respect. Here are the non-negotiable rules I follow in the shop:
- Inspect before touching – Look for cracks, leaks, or swelling. If you see any of these, don’t test; place the battery in a fireproof container and take it to a recycling center.
- Avoid short circuits – Remove watches, rings, and bracelets. Keep metal tools and loose change away from the terminals. Even a momentary short across a high‑current pack can cause burns or a fire.
- Test in a well‑ventilated area – Batteries can release flammable gases if they overheat. Do your testing on a non‑flammable surface, away from gasoline, solvents, or sawdust.
- Use insulated probes – Standard multimeter probes are fine. Just make sure the tips don’t accidentally bridge two terminals.
- Never puncture or disassemble a pack – The internal cells can vent violently if damaged. Leave pack rebuilding to professionals.
- Dispose of failed batteries properly – Most home improvement stores and municipal waste facilities accept rechargeable batteries for recycling.
As highlighted by UL’s battery safety testing guidelines, proper handling and testing prevent the vast majority of battery-related incidents. A few extra seconds of caution are always worth it.

Load testing simulates real-world tool use to reveal weak cells that voltage alone can’t detect.
Image source: www.youtube.com
Extending Battery Life After Testing
Once you’ve confirmed your battery is healthy, a few habits can keep it that way for years:
- Store Li‑ion at 40–60% charge – A fully charged pack sitting on a shelf in a hot garage degrades faster. If you won’t use the tool for a month, give it a partial charge before storing.
- Avoid extreme temperatures – Don’t leave batteries in direct sunlight, in a freezing shed, or in a hot truck cab. Temperature swings accelerate chemical aging.
- Don’t leave it on the charger indefinitely – Modern chargers are smart, but it’s still best to remove the battery once it’s topped up. Over‑long trickle charging can stress the cells.
- Keep contacts clean – Wipe the terminals with a dry cloth. Oxidized or dirty contacts create resistance that mimics a weak battery.
- Cycle the battery occasionally – Even if you’re not using the tool, run the battery down to about 20% and recharge it every few months to keep the cells balanced.
If you’re frequently running into battery problems, it might be that your current tools aren’t keeping up with your workload. A set of top-rated workshop drills with durable, high-capacity batteries can make these maintenance steps far less frequent.
Frequently Asked Questions
How often should I test my power tool battery?
Test every two to three months, or whenever you notice a drop in performance. Before a big project is a smart time to check all your packs so you aren’t caught off guard.
Can I test a battery without a multimeter?
Yes, you can use the tool’s own behavior as a rough gauge. If it runs at full speed for a few seconds and then stops, or if it struggles to spin under load, the battery is suspect. But a multimeter gives a precise measurement and removes the guesswork.
What voltage should a fully charged 18V Li‑ion battery read?
A healthy 18V (20V Max) lithium‑ion pack should read between 20.0V and 20.5V immediately after a full charge. A reading of 18V suggests it’s about half charged, and anything below 16V indicates trouble.
My battery reads 0V. Can it be revived?
Sometimes a deeply discharged pack will trigger a protective circuit that makes it read 0V. Some smart chargers can “wake” the battery with a recovery mode. If your charger has that feature, try it. If not, the pack is likely dead and should be recycled. Attempting to jump‑start a lithium‑ion battery without proper equipment is unsafe.
Is it dangerous to open a battery pack and test individual cells?
Yes—it’s dangerous and voids any warranty. Lithium‑ion cells can catch fire if punctured, and the protection circuitry is easily damaged. Leave cell‑level testing to professionals with the right tools and training.
What’s the difference between a battery tester and a load tester?
A battery tester usually measures voltage and sometimes internal resistance, giving a snapshot of health. A load tester applies a real electrical load and measures how the voltage holds up—much closer to actual use.
Conclusion
Testing a power tool battery doesn’t require a bench full of expensive gear. A simple multimeter, a few minutes of your time, and a clear understanding of what the numbers mean will tell you everything you need to know. Whether you use the quick voltage check, a load test, or a smart charger’s diagnostics, you’ll stop guessing and start making informed decisions.
Regular testing keeps your tools ready, your projects on schedule, and your wallet happier. If you’ve found that your current battery is finished, don’t just grab any replacement. Look for a drill or kit that matches how you work—a dependable drill for home use or a set of affordable DIY options can breathe new life into your workshop without blowing your budget. Keep your batteries tested, your tools spinning, and your projects moving forward.

Michael Harris is an experienced woodworker and power tool expert with over 12 years in woodworking. Specializing in functional, high-quality furniture, he offers expert advice on tool selection, maintenance, and sharpening for both beginners and professionals.