Have you ever been right in the middle of a project when your drill bit suddenly breaks? It’s frustrating, isn’t it?
You might think you have to throw it away and buy a new one. But what if you could fix that broken drill bit yourself and save time and money? You’ll learn simple, step-by-step ways to repair your drill bit quickly and safely.
Keep reading, and by the end, you’ll be ready to tackle your next job without missing a beat.

Credit: www.reddit.com
Identify The Break
Before fixing a broken drill bit, you need to identify the break clearly. Knowing the type of break helps you decide the best repair method. It also prevents further damage to your tool and workpiece.
Identifying the break involves careful inspection. Look closely at the drill bit for cracks, bends, or missing parts. Understanding the break type saves time and effort during repair.
Types Of Drill Bit Breaks
Drill bits can break in different ways. A common break is a snapped tip, where the cutting point is missing. Another type is a bent bit, which causes wobbling. Sometimes, the bit may have a crack along its shaft. Each break type requires a different fix.
Signs Of A Broken Bit
Notice if the drill bit stops cutting smoothly. Sparks or smoke during drilling can signal a broken bit. Loud noises or unusual vibrations also show damage. Visual damage like chips or cracks confirms the bit is broken.

Credit: www.youtube.com
Gather Repair Tools
Before fixing a broken drill bit, gather all the tools you need. Having everything ready saves time and makes the repair easier. Use the right tools to avoid damaging the bit or drill.
Essential Tools Needed
Start with a pair of pliers to grip the broken bit firmly. Use a small hammer to tap the bit out carefully. A drill chuck key helps loosen and tighten the drill chuck. Needle files smooth rough edges on the bit. A vise holds the drill bit steady during repair. Lubricant oil helps to ease stuck parts and prevent rust.
Safety Gear To Use
Wear safety glasses to protect your eyes from flying metal shards. Use gloves to protect your hands from sharp edges. Ear protection helps if you use power tools nearby. Work in a well-lit area to see all parts clearly. Avoid loose clothing or jewelry that might get caught in the drill.
Remove The Broken Piece
Removing the broken piece of a drill bit is a key step in fixing it. This part often gets stuck inside the drill or the material. Removing it carefully prevents more damage and saves time. Use the right tools and methods to take out the broken piece safely.
Using Pliers Or Extractors
Pliers work well if the broken piece is visible and easy to grab. Use needle-nose pliers for small bits. Grip the broken part firmly and pull it straight out. Avoid twisting to prevent breaking it further.
Extractors are tools designed to remove broken drill bits. They grip the inside of the broken piece tightly. Turn the extractor counterclockwise to pull the bit out. Extractors come in different sizes for various drill bits.
Alternative Removal Techniques
Drilling a small hole inside the broken bit can help. Insert a screw into this hole and pull it out with pliers. This works if the broken piece is deep inside.
Use a magnet if the bit is made of steel. Strong magnets can pull out small metal pieces easily.
Sometimes, tapping the drill gently can loosen the broken bit. Use a small hammer and tap around the bit carefully. This helps in loosening stuck parts.
Straighten Or Sharpen The Bit
Fixing a broken drill bit often means straightening or sharpening it. Both steps help bring the bit back to life. Straightening fixes bends that make the bit unsafe or unusable. Sharpening improves the cutting edge for better drilling. Follow simple methods to do these tasks at home. Safe tools and clear steps make the process easier.
Methods To Straighten Bent Bits
Start by checking the bit’s bend. Hold it between your fingers and roll it on a flat surface. Notice any curves or bends. Use a vise to hold the bit firmly. Apply gentle pressure with pliers to bend it back straight. Work slowly to avoid breaking the bit. Check the straightness often by rolling it again. For slight bends, light tapping with a small hammer can help. Always wear safety glasses during this process.
Sharpening Tips And Tools
Use a bench grinder or a sharpening stone to sharpen bits. Hold the bit at the correct angle to the grinder. The angle is usually 60 degrees for most bits. Move the bit gently against the grinding wheel. Avoid overheating by dipping the bit in water. Overheating can ruin the metal hardness. Sharpen both cutting edges evenly for balance. After grinding, smooth the edges with a fine file. This step removes any burrs and sharpens the bit fully.
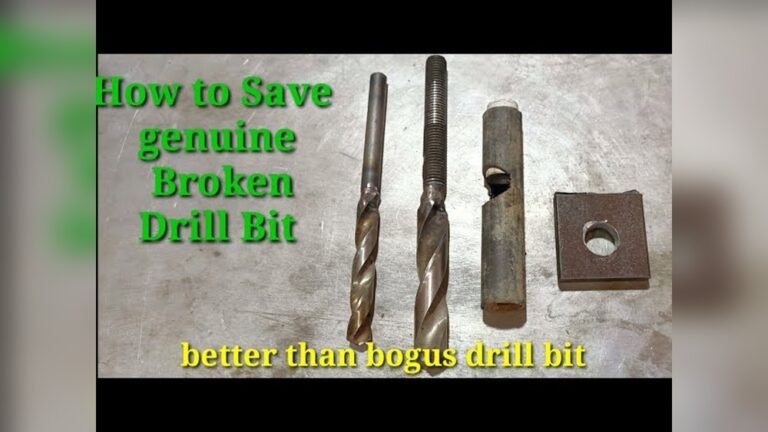
Reinforce Or Modify The Bit
Fixing a broken drill bit can save money and reduce waste. Reinforcing or modifying the bit helps extend its life. Small changes can improve its strength and usability. This section explains easy ways to make your drill bit work again.
Applying Epoxy For Strength
Epoxy glue can hold broken drill bits together. Clean the broken parts well before applying. Use a strong, two-part epoxy for the best bond. Apply the epoxy carefully on the broken edges. Press the parts firmly and hold them in place. Let the epoxy cure fully as the instructions say. This creates a solid joint to prevent further breakage.
Adjusting Bit Length
Shortening the drill bit can make it more stable. Use a metal file or grinder to cut the broken end. Keep the new tip straight and smooth. A shorter bit is less likely to bend or break again. Check the new length fits your drill and work needs. This simple change can improve control and safety during drilling.

Credit: mechanics.stackexchange.com
Test The Repaired Bit
Testing a repaired drill bit is important to ensure it works safely and correctly. This step helps avoid damage to your tools or workpiece. It also protects you from accidents caused by a faulty bit. Follow clear steps to test the bit carefully before using it on any project.
Safe Testing Procedures
Wear safety glasses and gloves before starting the test. Secure the drill bit in the chuck tightly. Choose a scrap piece of wood or metal for testing. Start the drill at a low speed to check stability. Watch for unusual vibrations or noises. Stop immediately if the bit wobbles or feels loose. Gradually increase speed if the bit runs smoothly. Avoid applying too much pressure during the test.
Signs Of A Successful Repair
A repaired bit spins evenly without wobbling. It cuts through material cleanly and easily. No sparks or strange smells should appear. The bit should not overheat quickly. You should feel steady control with minimal resistance. If all these signs show, the repair is good. The bit is now ready for normal use.
Prevent Future Breaks
Preventing future breaks of drill bits saves time and money. Simple habits can extend the life of your tools. Using the right methods and care keeps drill bits strong and effective. Follow these tips to avoid frequent breaks and enjoy smoother work.
Proper Drilling Techniques
Use the correct drill bit for the material. Avoid forcing the drill; let the bit do the work. Keep the drill steady and straight to reduce stress. Start drilling at a slow speed, then increase gradually. Clear debris from the hole often to prevent overheating. These steps reduce pressure and help the bit last longer.
Maintenance Tips
Clean drill bits after every use. Remove dust and metal shavings with a brush or cloth. Store bits in a dry place to stop rust. Sharpen dull bits to keep them cutting well. Check bits for cracks or damage before use. Regular care keeps bits strong and ready for the next job.
Frequently Asked Questions
How Can I Remove A Broken Drill Bit Safely?
Use pliers or a screw extractor to grip and twist out the broken bit. Apply penetrating oil to loosen stuck bits before removal.
What Tools Are Best For Fixing A Broken Drill Bit?
Common tools include pliers, screw extractors, and drill bit removers. These help safely extract or repair the broken piece.
Can A Broken Drill Bit Be Repaired?
Yes, minor breaks can be fixed by sharpening or welding. However, severely damaged bits should be replaced for safety and efficiency.
Why Do Drill Bits Break During Use?
Drill bits break due to excessive pressure, overheating, or using the wrong bit for the material. Proper technique prevents breakage.
Conclusion
Fixing a broken drill bit is easier than it seems. Follow the steps carefully and stay safe. Use the right tools and take your time. Practice helps you get better at repairs. Avoid rushing to prevent more damage. Keep your drill bits sharp and clean.
This saves money and makes work faster. Small fixes can extend your tool’s life. Try these tips next time a bit breaks. You’ll feel confident handling simple drill repairs.

Michael Harris is an experienced woodworker and power tool expert with over 12 years in woodworking. Specializing in functional, high-quality furniture, he offers expert advice on tool selection, maintenance, and sharpening for both beginners and professionals.