How to Cut Curves With a Jigsaw: Expert Tips for Perfect Cuts
Cutting curves with a jigsaw might seem tricky at first, but once you know the right steps, it becomes simple and even fun. If you want to give your projects a smooth, professional look, mastering this skill is a must.
In this guide, you’ll learn easy tips and tricks to handle your jigsaw like a pro, avoid common mistakes, and create perfect curves every time. Ready to take your woodworking or DIY skills up a notch? Keep reading, and you’ll see just how easy it can be.
Choosing The Right Jigsaw Blade
Choosing the right jigsaw blade is key to cutting smooth curves. The blade type, material, and size affect how well the blade cuts. Picking the right blade helps you avoid rough edges and broken blades. This guide explains what to consider for the best results.
Blade Types For Curves
Different blade shapes cut curves in various ways. Narrow blades bend easily, letting you make tight curves. Wider blades are better for long, gentle curves. Scroll blades, with small teeth, work well on thin materials. Choose a blade that matches the curve tightness you need.
Material Considerations
Blade material must match the wood or metal you cut. High-carbon steel blades cut soft wood smoothly. Bi-metal blades last longer and cut harder materials like metal. Tungsten carbide blades resist heat and wear, ideal for tough jobs. Match blade material to your project for clean cuts.
Blade Tpi And Thickness
TPI means teeth per inch. More teeth give finer, smoother cuts. Lower TPI cuts faster but rougher. Thin blades bend better for curves but may break easily. Thicker blades are stronger but harder to curve. Pick TPI and thickness based on your material and curve size.
:max_bytes(150000):strip_icc()/101653033-090ebbb4cf3b4fedb7e523d3778b7a62.jpg)
Credit: www.woodmagazine.com
Preparing The Workpiece
Preparing the workpiece is the first step before cutting curves with a jigsaw. Proper preparation ensures clean cuts and safety. It also helps to avoid mistakes and material waste. This section covers marking curved lines, securing the material, and safety precautions.
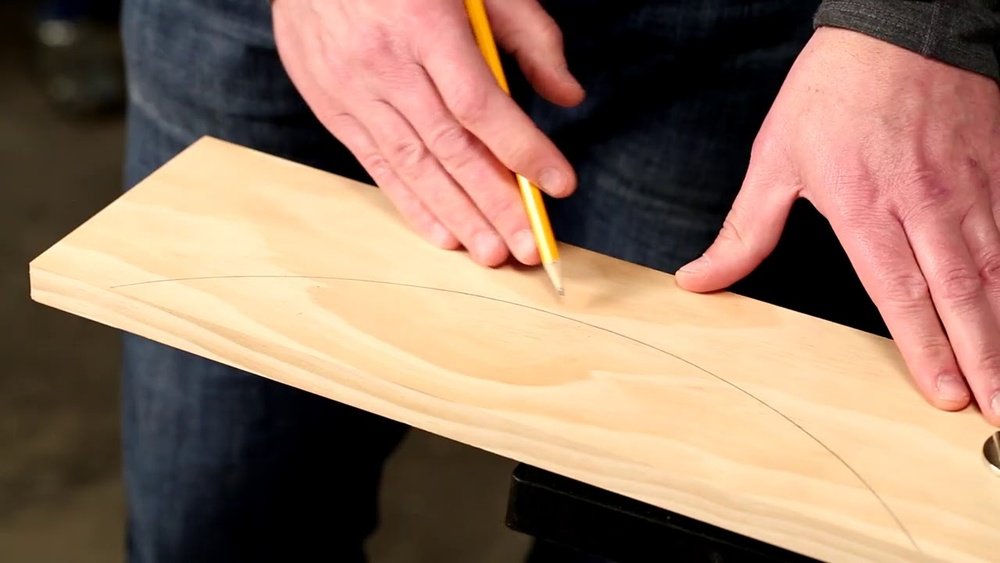
Marking Curved Lines
Use a pencil or marker to draw the curve clearly. Choose a tool that shows well on the material surface. Use a flexible ruler or a compass for smooth curves. Double-check the lines before cutting. Clear lines guide the jigsaw and improve accuracy.
Securing The Material
Clamp the workpiece firmly to a sturdy table. This prevents movement during cutting. Use clamps that do not damage the material. If clamps are not available, hold the piece firmly with your hand. Keep fingers away from the cutting path. Stable material ensures better control and cleaner cuts.
Safety Precautions
Wear safety glasses to protect your eyes from dust and debris. Use ear protection if the jigsaw is loud. Avoid loose clothing that can catch in the tool. Keep the work area clean and well-lit. Read the jigsaw manual for specific safety tips. Safety helps prevent accidents and injuries.
Setting Up The Jigsaw
Setting up your jigsaw correctly is key for smooth, precise cuts. Proper setup ensures safety and helps you follow curves easily. Take your time to prepare the tool before cutting. This section covers three main steps: adjusting speed, installing the blade, and using guide attachments.
Adjusting Speed Settings
Choose the right speed for your material. Slower speeds work well for metal and hard wood. Faster speeds suit soft wood and thin materials. Many jigsaws have variable speed controls. Start slow and increase speed as needed. This control helps avoid rough edges and burning.
Installing The Blade
Use the correct blade for curved cuts. Blades with fine teeth offer better control. Turn off and unplug the jigsaw first. Loosen the blade clamp or release lever. Insert the blade with teeth facing forward. Secure the blade tightly to avoid wobbling. Check the blade is straight before cutting.
Using Guide Attachments
Guide attachments improve accuracy for curves. A pivoting shoe allows smooth turns. Edge guides keep the jigsaw steady along straight lines. Attach these guides firmly to the base. Adjust guides to match your cutting path. Guides reduce mistakes and make cutting easier.

Credit: www.youtube.com
Techniques For Cutting Curves
Cutting curves with a jigsaw needs steady hands and good techniques. Curves can be tricky, but with the right approach, you can make smooth, clean cuts. Understanding key steps helps you guide the blade carefully around bends. Practice and patience improve your skill over time.
Starting The Cut
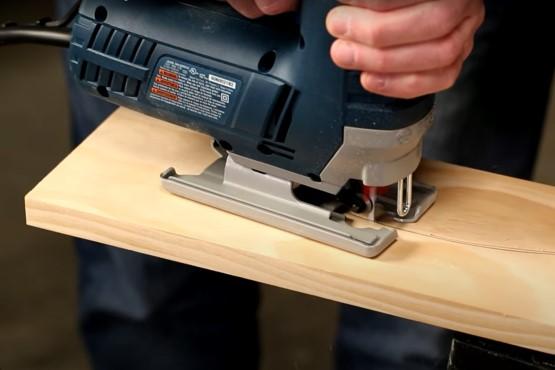
Place the jigsaw at the edge of the wood. Make sure the blade is aligned with your cutting line. Turn on the jigsaw and let the blade reach full speed. Slowly push the blade into the wood to begin the cut. Avoid forcing the saw; let the blade do the work.
Controlling The Jigsaw Movement
Hold the jigsaw firmly but do not grip it too tight. Use smooth, steady movements to follow the curve. Keep the base of the saw flat on the wood for stability. Move the saw forward at a moderate speed. Keep your eyes on the cutting line for accuracy.
Handling Tight Turns
Slow down as you approach sharp curves. Lift the front of the jigsaw slightly to help pivot the blade. Turn the saw gently to stay on the line. For very tight curves, make small relief cuts ahead of time. These cuts help the blade bend without binding.
Finishing The Cut
Finishing the cut is a crucial step when using a jigsaw for curved cuts. It ensures your work looks smooth, clean, and professional. This step also prepares the piece for any further use or decoration. Taking time to finish the cut well improves the overall quality of your project.
Sanding Edges
Start by sanding the edges of your cut. Use fine-grit sandpaper for a smooth finish. Sand gently along the curve to avoid changing its shape. This removes rough spots and splinters, making the edge safe to touch. Sanding helps the cut look neat and ready for painting or staining.
Removing Burn Marks
Burn marks can happen if the jigsaw blade moves too slowly. To remove them, lightly sand the affected areas. You can also use a soft cloth with a small amount of mineral spirits. This cleans the surface and lifts any discoloration. Removing burn marks improves the wood’s appearance and prevents further damage.
Checking For Accuracy
After sanding and cleaning, check your cut for accuracy. Compare the cut edge to your original outline. Use a ruler or template to measure curves and angles. Make small adjustments by sanding if needed. Ensuring accuracy helps your project fit perfectly in its place.
Common Mistakes To Avoid
Cutting curves with a jigsaw can be tricky. Avoiding common mistakes makes your work smoother and safer. Watch out for errors that slow you down or ruin your cuts. Focus on these key points to get better results every time.
Forcing The Blade
Do not push the blade too hard. Forcing the blade can bend or break it. Let the jigsaw do the work at its own pace. Moving slowly keeps the cut clean and prevents damage. Patience helps you follow curves more accurately.
Using Dull Blades
Dull blades make cutting difficult and rough. They cause burning marks and tear the wood. Change blades often to keep the cut smooth. Sharp blades give you better control and faster results. Always check blade condition before starting.
Ignoring Safety Gear
Never skip safety gear while using a jigsaw. Wear safety glasses to protect your eyes from dust and debris. Use ear protection to reduce noise damage. Gloves help keep your hands safe from sharp edges. Safety gear keeps accidents away and protects your health.
Advanced Tips For Precision
Cutting curves with a jigsaw can be tricky. Precise cuts need more than just steady hands. Advanced tips help improve accuracy and save time. These methods guide your jigsaw better. They make your curves smooth and exact. Follow these tips for sharper results.
Using Templates
Templates act as a guide for your cuts. Trace the curve on a sturdy material like plywood. Clamp the template firmly on your workpiece. Run the jigsaw blade along the edge of the template. This stops the blade from wandering off track. Templates help repeat the same shape easily. They reduce mistakes and speed up your work.
Multiple Passes Technique
Make several shallow cuts instead of one deep cut. This method reduces blade bending and wood splintering. Start with a light cut to outline the curve. Then, gradually cut deeper with each pass. This technique improves control and keeps the curve smooth. It also makes the jigsaw easier to handle.
Maintaining Blade Alignment
Keep the blade straight and aligned with the cut line. Check the blade angle often during cutting. A misaligned blade causes uneven edges and rough curves. Use a sharp blade designed for curves to improve precision. Hold the jigsaw steady and avoid forcing it. Proper blade alignment leads to clean, accurate cuts every time.
Credit: learn.kregtool.com
Frequently Asked Questions
What Blade Type Is Best For Cutting Curves With A Jigsaw?
Use a fine-toothed blade designed for curves, like a scroll or narrow blade. It allows precise, smooth cuts on wood or plastic. Avoid wide blades as they can cause rough edges and less control. Always match the blade to your material for best results.
How Do I Prevent Splintering When Cutting Curves?
Apply painter’s tape along the cut line to reduce splintering. Cut slowly and use a fine-toothed blade for cleaner edges. Also, ensure the wood is securely clamped to avoid movement, which can cause tear-out or rough cuts.
What Speed Setting Is Ideal For Jigsaw Curve Cuts?
Use a moderate speed setting to maintain control and accuracy. Too fast can cause mistakes or rough edges, too slow might burn the wood. Adjust speed according to material thickness and blade type for smooth, precise curves.
How To Guide The Jigsaw For Smooth Curved Cuts?
Follow the marked line closely while keeping the base flat and steady. Use both hands for better control and avoid forcing the saw. Let the blade do the work, gently guiding it along the curve for clean results.
Conclusion
Cutting curves with a jigsaw takes practice and patience. Choose the right blade for smooth cuts. Mark your lines clearly before you start. Move the jigsaw slowly to follow the curve. Keep your hands steady and focus on the path.
Clean up edges with sandpaper for a neat finish. With time, your curved cuts will look great. Enjoy creating shapes and designs with ease.

Michael Harris is an experienced woodworker and power tool expert with over 12 years in woodworking. Specializing in functional, high-quality furniture, he offers expert advice on tool selection, maintenance, and sharpening for both beginners and professionals.