Build a DIY Lawn Mower Lift for Easy Maintenance
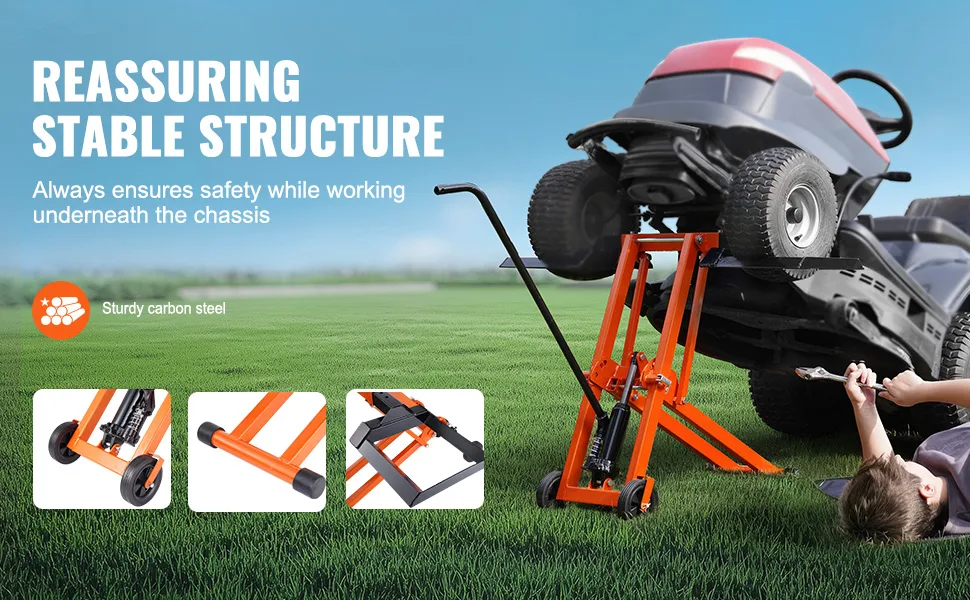
Building a diy lawn mower lift saves you hundreds of dollars and gives you workshop-grade access to your mower's underside. Most homeowners don't realize a solid steel frame can be fabricated in a weekend using materials from any local supply store. The payoff is weeks of comfortable deck maintenance instead of wrestling into awkward positions on concrete.
According to manufacturer specifications, a typical riding mower weighs between 300 and 800 pounds, with most models clustering around 500 pounds at operating weight. Per SAE J326 testing standards for mower safety, understanding where that center of gravity sits matters more than knowing the total weight. Let's walk through the math and the build without cutting corners.
Quick Answer
A diy lawn mower lift holds a riding mower safely off the ground using a welded steel frame, rated jack stands, and a hydraulic jack as the lifting mechanism. You'll need angle iron or square tubing, a steel plate platform, heavy-duty casters, and basic welding equipment. The lift must support at least twice your mower's weight.
That means a 500-pound mower needs a lift rated for 1000 pounds minimum. Build time runs 4 to 8 hours for a first-time maker.
Why a DIY Lift Can Save You Money — and Your Fingers
Commercial mower lifts run anywhere from $500 to over $2,000 depending on brand and capacity. A homemade version using angle iron, a floor jack, and casters typically costs between $100 and $300 in materials. That is not just a budget win.
It is a custom fit for your exact mower model.
We have seen forums and maker communities where people report building their first lift in a single weekend. The tools required line up with what most home mechanics already own or can borrow: a chop saw or angle grinder, a MIG welder, basic hand tools, and a measuring square. If you already own top-rated garage tools for maintenance tasks, you are closer than you think.
The real savings compound over time. A well-built lift lasts decades. It eliminates service calls for blade sharpening, deck cleaning, and height adjustments.
More importantly, it puts your mower at waist height instead of forcing you onto your back on cold concrete. That shift alone makes weekend maintenance feel manageable rather than miserable.
The Critical Safety Math Every DIY Lift Must Pass
Safety is not a suggestion when you are working under half a ton of machinery. The single biggest mistake beginners make is treating a hydraulic jack as a support device. Hydraulic cylinders can leak, fail, or slowly lower.
Jack stands are your only real safety net. Never crawl under a mower that is resting solely on a jack.
Weight capacity needs a 2× safety margin. If your mower weighs 500 pounds, your lift frame, casters, and jack stands must each handle at least 1,000 pounds. That margin accounts for dynamic loads.
The wobble when you push the mower onto the platform, the shift as you move tools around underneath, these all add stress that rated components must absorb without bending.
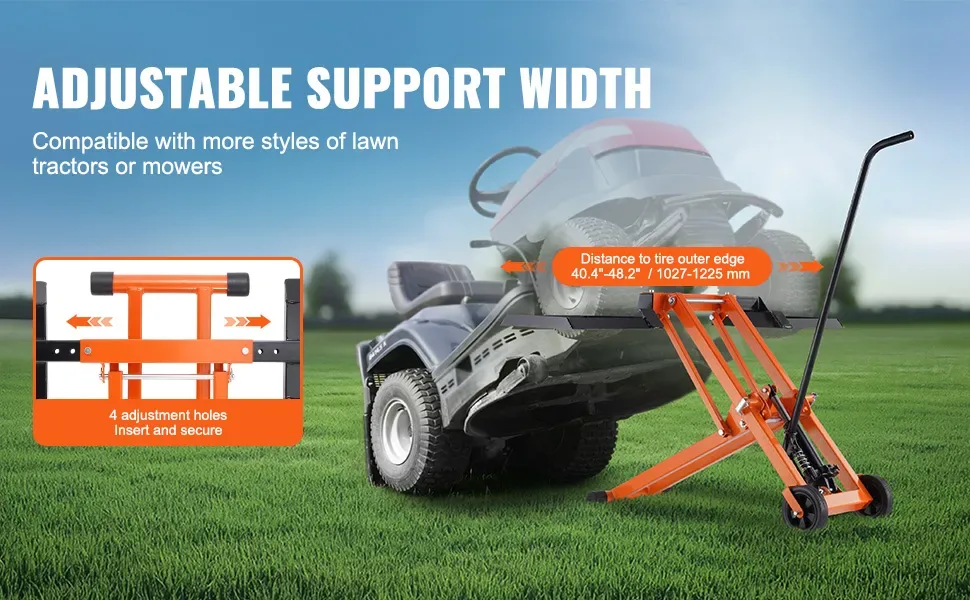
Center of gravity placement determines whether your lift tips sideways or stays planted. Most riding mowers balance slightly forward of the rear axle because the engine sits up front. Your lift support points need to sit directly beneath that balance point.
Measure from the front wheel to the mower's heaviest section, then position your jack stands accordingly. An uneven base or narrow footprint turns a simple maintenance task into a tipping hazard.
Ground surface matters more than most builders realize. Concrete is ideal. Compacted gravel works if it is level.
Dirt, soft soil, or a sloped driveway introduces unpredictable movement. The American Society of Mechanical Engineers maintains guidelines on load stability that apply directly to homemade lifting frames. Check out our guide on selecting the right metal-cutting blade before you start fabricating if you need to prep your cutting tools.
Designing Your Lift: Frame, Platform, and Lock-in Points
The frame starts with 1-inch by 1-inch by 1/8-inch angle iron or 1-inch square tubing. Both work. Angle iron is cheaper and easier to weld for beginners.
Square tubing looks cleaner and resists denting better over time. Pick based on your comfort level and available welding stock.
Base footprint needs to exceed your mower's wheel track by at least 6 inches on every side. A 42-inch deck mower typically has a wheel spread around 40 inches. Your base should be 46 to 48 inches wide minimum.
Depth should run 48 to 60 inches to accommodate the mower's length plus handling clearance.
Steel plate forms the platform. Go 3/16-inch minimum. Thinner plate flexes under load and creates dangerous bounce when you shift weight on the mower.
Bolt or weld cross-members underneath the plate for rigidity. Think of it like flooring joists. Bare plate alone sags.
Caster selection makes or breaks mobility. You want 3-inch to 5-inch polyurethane or solid rubber wheels rated at 100 to 150 pounds each. Four casters give you a 400 to 600-pound total rating, which covers most home builds.
Locking casters on at least two wheels keep the lift from rolling while you work.
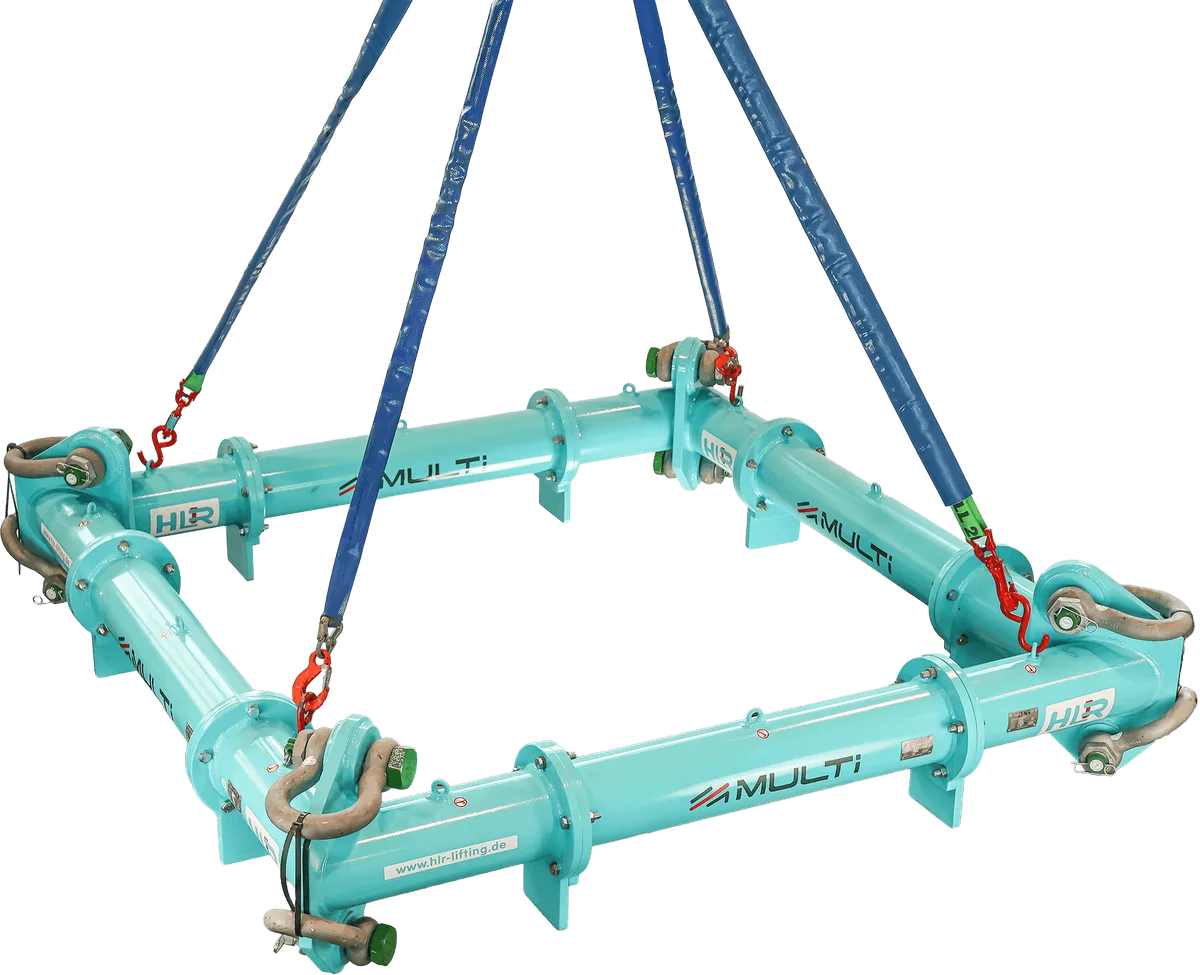
The jack receiver is your lifting interface. A standard 2-inch tow ball mount welded perpendicular to the frame works reliably. It accepts a floor jack hitch adapter directly.
Some builders prefer a square tube receiver that bolts on instead, which lets you swap configurations. Either approach is fine as long as the mount sits centered under the mower's expected lift points.
Step-by-Step Process: Fabrication and Assembly
Start by cutting your frame pieces to the planned dimensions. Use a chop saw with a metal-cutting blade for clean cuts. Angle grinders work too but require more skill to keep edges square.
Lay everything out on a flat surface and tack weld the corners. Check for square with a carpenter's square before committing to full welds.
Once the base frame is square and tacked, run full welds on every joint. Focus extra attention on the corners and the caster mounting areas. These carry the highest stress.
Incomplete penetration at corner joints is the most common failure point in DIY builds. Take your time on those passes.
Attach the steel plate platform next. You can bolt it with 3/8-inch carriage bolts and lock nuts for future disassembly, or weld it directly for maximum rigidity. Bolting is cleaner if you plan to modify the lift later.
Welding is faster and eliminates loose hardware that can rattle or fall off.
Mount the casters with the correct hardware. Most heavy-duty casters use a 3/8-inch or 1/2-inch bolt. Use a lock washer plus a nyloc nut to prevent vibration loosening.
Hand-tighten everything first, then torque to manufacturer specs once the lift is on its feet and bears weight.
Slide the floor jack into the receiver and perform a dry load test before inviting the mower. Stack concrete blocks or sandbags totaling at least 600 pounds on the platform. Watch for frame deflection, caster wobble, or uneven settling.
If anything flexes or shifts, reinforce before proceeding.
Read more about maintaining your mower's air intake system to keep your engine running cleanly while you work on the deck.
Real Build: One Owner's 8-Hour Project and Lessons Learned
A homeowner in Ohio built a lift for his 2018 Cub Cadet RZT 42, which tips the scales at roughly 540 pounds dry. He sourced 1-inch angle iron from a local metal supplier and picked up a set of four 4-inch casters rated at 125 pounds each. The total material cost came to $187 including welding rod and fasteners.
The first attempt had a critical flaw. He mounted the casters too close to the frame edge, creating a narrow base that made the lift feel tippy when he rolled it across an uneven garage floor. He also used a single jack stand positioned off-center, which put uneven stress on one corner of the frame during the load test.
After rebuilding with a wider base and relocating the support points directly under the mower's factory lift locations, the second version held steady for three days straight with the mower at 18 inches off the ground. Blade removal and deck cleaning became noticeably easier at working height.
His key takeaway was straightforward: measure your mower's actual weight and center of gravity before cutting metal. Do not guess. Also invest in a good square and take the time to check it at every welding stage.
The extra 30 minutes upfront prevented a wobbly, unsafe lift that would have needed tearing apart anyway.
DIY vs. Commercial vs. "Good Enough" Alternatives
Choosing between building, buying, or improvising comes down to your skill set, budget, and how often you will use the lift. Let us break down what each option actually delivers.
| Option | Upfront Cost | Build Time | Safety Margin | Best For |
|---|---|---|---|---|
| DIY steel frame lift | $100–300 | 4–8 hours | High if built correctly | Homeowners who want a permanent, custom-fit solution |
| Commercial mower lift | $500–2,000 | None | Certified ratings, foldable designs | Users who need portability or lack welding access |
| Floor jack + jack stands alone | $80–150 | 10 minutes | Moderate, no mobility | Occasional maintenance in a fixed garage space |
| Mower ramp lift | $200–400 | None | Limited deck access | Quick blade swaps, not full underside work |
| Engine hoist setup | $150–300 | Varies | Good reach, poor stability | Heavy equipment, overkill for most mowers |
| Cinder block stack | Free | 5 minutes | Dangerous and unstable | Emergency use only, never recommended |
A DIY lift shines when you plan to maintain your mower regularly. The custom fit means it will accommodate your specific model's lift points perfectly. You also gain the satisfaction of building something that lasts decades.
The trade-off is time and tool access. If you do not own a welder or feel comfortable using one, the learning curve can stretch beyond a weekend.
Commercial lifts offer polish and portability. Brands like Haul-All and Little Guy make models that fold for storage and roll through doorways. They come with certified weight ratings and usually include adjustable arms for different deck widths.
The downside is price and potential fit issues with unusual mower geometries.
Floor jack and jack stand combinations cost almost nothing extra if you already own the tools. But they lack mobility and require you to reposition stands for every task. That friction often discourages maintenance, which is exactly when you need it most.
Ramp lifts work for blade changes but will not let you crawl underneath for deck cleaning or adjustment. Engine hoists are powerful but designed for vertical lifting, not stable horizontal support. They are unstable sideways and overbuilt for mower work.
Cinder blocks belong in trash, not under machinery. They crack, shift, and offer zero redundancy. Aggregate reviews from mechanic forums consistently warn against this approach.
If you already have welding experience and a chop saw, a DIY build makes financial sense. If you need something portable and do not mind paying for convenience, a commercial unit fits better. Choose based on how you will actually use it, not on what sounds cheapest upfront.
Check out our guide on choosing the right grinder disc for rust removal if welding sounds intimidating but you still want to fabricate.
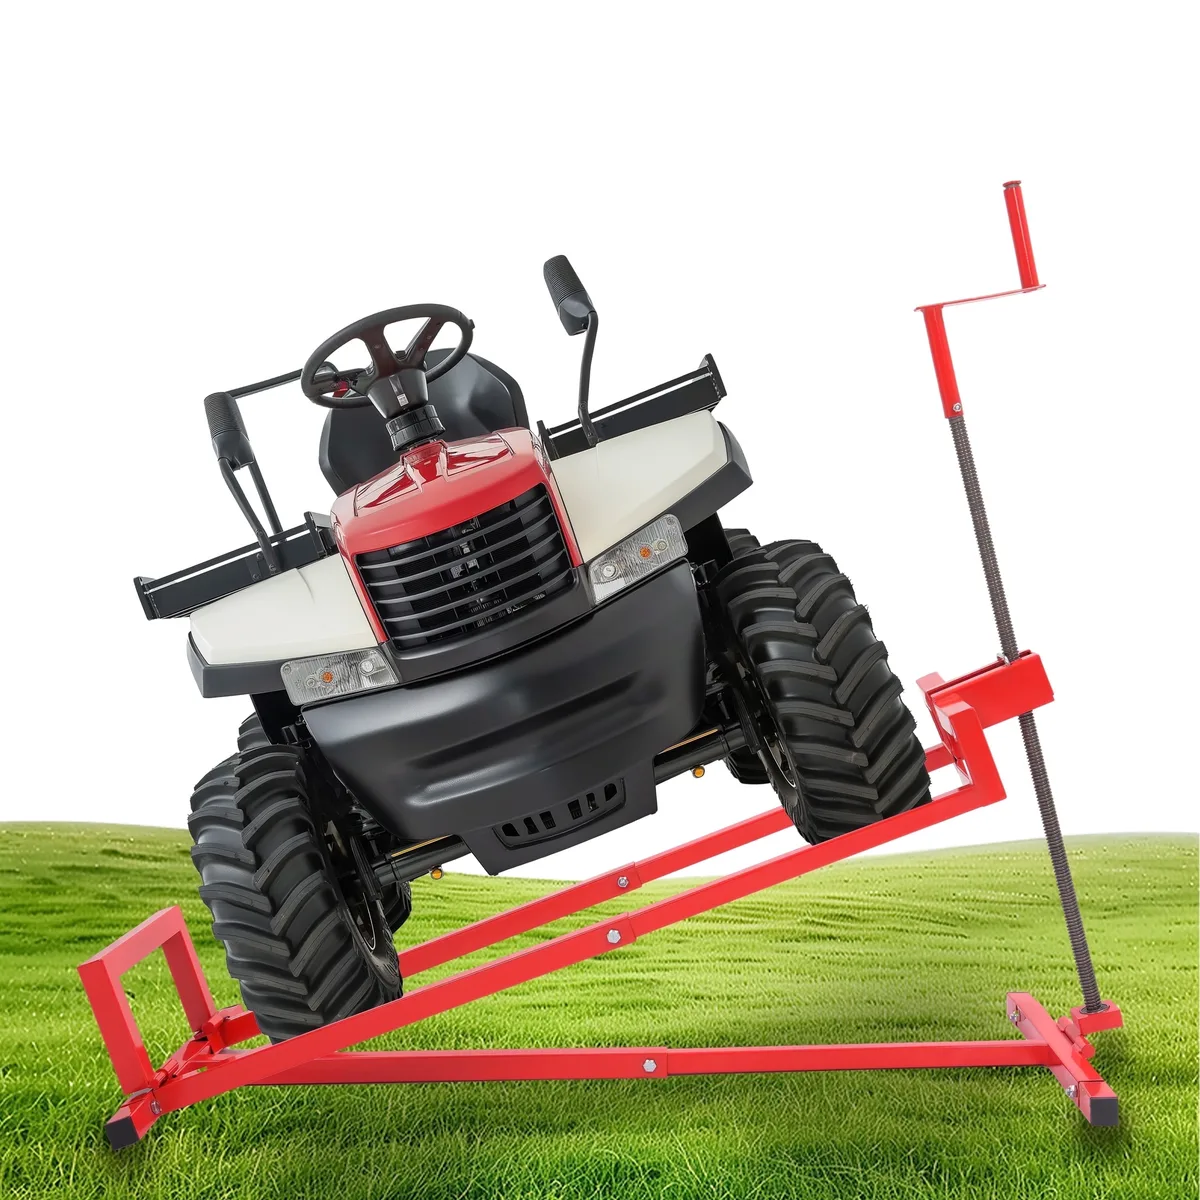
Safety Checklist: What to Verify Before You Crawl Under That Mower
Before you lower yourself under any lifted machine, run through this checklist. Missing a single item can turn a routine blade swap into an emergency room visit.
Start with surface verification. Your lift must sit on level, solid ground. Concrete is ideal.
Compact gravel works if it has not settled unevenly. Dirt, asphalt with cracks, or any slope introduces hidden movement. Test stability by rocking the lift with your hands before placing the mower.
Next, confirm jack stand placement. Stand directly beneath the mower's factory lift points, not random frame sections. Most manufacturers mark these locations in the owner's manual.
If yours is missing, locate the strongest cross-members near the axle mounts. Never place stands on plastic components, exhaust pipes, or thin sheet metal.
Verify weight ratings on every component. Your floor jack should handle 1.5× the mower's weight. Jack stands need 2× capacity minimum for redundancy.
Caster ratings matter too. Four 125-pound casters give you 500 pounds of rolling support, which covers most home mowers but leaves no margin for heavier equipment.
Check pin retention on all clevis pins. Vibration will shake loose pins out during use. Always use R-pins or hairpins on every joint.
A missing pin turns a stable lift into a tipping hazard the moment you shift your weight.
Test the parking brake and block the wheels before driving the mower onto the platform. Even on a flat surface, momentum can roll the machine off-center. Wheel chocks prevent unwanted movement during positioning.
Schedule annual inspections. Look for cracks at weld joints, especially near caster mounts and the jack receiver. Lubricate caster bearings if they have gone more than two seasons without service.
Replace any component showing wear before the next use.
The Occupational Safety and Health Administration maintains guidelines on material handling that apply to workshop equipment. While their focus is workplace safety, the principles around load security and redundancy hold for home builds too.
FAQs
Can I use a car floor jack instead of a hydraulic mower lift?
Yes, but only as a temporary raise tool, never as a support device. A car jack lifts, then you transfer the weight to rated jack stands immediately. Never work under a mower resting solely on a hydraulic jack.
Cylinder failure or slow leaking can drop hundreds of pounds without warning. Always use redundant mechanical supports.
How do I know my welds are strong enough?
Visual inspection catches most failures. Look for complete penetration at corner joints, no cracks along the weld bead, and smooth transitions without excessive buildup. If you lack welding experience, consider having a professional inspect critical joints before loading weight.
Structural failures rarely announce themselves before catastrophic collapse.
Will a homemade lift fit through a standard garage door?
Most DIY lifts measure 48 to 60 inches deep and 46 to 48 inches wide. Standard garage doors open to 7 feet wide and 7 feet tall, so width and height rarely pose issues. The real constraint is maneuvering the lift through the doorway while loaded.
Test the clearance with your mower already positioned on the platform before committing to a permanent build location.
What is the safest way to position jack stands under my mower?
Locate the manufacturer-specified lift points in your operator's manual. These sites reinforce the frame and distribute load across structural members. If the manual is unavailable, place stands directly beneath the rear axle housings or reinforced frame rails near the axle mounts.
Avoid thin sheet metal, plastic covers, exhaust components, and hollow frame sections that can buckle under concentrated weight.
Do I need to bolt or weld the platform to the frame?
Both approaches work, but they serve different needs. Welding creates a rigid, permanent connection that eliminates loose hardware and rattling. Bolting allows future modifications and simplifies disassembly for storage or transport.
Use 3/8-inch carriage bolts with lock nuts if you choose the bolted route. Torque to manufacturer specs and inspect annually for loosening.
How often should I inspect my DIY lift?
Perform a visual inspection before each use. Check for loose pins, caster wobble, weld cracks, and frame deformation. Conduct a thorough annual inspection that includes testing load capacity with sandbags or concrete blocks before placing the mower.
Replace any component showing stress marks, excessive wear, or deformation immediately.

Michael Harris is an experienced woodworker and power tool expert with over 12 years in woodworking. Specializing in functional, high-quality furniture, he offers expert advice on tool selection, maintenance, and sharpening for both beginners and professionals.