How to Set Up Your Push Mower Blade: Quick Guide
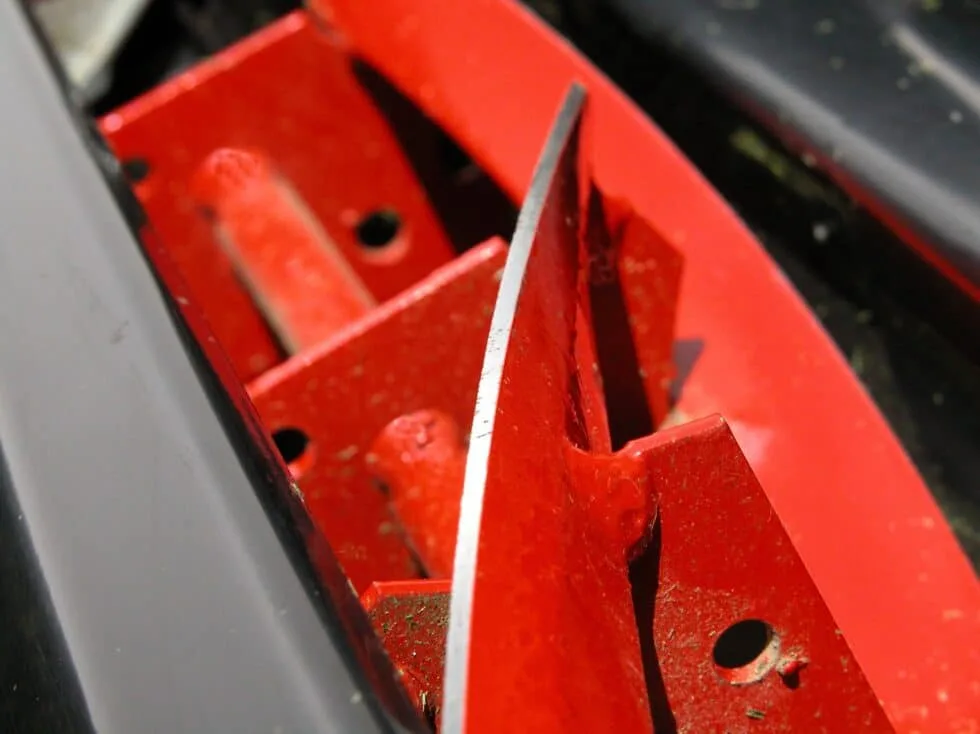
Getting your push mower blade setup right makes the difference between a clean, even cut and a frustrating job with torn grass. A sloppy installation also invites real danger, loose blades spin out of control and can throw debris across your yard. Most homeowners skip the small details that actually matter, and that's where trouble starts.
Proper setup isn't just about dropping a new blade on and going. You need to understand blade orientation, deck leveling, and the torque spec that keeps everything locked in place. Manufacturer guidelines typically recommend a front deck pitch of 1/4 to 1/2 inch lower than the rear, along with a spindle nut torque between 35 and 70 ft-lbs depending on your model.
Let's walk through exactly what you need to know.
Why This Matters (And Why Getting It Wrong Is Risky)
A correctly set up mower blade does more than make your lawn look tidy. It directly affects the health of your grass, the performance of your engine, and your personal safety around the equipment. When a blade is loose, unbalanced, or pointing the wrong direction, every pass through the yard becomes a risk.
The two biggest dangers come down to injury and lawn damage. A blade that isn't torqued properly can come loose mid-operation and fly off. We've seen reports of homeowners dealing with cracked decks and damaged spindles because someone skipped the torque check.
Grass tearing from a dull or misaligned blade invites disease and brown patches across an otherwise healthy lawn.
Beyond the immediate risks, poor blade setup creates long-term headaches. An unlevel deck scalps your turf in some spots and leaves tall patches in others. You end up making double passes, burning extra fuel, and wearing out your equipment faster than you should.
That sort of waste adds up over a single season.
Keeping your engine running smoothly with routine upkeep like checking fluid levels can extend the life of your mower, but only if the cutting end is doing its job correctly. A well-setup blade reduces strain on the engine because it cuts cleanly instead of chopping and dragging through grass.
The good news is that proper setup takes about 30 minutes and requires basic tools most people already own. You won't need a degree in mechanics or a trip to the dealer. You just need to follow a clear sequence and pay attention to the details that most people gloss over.
Understanding Your Mower Blade and How It Works
Before you touch a single bolt, it helps to know what you're actually working with. Mower blades aren't one-size-fits-all, and mixing up the wrong type can cause more problems than it solves. The blade shape, lift design, and mounting hardware all matter when you're trying to achieve a clean cut.
Blade types and what they do
| Blade Type | Best Use Case | Key Feature |
|---|---|---|
| Standard high-lift | Bagging and side discharge | Aggressive curvature creates strong airflow |
| Low-lift | Mulching in wet conditions | Reduced suction prevents bogging down |
| Mid-lift | General purpose mowing | Balanced airflow for mixed conditions |
| Mulching-specific | Mulch-only decks | Extra curved wing holds clippings longer |
A standard rotary blade spins at high speed and uses centrifugal force to lift grass before cutting it. The arrow stamped on most blades shows the correct rotation direction. Mounting it backward reverses airflow, which means poor cut quality and potential damage to your deck.
Deck pitch is another critical factor. The deck should sit slightly lower in the front than in the rear, typically by about 1/4 to 1/2 inch. This rake creates a slicing motion rather than a hammering one.
When the deck sits flat or tilts the wrong way, the blade chops instead of shears, leaving a ragged grass tip.
Understanding these basics means you won't second-guess yourself during installation. You'll know why the arrow points the way it does and why that small gap at the front of the deck matters more than it seems.
Step-by-Step: Setting Up Your Push Mower Blade Correctly
This is where the rubber meets the road. Follow this sequence in order, and you'll avoid most of the mistakes that trip up first-time installers. Each step builds on the last, so don't rush through the safety checks or skip the measurement phase.
Safety First — Don't Skip This
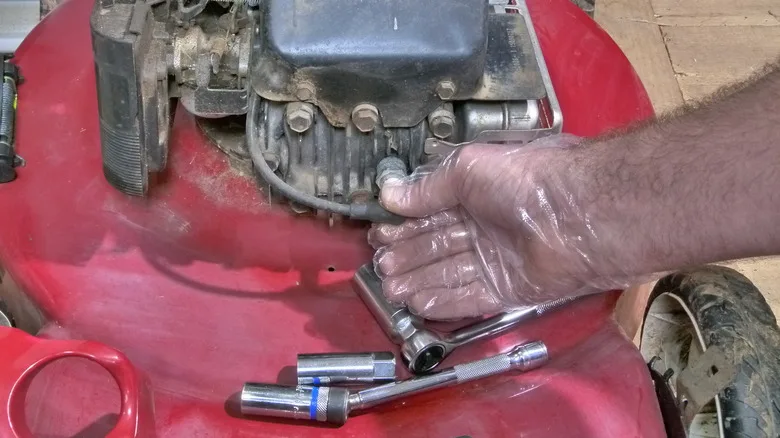
Your safety starts before you touch the blade. Disconnect the spark plug wire and tuck it away from the plug so the engine can't accidentally fire while you're working. If you skip this step, you're rolling the dice with a spinning blade.
Tilt your mower carefully. For most gas-powered push mowers, tilt it with the air filter and carburetor side facing up. Tilting the wrong way can cause oil to flood the cylinder and damage the engine.
If your mower has a Briggs & Stratton engine or similar, consult the manufacturer's guidance on proper tilt angles.
Put on work gloves and safety glasses. Blade edges are sharp enough to slice skin on contact, and metal fragments can fly loose when you're removing a bolt. A few seconds of prep protects you from unnecessary pain.
Removing the Old Blade
Block the blade from rotating with a wooden 2×4 pressed against the deck opening. This keeps the blade steady while you loosen the retention nut. Most blades use a standard 5/8-inch or M14×1.5 thread, but always check your owner's manual for the exact size.
Use a socket wrench or breaker bar to turn the nut counterclockwise. If the bolt is corroded, apply penetrating oil and let it sit for a few minutes before attempting removal. Forged steel blades can seize onto the spindle after a full season of use.
Note the blade orientation before you lift it off. Take a quick photo with your phone if you're unsure. The curved cutting edge should face the deck, and the arrow should point in the direction of rotation when viewed from below.
Installing the New or Sharpened Blade
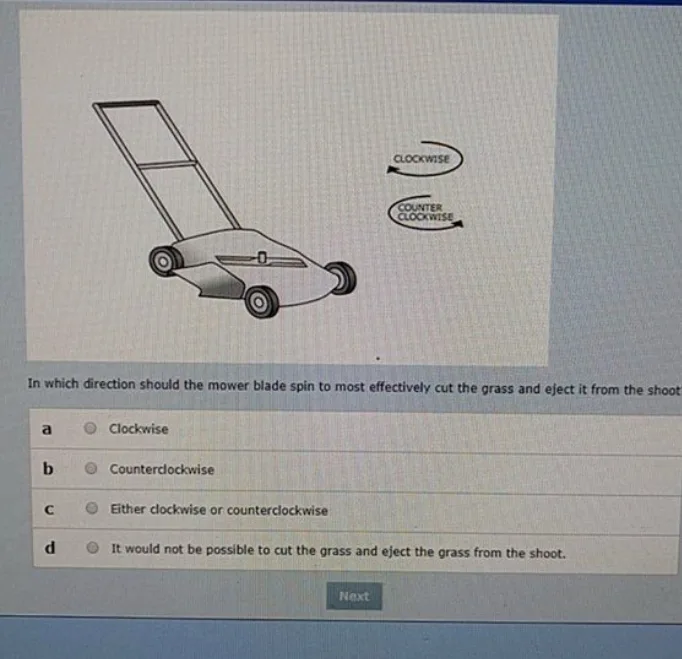
Compare the new blade against the old one to verify length, mounting hole position, and overall profile. A blade that looks similar but measures half an inch shorter will throw off your cutting pattern and create uneven height across the deck.
Slide the blade onto the spindle with the arrow pointing in the rotation direction. Most blades have a flat side that mates against the spindle nose and a curved cutting edge that faces downward toward the grass. If the blade doesn't sit flush, double-check the orientation before tightening.
Insert the adapter washer if your model requires one. Some decks use a tapered adapter that centers the blade on the spindle. Others rely solely on the blade's mounting hole.
Missing this small part can cause vibration and premature wear on the spindle seal.
Hand-tighten the retention nut, then use a torque wrench to reach the manufacturer's specified value. Most push mower spindles call for 35 to 70 ft-lbs, but your owner's manual will give you the exact number for your model. Hand-tight alone is not sufficient.
Leveling and Setting the Deck
Deck leveling determines whether your cut is even or whether you'll end up with scalped strips and missed patches. Set your mower on a flat, hard surface like a garage floor or driveway before measuring.
Measure from the ground to the highest point of the blade housing at three locations: front-left, center-front, and front-right. Adjust the lift links or rods on each side until the front measurement sits 1/4 to 1/2 inch lower than the rear measurement. This creates the proper deck pitch for a clean slicing cut.
Set your cutting height using the wheel adjustment levers or central dial. Most push mowers offer a range from about 1 inch to 4 inches. For healthy turf, aim for the higher end of that range during hot summer months and the lower end during cool spring and fall growth.
Final Checks Before You Start Mowing
Reconnect the spark plug wire only after everything is secured and the deck is level. Double-check that the blade spins freely by hand and doesn't rub against the deck housing. A blade that contacts the deck will create sparks, damage the blade edge, and potentially crack the housing.
Start the engine and let it idle for 30 seconds. Listen for abnormal vibration or rattling noises. If the mower shakes noticeably, shut it off immediately and re-inspect the blade installation.
A loose or unbalanced blade is dangerous and will tear grass instead of cutting it.
Run a quick test pass on a small section of lawn. Inspect the cut afterward. Even clipping length and clean shearing at the blade tip indicate a successful setup.
If you see torn grass tips or uneven patches, recheck your deck pitch and blade orientation before committing to a full mow.
Common Mistakes That Can Lead to Injury or Damage
Most blade setup failures come from skipping steps or ignoring details that seem minor in the moment. These mistakes show up repeatedly in repair shop reports and homeowner forum discussions. Avoiding them saves you time, money, and potentially a trip to the emergency room.
Installing the blade upside-down or backward is the most common error. The arrow on the blade exists for a reason, and ignoring it reverses airflow through the deck. This causes poor discharge, clumping, and an uneven cut that looks like you missed sections entirely.
Skipping the spark plug disconnect is a serious safety lapse. Blades can spin freely when you're loosening or tightening the retention nut if the engine is connected. A sudden grab can pull your hand into the blade or send the wrench flying.
Always disconnect first.
Using incorrect torque on the retention nut creates two different problems. Too loose and the blade wobbles or falls off during operation. Too tight and you risk stripping the spindle threads or cracking the blade mounting area.
A torque wrench costs about $20 and prevents both outcomes.
Ignoring deck pitch is a silent quality killer. A flat or reversed pitch makes the blade chop rather than slice. You'll notice the difference immediately in the grass appearance, but the engine also works harder, burning more fuel and wearing components faster over time.
Running the mower with a vibrating blade is dangerous and damaging. Vibration indicates an unbalanced or improperly seated blade. Stop immediately, recheck your installation, and balance the blade on a cone-style balancer or a simple nail through the center hole before starting again.
Tilting the wrong side of the mower damages the engine. Fuel and oil can flow into the carburetor or air filter area, causing starting problems or internal damage. Always tilt with the air filter side up, or consult your owner's manual for model-specific guidance.
When to Walk Away and Get Professional Help
Knowing when to stop DIY and call in a professional is just as important as knowing how to do the work yourself. Some problems require specialized tools, technical knowledge, or warranty considerations that make amateur intervention risky.
Seek professional help if you encounter stripped spindle threads. Repairing stripped threads often requires replacing the entire spindle assembly or welding and re-tapping the mounting point. These procedures need proper tools and experience that most homeowners don't have.
Cracked or severely bent blades and decks demand professional attention. A hairline crack in a blade can propagate during operation and cause catastrophic failure. Deck cracks that extend near the spindle mounting area compromise structural integrity and should be assessed by a qualified technician.
If your engine runs roughly after blade installation, the issue may lie beyond the blade itself. Valve adjustments, carburetor tuning, and ignition system checks require specialized knowledge and tools. A lawn mower forum can provide community guidance, but physical inspection by a certified technician is the safest path.
Mowers under warranty deserve special consideration. Improper blade installation that leads to deck or spindle damage may void your warranty coverage. Review your warranty terms before attempting complex modifications, and consider having a certified service center handle installations on newer equipment.
[/toolsfilter.com/john-deere-lawn-mower-model/] and similar manufacturer-specific resources can help you understand what your warranty covers and whether professional installation is recommended for your particular model. When in doubt, a quarter-hour phone call to an authorized service center can save you from a costly mistake.
What to Remember Before Your Next Mow
A few habits after setup will keep your mower running safely and cutting cleanly all season long. These checks take less than two minutes but prevent most common failures.
Always reconnect the spark plug wire only after confirming the blade spins freely and the deck is secured. A quick visual inspection of the mounting area catches loose hardware before it becomes a hazard.
Build a DIY Lawn Mower Lift for Easy Maintenance makes post-season inspections faster and safer. Keeping the deck elevated while you work reduces strain on your back and gives you better access to the spindle area.
Check blade sharpness every 20 to 25 hours of operation. A dull blade tears grass tips, which turns brown and invites disease. Sharp blades slice cleanly and reduce engine load.
[/toolsfilter.com/mower-blade-oil/] can help reduce friction and prevent rust on the spindle and mounting hardware. Apply a light coat after cleaning, but keep any oil away from the grass-catching surfaces inside the deck.
Store your mower in a dry, covered area whenever possible. Moisture accelerates corrosion on the blade and deck, which weakens both over time. A simple cover extends the life of every component.
Track your mowing hours with a simple log or a phone app. Knowing when the last sharpening or inspection occurred helps you stay ahead of wear before it affects cut quality.
Frequently Asked Questions
How do I know which way the blade should face?
The blade faces with the curved cutting edge pointing toward the ground and the stamped arrow showing clockwise rotation when viewed from below. Always cross-reference the arrow direction with your mower's manual to confirm.
What happens if I install the blade backwards?
Installing the blade backward reverses airflow through the deck, causing poor discharge, clumping, and an uneven cut. The engine also works harder because grass isn't being lifted and sliced correctly.
Do I need to level the deck perfectly flat?
No. The deck should sit with the front 1/4 to 1/2 inch lower than the rear. This pitch creates a slicing motion rather than a chopping motion, which produces a cleaner cut and reduces engine strain.
How often should I check blade tightness?
Check the retention nut torque at least once per season, or after every 25 hours of operation. Vibration and temperature changes can loosen the nut over time, so re-torque if you notice any play.
Can I reuse my old blade if it just needs sharpening?
Yes, if the blade is not cracked, bent, or excessively worn. Sharpening restores a clean edge, but always rebalance the blade afterward to prevent vibration and premature spindle wear.
What torque should I use for the blade nut?
Most push mower spindles require 35 to 70 ft-lbs, but the exact value depends on your model. Consult your owner's manual or the manufacturer's website for the specification that matches your mower.

Ms.Sultana
Affiliate Marketer | SEO Specialist | Blogger at Elite Global Marketing Agency
Ms.Sultana brings over 16 years of expertise working with global Clients by providing different skills and Services. For the last 5 years working as an Affiliate marketer, specializing in high-ticket campaigns that drive exponential growth. She holds a degree in Computer Science and Engineering as well as achieved many more skills certificates from different institute/academies/Platform. As part of the Elite Global Marketing team, Sultana has helped clients generate millions in revenue through strategic partnerships, innovative funnels, and data-driven insights. She’s passionate about empowering businesses to scale by connecting them with the right affiliate opportunities.
Explore our resources or connect with us on LinkedIn to stay ahead in affiliate marketing.