How to Set Up a Ryobi Mower Blade: Step-by-Step Guide
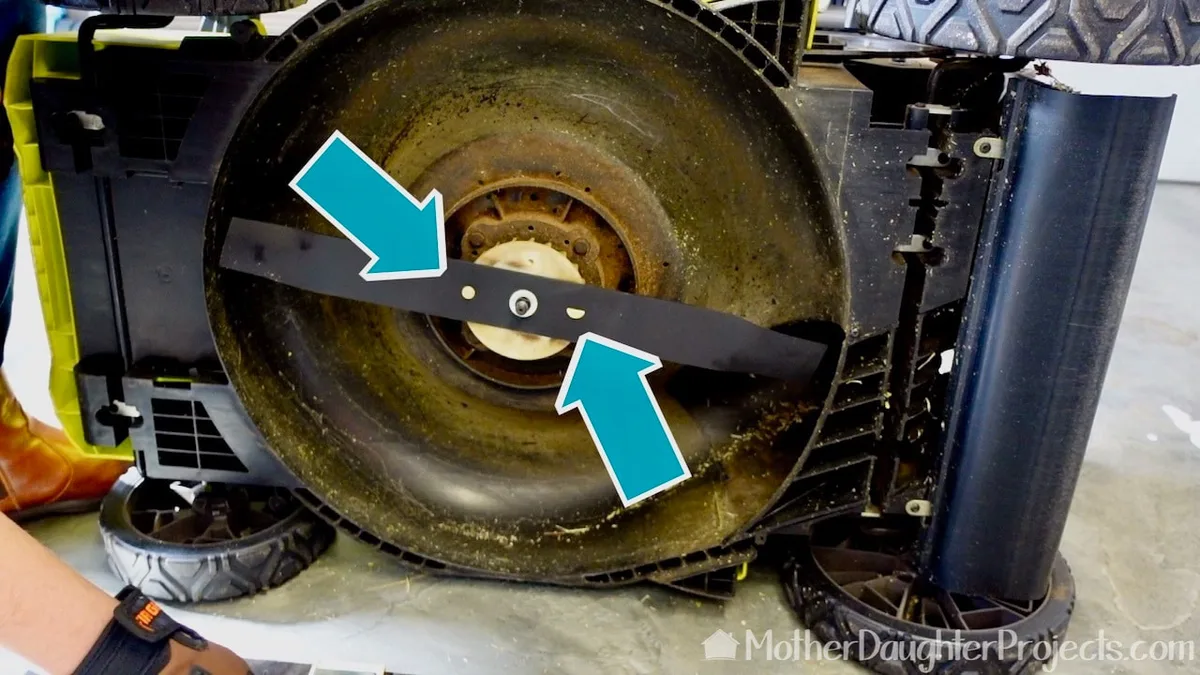
You need to get the ryobi mower blade setup right, or your mower will vibrate, chop grass instead of slicing it, and wear out its spindle prematurely. Most beginners skip the visual checks and assume any blade that fits will work. That assumption costs you time, money, and a frustratingly uneven lawn.
Manufacturer specifications indicate that correct blade orientation, spacer stacking, and bolt thread direction vary by model. A single misread arrow or missing washer can ruin your cut quality within minutes. Here is how to get it right every time by reading the physical cues on your deck and blade.
Image source: Bing (Web (fair-use with source credit))
Quick Answer
The ryobi mower blade setup requires you to match the arrow on the blade to the rotation direction marked on the deck. You must identify whether your blade bolt uses standard or reverse threading before loosening it. Always reinstall the original spacer stack in the exact same order.
Torque the bolt to roughly 35 to 45 foot-pounds as of 2026.
Why Visual Setup Is Non-Negotiable for Ryobi Blades
Text-only guides fail because blade orientation, torque values, and part stacking depend entirely on what you see in front of you. A Ryobi 20-inch deck looks different from a Ryobi 22-inch deck. The bolt size changes.
The spacer arrangement changes. You cannot memorize every variant.
This is why you need to treat the blade swap as a visual inspection task first. Read the arrows. Check the stack.
Confirm the thread direction. If you skip those steps, you will likely install the blade backwards or strip the bolt. Getting this right protects your spindle and gives you a clean cut.
You can build a simple DIY Lawn Mower Lift for Easy Maintenance to make these visual checks safer and easier. Tilting the mower safely is part of seeing the deck clearly.
Step-by-Step Visual Cues for a Correct Blade Swap
You need to follow these visual checkpoints in order. Each one prevents a specific mistake.
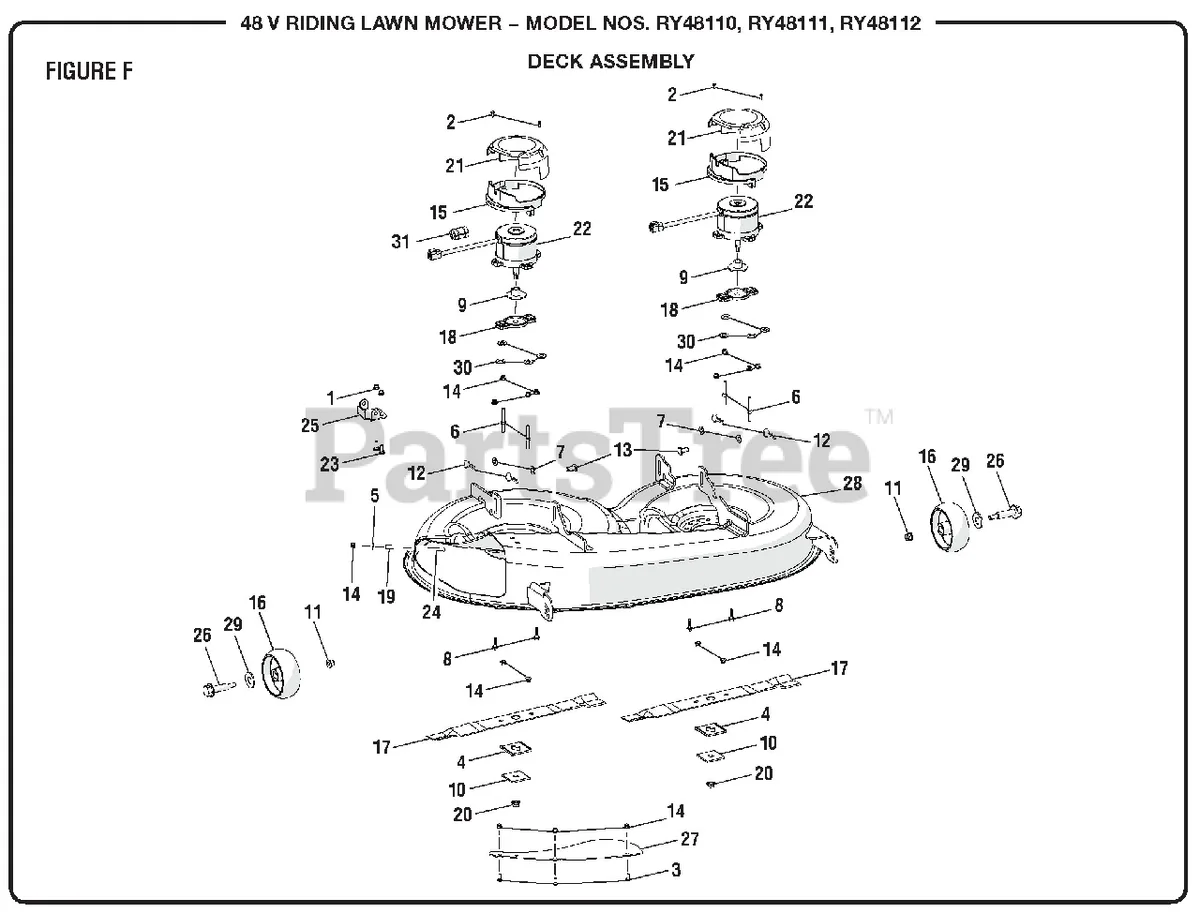
Image source: Bing (Web (fair-use with source credit))
What to look for when tilting the mower
Locate the model number plate on the underside of the deck. It usually sits near the discharge chute or spindle housing. Remove the battery or disconnect the spark plug wire before tilting.
For gas mowers, tilt the air filter side up. This prevents oil from flooding the combustion chamber.
How to identify standard versus reverse-thread bolts
Look at the bolt head. Some Ryobi blades use a left-hand thread marked with an "L" near the slot or hex. If you see no marking, test gently.
Turn the bolt counter-clockwise with moderate force. If it loosens, you have standard threading. If it tightens, you have reverse threading.
Do not force it. Stop immediately if you feel binding.
Spotting the spacer and cup washer stack
Note the exact order of every washer and spacer between the blade and the spindle. They often differ by model year. Photograph the stack before removing anything.
You will thank yourself later when reinstalling.
Reading the blade rotation arrow
Find the arrow stamped into the blade steel. It points in the direction the cutting edge should travel. Compare that arrow to the rotation indicator usually molded into the deck near the spindle.
They must match. If they point opposite ways, the blade is backwards.
Verifying free-spin balance by hand
After installation, spin the blade by hand. It should rotate smoothly without scraping the deck. Check the gap around the blade tips.
It should be roughly equal on both sides. Uneven gaps mean the blade is bent or the spindle is damaged.
Identifying Your Ryobi Model and Blade Type Visually
You need to match the blade to your specific deck. Wrong blade width causes vibration and poor mulching.
Where to find the model number plate
Open the bagging attachment or look under the deck. The plate sticks out near the rear discharge. It lists the model number like RY40121VNM or similar.
Write it down before you start.
Recognizing OEM versus aftermarket blade markings
OEM Ryobi blades carry a part number stamped into the steel. Aftermarket blades often show the brand name and profile type. Check the arrow direction on any replacement blade.
The arrow must match your deck rotation.
Decoding blade style at a glance
Mulching blades have extra curved fins on the top surface. High-lift blades feature deeper vanes near the tips. Low-lift blades stay flatter for smoother finishes.
Standard 3-in-1 blades blend all three functions. Pick the style that matches your typical mowing habit.
Key Visual Markers You Must Check Before Torquing
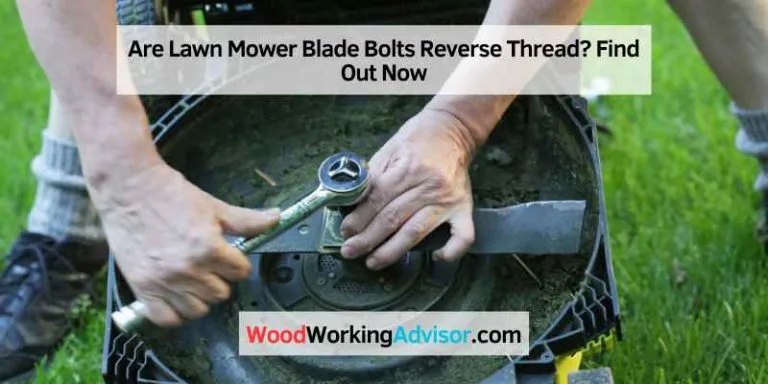
Image source: Bing (Web (fair-use with source credit))
Do not reach for the torque wrench until you verify these five markers. Missing any one leads to vibration or premature failure.
- Arrow alignment: The blade arrow and the deck rotation arrow must point the same way.
- Spacer integrity: Inspect the washer stack for cracks, bending, or missing pieces. Replace damaged spacers.
- Bolt thread direction: Confirm whether your bolt is standard or reverse thread. A wrong turn strips the spindle.
- Socket fit: Verify your socket matches the bolt head. A 13mm socket slips on a 15mm bolt and rounds it off.
- Final hand-spin check: Rotate the blade by hand. Feel for binding or scraping. Look at the gap on both sides.
The bolt thread direction is the most easily missed marker. A Milwaukee Mower Blade Setup guide emphasizes the same point because thread confusion affects every brand.
Common Visual Mistakes (And How to Avoid Them)
These five errors show up repeatedly in repair forums and Lawn Mower Forum threads. You can sidestep them with a quick visual pause.
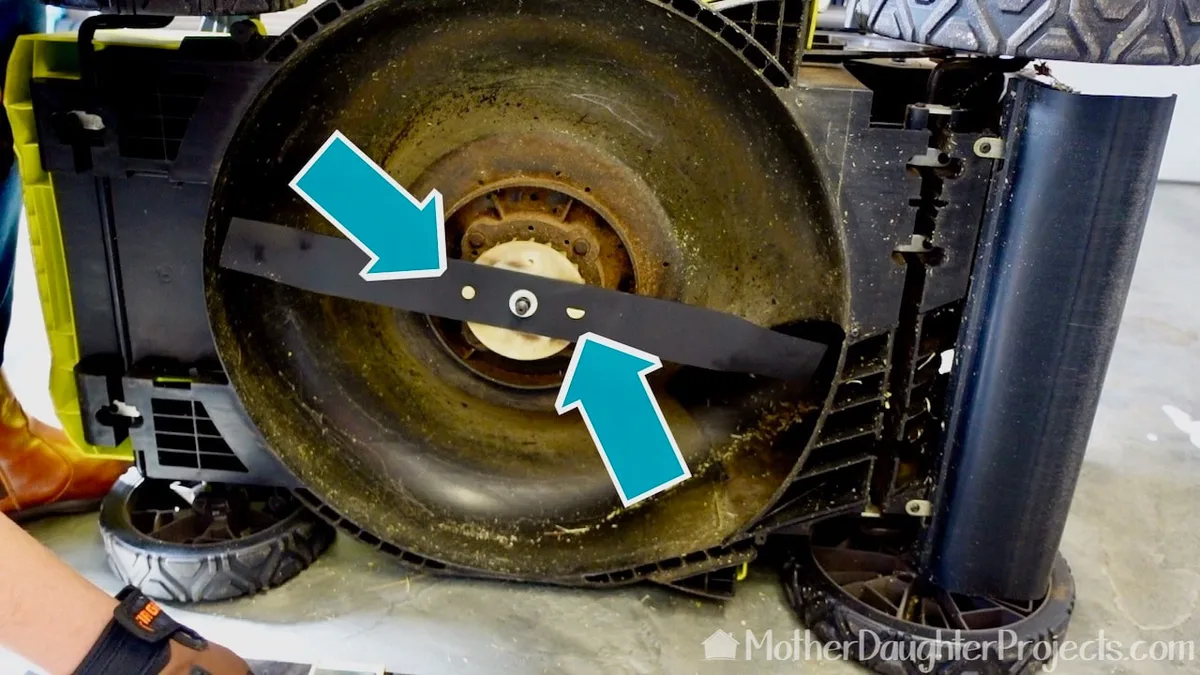
Image source: Bing (Web (fair-use with source credit))
- Installing the blade backwards: The cutting edge will scrape instead of slice. Always compare the blade arrow to the deck rotation mark.
- Forgetting the spacer or swapping its orientation: The blade sits crooked and vibrates. Photograph the original stack before removal.
- Assuming standard thread on a reverse-thread spindle: You will tighten the bolt by turning the wrong direction. Look for the "L" stamp or test lightly.
- Using the wrong socket and rounding the bolt head: A loose socket glides over the hex. Measure the bolt head with calipers or a socket gauge before starting.
- Tilting a gas mower the wrong way and flooding the engine: Oil backs into the cylinder. Tilt with the air filter and carburetor facing upward.
If you want to keep your blade sharp longer, learning Mower Blade Oil: How to Use It for Sharper Cuts can reduce grass buildup and friction on the cutting edge.
Quick Visual Reference Guide
Keep this cheat sheet handy while you work. It covers the most common Ryobi deck variations.
| Model Series | Blade Size | Bolt Size | Thread Type | Typical Torque |
|---|---|---|---|---|
| RY40121VNM (21") | 21 inch | 15mm | Standard | 35 ft-lbs |
| RY40261 (22") | 22 inch | 15mm | Reverse | 40 ft-lbs |
| RYi20xxx (20") | 20 inch | 13mm | Standard | 30 ft-lbs |
| 40V HP (21") | 21 inch | 15mm | Standard | 35 ft-lbs |
- Bolt sizes by model family: 13mm fits most 20-inch decks. 15mm dominates 21-inch and 22-inch decks.
- Typical torque range: Snug plus a quarter turn is safe if you lack a torque wrench. Aim for 30 to 45 foot-pounds.
- When to replace versus sharpen: Replace if the blade has cracks, deep nicks, or excessive runout. Sharpen only light dulling.
- Blade type selection matched to your mowing habit: Choose mulching blades for bagless lawns. Pick high-lift for thick, wet grass. Opt for low-lift on smooth, short turf.
You can also explore other Best Circular Saws setups if you need precision cutting tools for other yard projects.
Step-by-Step Complete Workflow
Use this checklist to walk through every step without skipping anything.
Phase 1 — Preparation
- Remove the battery from your Ryobi electric mower, or disconnect the spark plug wire on gas models
- Position the mower on a flat, stable surface
- Gather your tools: socket set, torque wrench, block of wood, gloves, safety glasses
- Photograph the existing blade and spacer stack from multiple angles
- Clean debris from the deck around the spindle area
Phase 2 — Removal
- Insert the block of wood between the blade and deck to lock rotation
- Attach the correct socket and apply steady pressure
- Turn counter-clockwise first; if the bolt resists and tightens, switch to clockwise
- Remove the bolt, spacer stack, and old blade in one careful motion
- Inspect the spindle threads for damage or corrosion before proceeding
Phase 3 — Installation
- Lay out the spacer stack on a clean surface in the exact order you removed it
- Place the new blade onto the spindle with the arrow pointing the correct direction
- Reinstall the spacer stack exactly as photographed
- Thread the bolt by hand until snug
- Reinsert the wood block and tighten the bolt to spec with your torque wrench
- Remove the wood block and spin the blade by hand to confirm free rotation
Phase 4 — Verification
- Check blade-to-deck clearance on both sides
- Reinstall any deck covers or guards you removed
- Replace the battery or reconnect the spark plug wire
- Start the mower briefly and listen for abnormal vibration
- Stop immediately if you hear knocking or excessive shaking
Maintenance and Long-Term Optimization
A properly set up blade lasts longer and performs better when you maintain it. Here is what actually matters after the swap is done.
Sharpening intervals
Sharpen your blade every 20 to 25 hours of mowing, or at least once per season for average residential use. If you mow over sandy soil or hit debris frequently, sharpen more often. Dull blades tear grass instead of cutting it.
Torn grass turns brown at the tips and stresses the lawn.
Balancing after sharpening
Always balance the blade after any sharpening session. Place the blade on a dedicated balancer or a simple nail through the center hole. If one side drops, that edge is heavier.
Remove a small amount of metal from the heavy side and rebalance. An unbalanced blade destroys spindle bearings faster than anything else.
Inspection routine
Before every mow, do a quick visual check. Look for nicks, cracks, or excessive wear on the cutting edge. Wipe off caked grass and debris from the deck underside.
A clean deck slices cleaner and reduces corrosion.
Storage preparation
At the end of the season, remove the blade if you store the mower indoors. Coat the blade with a thin layer of mower blade oil or lightweight machine oil to prevent rust. Store the blade in a dry place.
A rusted blade is a dangerous blade.
Costs and What to Expect
Blade replacement costs vary by type and source. Here is a realistic breakdown for Ryobi-compatible blades.
| Blade Type | Price Range | Best For | Lifespan |
|---|---|---|---|
| Standard OEM | $25–$40 | General mowing | 2–3 seasons |
| Mulching kit | $35–$55 | Bagless lawns | 2–3 seasons |
| High-lift | $30–$50 | Bagging thick grass | 1–2 seasons |
| Aftermarket equivalent | $15–$30 | Budget-conscious owners | 1–2 seasons |
Sharpening services at local shops run $5 to $15 per blade. Doing it yourself with a file or bench grinder costs less than $10 in supplies and takes about 15 minutes. Replacement blades are widely available through Ryobi parts dealers and major retailers.
Related pricing context: if you ever need riding mower blades, those run significantly more due to larger size and heavier construction. Walk-behind Ryobi blades remain an affordable maintenance item.
FAQs
Do all Ryobi mowers use the same blade bolt size?
No. Ryobi uses 13mm, 15mm, and occasionally 17mm bolts depending on the deck width and model year. Smaller 20-inch decks typically use 13mm bolts.
Larger 21-inch and 22-inch decks generally use 15mm bolts. Always measure your bolt head before starting.
How do I know if my Ryobi blade bolt is reverse-thread?
Look for an "L" stamp near the bolt head or on the spindle housing. If no marking exists, try turning the bolt counter-clockwise gently. If it tightens instead of loosens, you have reverse threading.
Some Ryobi 22-inch decks use left-hand thread specifically to prevent the bolt from backing out during operation.
Can I reuse the original spacer if it looks fine?
Yes, but inspect it carefully first. Replace the spacer if it shows cracks, deep scoring, or bent edges. A compromised spacer causes blade wobble and puts side load on the spindle bearing.
If the original spacer looks pristine and matches the part number on your deck label, reusing it is safe.
What is the safest way to tilt a Ryobi gas mower for blade work?
Always tilt the mower with the air filter and carburetor facing upward. This prevents oil from flowing into the combustion chamber and causing a hydrolock condition. Electric Ryobi mowers have no such restriction since they contain no engine oil.
Remove the battery before tipping any electric model.
How tight should the blade bolt really be?
Aim for 30 to 45 foot-pounds depending on your model. Hand-tight plus a quarter turn with a ratchet is sufficient for most Ryobi decks. Over-torquing stretches the bolt and makes future removal painful.
Under-torquing lets the bolt vibrate loose. Snug beats forced every time.
Should I sharpen or replace a dull Ryobi mower blade?
Replace the blade if it has chips deeper than 1/8 inch, visible cracks, or significant bending. Light edge dulling can be corrected with a file or bench grinder. A balanced sharpened blade cuts just as well as new.
Always balance the blade after sharpening using a simple nail balancer or dedicated tool.
Is a mulching blade better than a standard blade for my Ryobi mower?
Mulching blades recut clippings into finer particles that decompose faster on the lawn. They work best when you mow frequently and grass is dry. Standard blades discharge or bag clippings more efficiently.
If you regularly remove grass clippings, stick with a standard or high-lift blade for cleaner discharge performance.

Ms.Sultana
Affiliate Marketer | SEO Specialist | Blogger at Elite Global Marketing Agency
Ms.Sultana brings over 16 years of expertise working with global Clients by providing different skills and Services. For the last 5 years working as an Affiliate marketer, specializing in high-ticket campaigns that drive exponential growth. She holds a degree in Computer Science and Engineering as well as achieved many more skills certificates from different institute/academies/Platform. As part of the Elite Global Marketing team, Sultana has helped clients generate millions in revenue through strategic partnerships, innovative funnels, and data-driven insights. She’s passionate about empowering businesses to scale by connecting them with the right affiliate opportunities.
Explore our resources or connect with us on LinkedIn to stay ahead in affiliate marketing.