DIY: Homemade Snow Plow for Your Lawn Mower
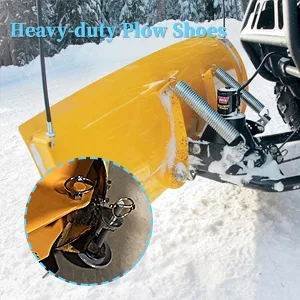
A homemade snow plow lawn mower conversion lets you mount a plow blade directly to your riding mower instead of shoveling driveways or paying someone else to do it. But this isn't a casual weekend project you should jump into blindly, because getting it wrong can crack your mower deck, ruin the transmission, or cause serious injury. Manufacturer specifications and field reports consistently show that improper setup causes more damage than the snow itself.
Understanding the risks before you pick up a welding torch makes the difference between a useful tool and a ruined investment. As of 2026, DIY plow kits start around $300 and custom builds run $400 to $1,200 when you factor in steel, hardware, and front ballast weight. Let's walk through what makes a safe setup and what could go wrong.
Quick Answer
A homemade snow plow lawn mower works by bolting or welding a curved blade in front of your riding mower's front axle. You add skid shoes to control cutting height and concrete weights to the frame to keep the front wheels planted. Blade width should be roughly 12 inches wider than your mower deck.
This setup handles light to moderate snow up to about six inches deep. Heavy wet snow or icy ground demands extra caution and slower speeds.
Image source: Web (Bing) / amazon.com (Web image (fair-use with source credit))
Why Homestead Snow Plow Conversions Carry Real Risk
Turning a riding mower into a snow plow sounds simple until you consider the physics. A plow blade acts as a lever that multiplies force against the front axle. If your mower isn't weighted properly, that force flips the front wheels off the ground.
A mower doing a wheelie at five miles per hour on an icy driveway is a dangerous situation. You lose steering control instantly and have no way to stop except cutting the engine.
Hydrostatic transmissions are especially vulnerable. Those systems rely on hydraulic pumps and motors to transfer power smoothly. When you push a plow through dense snow, the resistance spikes dramatically.
OSHA welding safety guidelines flag draft-load stress on small equipment as a documented hazard category. Aggressive plowing pushes forces well beyond what a lawn tractor's transmission was designed to handle. Many mower manufacturers explicitly warn against using their machines for towing or plowing in the owner's manual.
Improper blade angle creates a second danger zone. Set the blade too aggressively and it digs into asphalt, concrete, or frozen soil. A digging blade jerks the mower violently and can shear mounting bolts clean off.
Even a slight change in ground texture sends shock loads straight through the frame. That's why adjustable skid shoes exist. They set the blade clearance before you ever touch snow.
How a Homemade Snow Plow Works on a Riding Mower
A plow converts your riding mower into a pushing machine. The blade mounts ahead of the front axle and transfers all plowing force through the bracket assembly into the frame. Think of it like a cantilevered arm.
The farther the blade extends, the more leverage it creates against the front wheels. That's exactly why front weight matters so much.
Blade angle controls how snow moves. An angle of about 15 to 20 degrees points snow to the side instead of straight ahead. Too steep and the blade catches on ice or pavement.
Too flat and the snow just piles up in front of you. Adjustable angle brackets let you tweak this based on surface conditions. You want enough angle to throw snow clear but not so much that the edge bites into the ground.
Skid shoes ride above the surface and set your cutting height. They keep the carbide wear bar from grinding against asphalt or pavers. Set them too low and you destroy both the blade edge and your driveway.
Set them too high and snow gets pushed under the blade instead of cleared. Two to four inches of clearance usually works for flat surfaces. Rough or uneven ground calls for the lower setting.
Draft load is the force the snow applies against the blade as you push. Light powdery snow generates minimal draft. Wet heavy snow can double or triple that force.
Your mower's engine and transmission must absorb this load without stalling or overheating. Gear-drive mowers handle sustained draft better than hydrostatic units. Always consult your mower's manufacturer specs before attempting heavy snow removal.
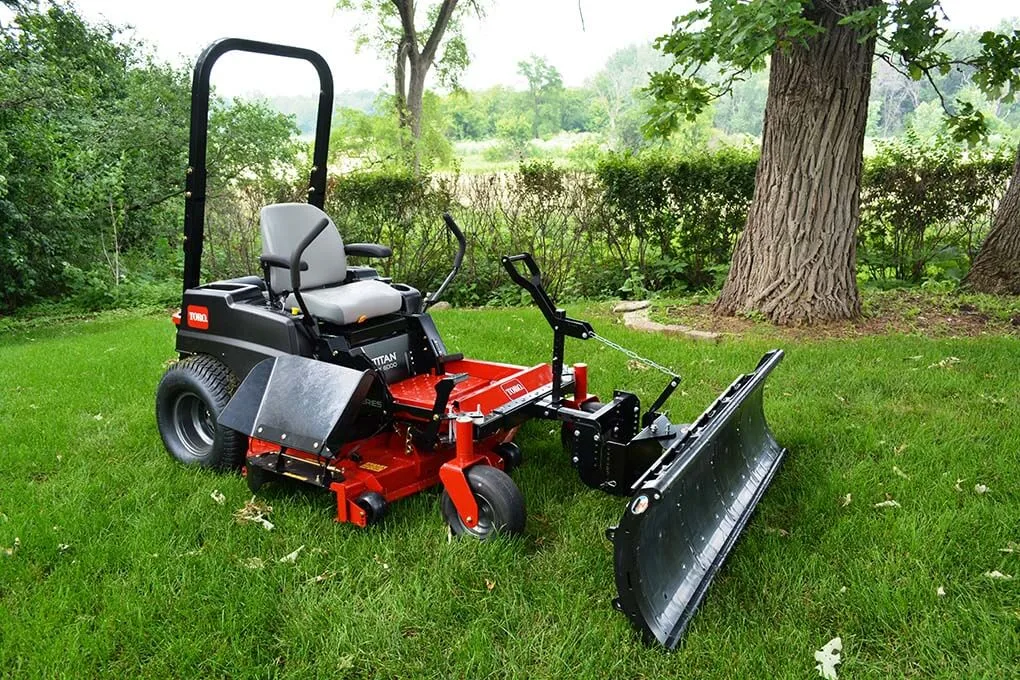
Image source: Web (Bing) / snowplowsdirect.com (Web image (fair-use with source credit))
Essential Components of a Safe DIY Plow Setup
Every safe plow setup shares five core components. Skip one and you're inviting trouble.
Blade selection matters most. Steel blades in 7-gauge or 11-gauge thickness resist warping under pressure. Polyethylene blades won't scar lawns if they scrape the ground but they lack the rigidity for heavy snow. A replaceable carbide-tipped wear bar at the blade base is non-negotiable.
It costs less than $30 and saves you from grinding down solid steel every season.
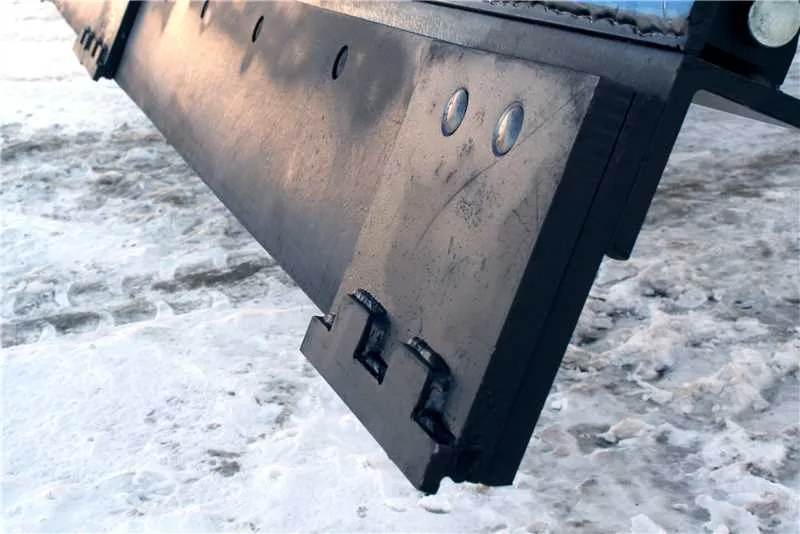
Image source: Bing (Web (fair-use with source credit))
Lift bracket assembly connects the blade to your mower frame. Bolt-on kits work for most riding mowers and require no welding. Welded brackets offer more adjustability but demand proper fabrication skills.
Check these essential home mechanic tools if you're building from scratch.
Skid shoes control blade height and protect your surface. Adjustable steel shoes bolt to the bracket and slide up or down. Plastic skids wear faster but won't scratch concrete.
Replace them when they drop below half their original thickness.
Front weight is mandatory. A concrete bar bolted to the front frame or wheel-mounted weights add the downward force needed to keep the front wheels planted. You generally need at least 30 percent of total machine weight on the front axle during plowing.
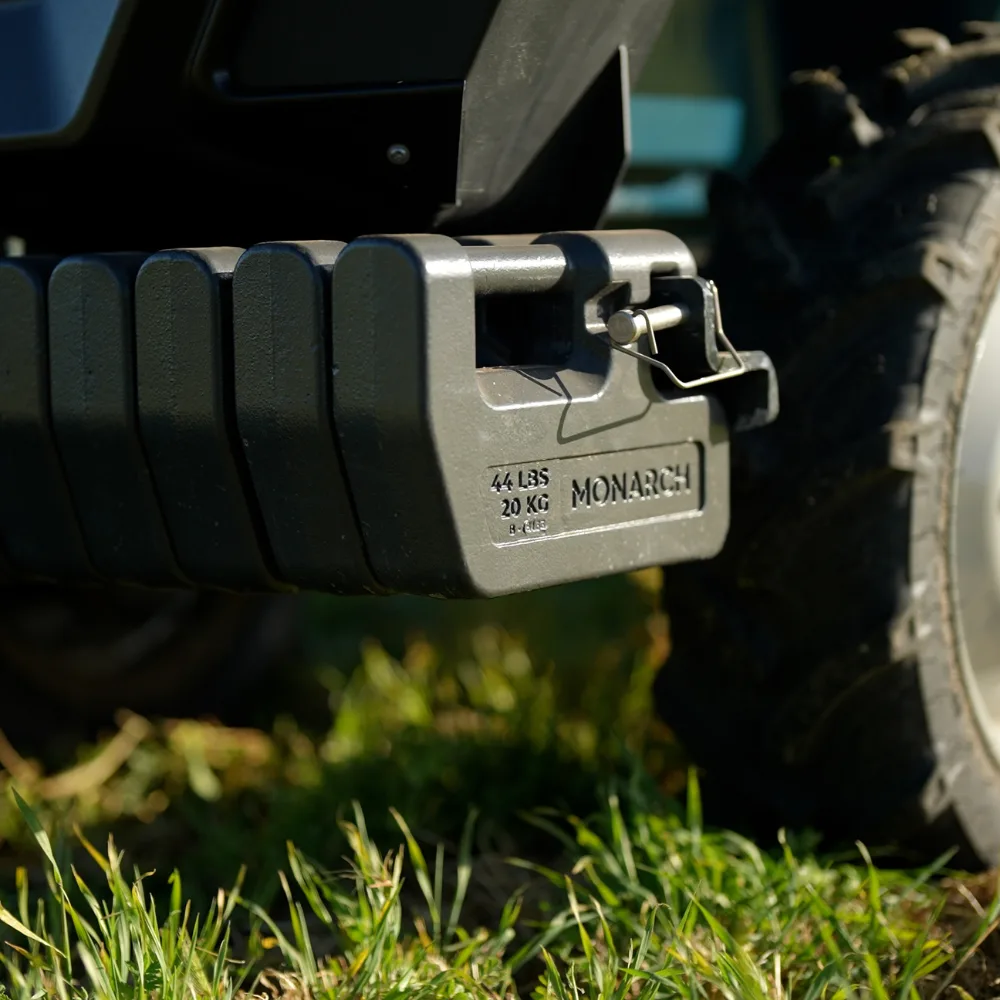
Image source: Bing (Web (fair-use with source credit))
Mower deck protection plate shields the underside from flying debris and accidental blade contact. A simple steel plate bolted beneath the deck prevents costly damage if the plow dips too low on a bump.
Step-by-Step: Building and Installing Your Snow Plow
Step one: measure your mower deck. Record the exact width in inches. Add 12 inches to that number and that's your target blade width. A 48-inch deck calls for a 60-inch blade.
Going wider reduces visibility and increases strain on the frame.
Step two: choose your mounting method. Bolt-on kits include all hardware and slot into existing frame holes. Welded setups require cutting, fitting, and proper TIG or MIG welds on structural steel. Both methods work if executed correctly.
Improper welds crack under load and become safety hazards.
Step three: install the bracket assembly. Position the brackets so the blade sits centered and clear of the deck. Tighten all bolts to specification before proceeding. Loose brackets shift during plowing and cause misalignment.
Step four: attach the blade and skid shoes. Mount the blade to the bracket with pivot bolts. Install skid shoes at your chosen height setting. Aim for three inches above flat pavement initially.
You will adjust this after your first test run.
Step five: add front weight. Bolt a concrete bar to the frame or fill tires with calcium chloride solution for permanent ballast. Verify the front axle stays planted when someone pushes down on the blade.
Step six: test run before snow season. Drive the mower over a flat concrete area with the blade engaged. Check for interference with the deck, steering linkage, and engine components. Adjust bracket position if anything rubs.
Step seven: sharpen the wear bar. A sharp edge cuts through crust and ice cleanly. A dull edge pushes snow and drags on pavement. Keep a grinding disc ready and maintain it alongside recommended abrasive disc guides for best results.
Build time ranges from four to eight hours depending on your experience level. Factor in extra time if you're fabricating custom brackets from raw steel.
Critical Safety Rules You Cannot Skip
Three rules prevent the most common injuries and equipment failures.
Never skip front ballast. A mower without adequate front weight will lift its front wheels when the blade hits resistance. Wheelie incidents happen fast and often end with the operator thrown clear or pinned under the machine. Always verify front-down force before engaging the blade in snow.
Respect hydrostatic transmission limits. Many riding mower manufacturers state clearly in their manuals that plowing or heavy towing voids the warranty. Excessive draft load causes internal pump failure that costs hundreds to repair. If your mower carries a hydrostatic drive warning, consider a gear-drive alternative or hire help for heavy snow years.
Set the correct blade angle for surface type. Asphalt and concrete require a shallower angle closer to 15 degrees to prevent edge digging. Gravel surfaces tolerate slightly steeper angles but still demand caution. Never angle the blade aggressively on frozen or icy ground.
The edge will catch and jerk the mower sideways.
Always wear safety glasses and hearing protection during installation and welding. Secure the mower on a level surface before working underneath it. Block the rear wheels when testing blade clearance.
Never plow near open edges, dropped stone steps, or uneven terrain without first walking the path to identify hazards.
Check local ordinances before plowing. Some municipalities require snow to be deposited on your own property rather than pushed onto public sidewalks or roads. HOAs may restrict plow width or dictate pile placement.
Ignoring these rules can result in fines beyond the cost of your plow kit.
Keep routine maintenance on schedule. Routine air filter care and proper fluid levels before winter storage prevent cold-start failures when you need the machine most. Proper servicing extends equipment life significantly across all attachments.
Real Costs and Performance Data
A homemade plow setup ranges from $400 to $1,200 depending on your skill level and whether you buy a kit or fabricate from scratch. Kit prices run $300 to $800, while raw steel and hardware for a custom build cost $150 to $400. You still need front weights, which adds another $50 to $100 for a concrete bar or wheel weights.
Time investment sits between four and eight hours for a first-time build.
| Component | Cost Range | Notes |
|---|---|---|
| Plow blade kit | $300–$800 | Includes bracket, angle adjuster, skid shoes |
| Raw steel fabrication | $150–$400 | Plate steel, tubing, hardware, welds |
| Front weight bar | $50–$100 | Concrete bar or tire fill solution |
| Carbide wear bar | $20–$40 | Replaceable edge, saves blade life |
| Total project | $400–$1,200 | Varies by existing tools and skills |
Blade width should match your mower deck plus 12 inches. A 48-inch deck gets a 60-inch blade. Going wider improves efficiency but strains the frame and hides your view.
Stick to the recommended width.
Performance depends on snow type. Dry powder up to eight inches clears easily at three to five mph. Wet heavy snow doubles draft load and drops that speed to two mph.
Ice or crusty ground requires slow passes and a shallow blade angle. Pushing too hard on frozen surfaces digs the edge and jerks the mower.
Maintenance costs are low. Sharpen or replace the carbide edge every five to ten hours of use. Lubricate pivot bolts and check bracket tightness after each session.
Store the blade off the ground in a dry place to prevent rust. A simple coat of spray lubricant on the wear bar extends its life through the winter.
Common Mistakes That Damage Mowers or Cause Injury
Three mistakes cause most damaged equipment and accidents. Avoid them and you'll save money and risk no injuries.
Under-weighting the front axle is the top error. A mower without enough front ballast lifts its wheels when the blade hits resistance. This causes loss of steering and potential rollover on slopes.
Always add weight until the front tires stay planted at full blade engagement. Test by pushing down on the blade before snow falls.
Setting the blade angle too aggressively digs the edge into pavement or ice. A steep angle beyond 25 degrees creates excessive draft force and catches on irregular surfaces. Start at 15 degrees on smooth concrete.
Increase only if snow throws poorly. Watch for the blade biting and adjust immediately.
Skipping skid shoes on hard surfaces grinds the carbide edge against asphalt in seconds. Without clearance, you destroy the blade and scar your driveway. Install skid shoes set three inches above flat ground.
Raise them for rough terrain to avoid scraping.
Other frequent errors include using a hydrostatic mower for heavy draft loads beyond manufacturer limits, failing to secure loose tools before starting the engine, and plowing near utility lines or curb edges without first walking the path. Check your mower's manual for towing or plow warnings. Many gear-drive models handle sustained load better than hydrostatic units.
FAQs: Honest Answers to Tough Questions
Can I plow snow with any riding mower?
No. Only mowers with a solid front frame and sufficient weight capacity work safely. Lightweight garden tractors lack the structural strength for draft loads.
Check your manufacturer's manual for any plow or towing warnings before proceeding.
Is it safe to plow wet heavy snow?
Yes, but at reduced speed and with shallower blade angles. Wet snow doubles draft force and increases strain on the transmission. Go slower, lighten the angle, and watch for ice patches that could catch the edge.
Will this void my mower warranty?
Likely yes. Most manufacturers explicitly exclude plowing or heavy towing from warranty coverage. Review your owner's manual for exclusion clauses.
If your mower is under warranty, consider a removable bracket that disengages easily for normal mowing use.
How do I protect my lawn during plowing?
Raise skid shoes two inches higher than your desired cut. This prevents the blade from scoring turf. Avoid plowing frozen or sodden ground that tears easily.
Deposit snow piles on areas that can absorb moisture without damage.
What is the maximum snow depth for a homemade plow?
Six inches is safe for most setups. Eight inches works for dry powder on flat surfaces. Anything deeper requires multiple passes or a heavier-duty plow.
Pushing beyond capacity risks transmission overload and loss of control.
When should I hire a professional instead?
Hire help when snow exceeds eight inches consistently, when ice crust forms, or when your driveway has steep slopes or narrow passages. Professional plow services carry liability insurance and equipment built for extreme conditions. DIY works best for light to moderate seasonal snow.

Michael Harris is an experienced woodworker and power tool expert with over 12 years in woodworking. Specializing in functional, high-quality furniture, he offers expert advice on tool selection, maintenance, and sharpening for both beginners and professionals.